12. Creating a trip#
The trip is the bracket around everything else: accommodations, journeys, budget, journal. To create one, all you need is a title — everything else can be added at any time.
12.1 Add manually or let the assistant guide you#
In the Trips overview, the plus sits at the top right. It opens a small menu with two entries:
- Add manually opens the complete form on a single page.
- Add with assistant asks you one question per screen.
If you don’t have a trip yet, the empty view offers both routes directly: the Create trip button starts the assistant, and Add manually below it leads to the form. You can also reach the assistant from the “Getting started” help.
The assistant pays off for vague plans, because it lets you skip anything unclear with Don’t know yet. The form is faster if you know the key facts — and it can do things the assistant doesn’t ask about: place/region, status, rating, and verdict. Creating and editing require write access in Etappe (Trial and full version).
12.2 The trip assistant step by step#
A bar along the top shows how far you’ve come. Back lets you correct things at any time; Cancel discards everything.
| Step | Question | Required? |
|---|---|---|
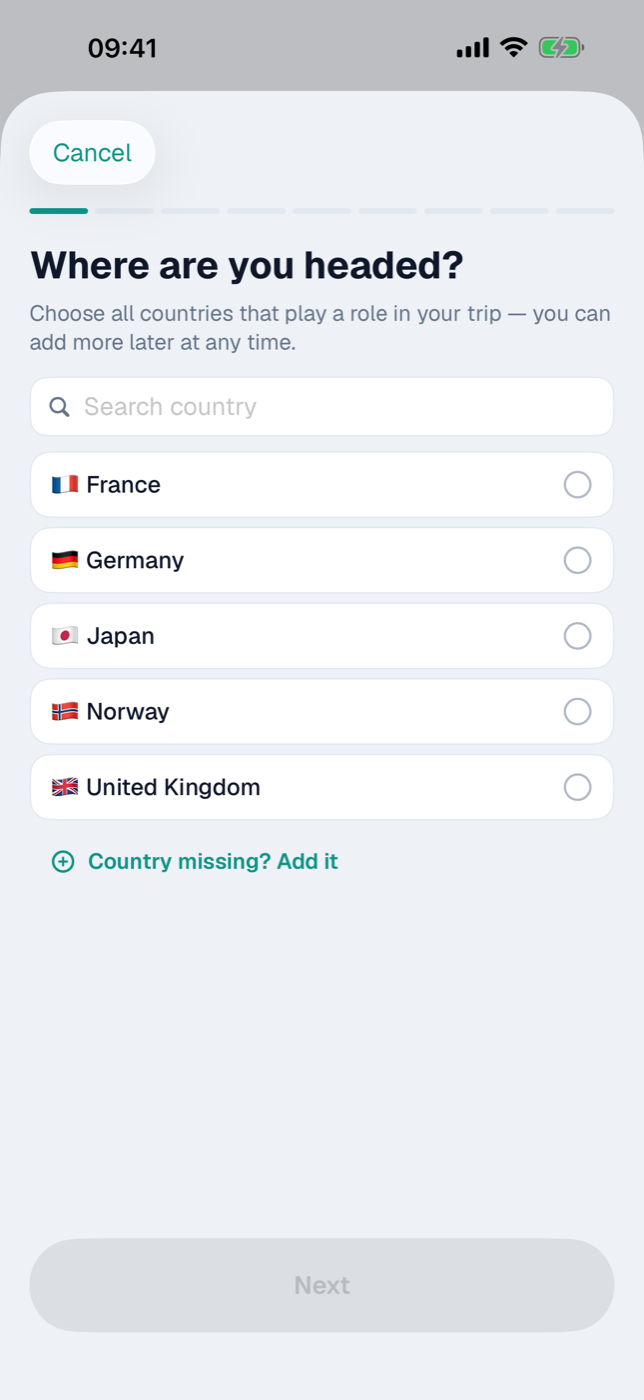
| 1 | Where are you headed? (countries) | yes, at least one |
| 2 | What should the trip be called? | yes |
| 3 | Do you know who’s coming? | no |
| 4 | Are the pets coming along? | no, skipped if there are no pets |
| 5 | Do you know when? | no |
| 6 | Are you driving yourself? | no, vehicle optional |
| 7 | Do you already have a budget in mind? | no |
| 8 | Would you like a cover photo? | no |
| 9 | Everything right? (summary) | — |
A few finer points:
- The country list has a search field. If a country is missing, Country missing? Add it creates an empty entry with the name you typed, which you fill in later under Records; if you also enter the two-letter country code (e.g. FR), the country shows up on maps and in the statistics as well. If you cancel the assistant or deselect the country again, that entry disappears again.
- If there are no countries in Records at all — for instance because you skipped the initial setup —, the first step offers Load countries from etappe.app directly and, as an exception, can be skipped with Don’t know yet; you can assign countries to the trip at any later time. Without an internet connection, the bundled records step in (more in Countries).
- At Are you driving yourself?, Next only becomes active once you have chosen Yes or No; if you’re undecided, Don’t know yet still moves you on. If you say Yes and exactly one vehicle is on record, it is preselected.
- If there are no people in Records yet, you create the first one right in step 3: enter a first name (last name optional), Add person — the entry is selected immediately, after which the normal selection list appears. The same in step 6: if there is no vehicle, a name and Add vehicle are enough. You add the details later under People or Vehicles. As with the countries: if you cancel the assistant or deselect the entry again, it disappears again.
- In the summary, each row with the pencil icon takes you back to exactly that question; Apply brings you straight back to the summary.
Create trip saves; the new trip starts with the status “Considering”. You then choose between Open sketch (see Sketch — planning before the dates are fixed), Open trip, and Close.
12.3 Title, region, period, status#
The form is divided into sections. At the very top:
- Title — the only required field; without a title, Save stays grayed out.
- Place / region — free text, shown in small type beneath the title on the trip card.
- Status — determines the color and the grouping in the overview:
| Status | meant for |
|---|---|
| Considering | loose ideas |
| Bucket list | far-off destinations without a date |
| Planning | getting concrete |
| Making arrangements | booked, departure is coming up |
| Under way | happening right now |
| Past | finished |
From Making arrangements onward, Etappe advances the status itself as soon as a period is set: to “Under way” when the trip begins, to “Past” after the trip ends. Considering, Bucket list, and Planning are left untouched, and “Past” is never reset automatically.
In the Period section, the Set period switch reveals the two date fields. The end date can never be before the start date — if you move the start later, the end moves with it. Without a period, the trip remains usable; only the calendar, the travel-day count, and deadlines need one.
Further down: Available budget in your base currency (the basis for the budget status light, see Budget), Stars for the rating — tapping the same star again clears it — and, once the status is “Past”, the multi-line Verdict field in the Retrospective section.
12.4 Setting or cropping a cover photo, or keeping the duotone artwork#
Without a photo of your own, Etappe draws a duotone image that stays the same for a given trip. If you want your own picture, use the Cover photo section:
- Choose cover photo opens the photo picker; the image is reduced to a maximum edge length of 1,600 pixels.
- Crop opens the Choose crop editor: zoom with two fingers (up to 6×), move with one finger. The white frame shows the 16:9 section, which is saved at 1,600 × 900 — Apply writes it back, Cancel discards it.
- Remove deletes the photo; the duotone image returns.
The cover appears on the trip card, on the mini tile, and as the header image in the trip detail. How much space the images take up is covered in Storage and files.
12.5 Setting the trip’s countries#
The Countries section leads to a searchable list of all country records with flag and name; you select with a checkmark, and Done closes it. The form row then shows the codes of the chosen countries.
The flags then appear on the trip card and in the trip header. Tapping them opens the trip’s countries overview with the embassy’s phone number and email (both tappable) plus the entry notes: required ID document, ETA, visa. The same countries feed the Entry checklist and Where I’ve been. On the mini tiles, the home country set in the settings stays hidden (Home); details on the country data are in Countries.
12.6 Assigning participants: people, pets, vehicles#
In the Travel party section, you choose Participants and Pets by multiple selection, plus a Vehicle (or None).
Archived people, pets, and vehicles are no longer offered; if one of them is already assigned, it stays visible so that past trips can still be edited. If a list is empty, Etappe points out that the records need to be created first — see People, Pets, and Vehicles.
The assignment has knock-on effects: pets bring rabies and deworming checks into Alerts, the vehicle supplies consumption figures for Journeys, and people can be addressed in the Packing list. In the trip detail, the avatars beneath the title lead to the Travelers view with photo, role, and species; a tap opens the records.
Each person carries a Role there per trip: Companion (the default), Organizer, or Guest. A long press on the row opens the Role menu, where you change it — the choice applies to this trip only; the same person can have a different role on another trip.
Deleted people and pets remain in the Travelers view as a gray row “No longer in records” — the trip doesn’t forget who was there.
12.7 Editing, archiving, deleting a trip#
Edit: Open the trip and tap More → Edit trip in the floating bar — the same form as when creating.
Archive: In the Trips overview, press and hold a trip and choose Archive. It disappears from the status groups, remains reachable via the Archive filter chip, and comes back with Restore from archive. Archived trips do not take part in the automatic status updates.
Delete: The same context menu holds Delete trip. Etappe asks for confirmation, naming the trip’s title, and points out that all its contents — journal, photos, budget, and the rest — go with it and that the trip also disappears from “Where I’ve been”. This cannot be undone: if you’re unsure, create a Backup first, or archive instead of deleting.