
1. Welcome to Etappe#
Etappe is a travel planner for iPhone and iPad. Before we get to buttons and fields, this chapter sets the scene: what the app is built for, which jobs it deliberately leaves to others, and how to find your way around this manual.
1.1 What Etappe is for: your travel memory#
A trip produces paperwork that ends up scattered across your email inbox, notes app, photo library and glove compartment: the address of the vacation home, the ferry booking number, the slip of paper with the door code, the fuel receipt, the dog’s vaccination record. Etappe gathers all of it in one place and keeps it within reach — even when there is no signal out in the back country.
The structure follows this idea:
- Records you set up once: countries, people, pets, vehicles, packing list templates and your home. After that they are ready for every trip.
- A Trip is the bracket around everything else: accommodations, journeys, activities, outdoor activities, budget, packing list, to-dos, entry checklist, documents and reminders.
- On the road you work with “Today”, the calendar, the map and the journal — that is, with whatever is coming up right now.
- At a glance, the Overview, Alerts and “Where I’ve been” show what you have prepared and what is still missing.
Everything lives on your device. The app keeps working without an internet connection; only map tiles and the one-time country download need one. If you use iCloud, Etappe syncs your data between your devices through your private iCloud database — see iCloud sync.
1.2 What Etappe deliberately doesn’t do (no booking, no navigation, no recommendations)#
Etappe is deliberately narrow in scope. Four things the app does not do:
- Not a booking portal. You keep booking wherever you like. In Etappe you record what came of it: booking status, booking number, price, address, attachment. Prices are never looked up or compared.
- Not a navigation device. The map shows what you have planned — it does not tell you when to turn. From “Today” you can hand the next destination over to your route planner (set under Settings, with Apple Maps as the fallback). That app then does the guiding.
- Not a recommendation engine. There is no “Top 10 near you”. What you find interesting, you collect yourself under Research and turn into an accommodation, journey or activity when you need to.
- No data sharing. Etappe requires no sign-in and creates no account. Your data leaves the device only when you export or share it — or sync it through your own iCloud. Details in Your data.
On top of that: no subscription. After the trial, the full version is a one-time purchase (Trial and full version).
1.3 Who the app is for — road trip, camper, family, traveling with a dog#
Etappe is built for trips made up of many separate parts — not for the package flight with transfer.
| If this is how you travel | what helps you most |
|---|---|
| Road trip with many stops | Sketch, journeys and map |
| Motorhome or caravan | Vehicles with dimensions, consumption, documents and service log |
| Family or group | People with ID documents and vaccinations, packing list per person |
| Traveling with a dog or cat | Pets with EU pet passport, rabies status and deworming treatment deadlines |
| Hiking, cycling, sports | Outdoor activities with GPX import, elevation profile and walking time |
| Vague ideas without a date | Trip status “Considering” and “Bucket list” |
The chapters that go with these are Sketch, Journeys, Map, Vehicles, People, Packing list, Pets, Outdoor activities and Core concepts.
Etappe is a poorer fit if you are looking for an app that suggests destinations, books accommodations or navigates you live.
1.4 How this manual is organized#
The manual follows the course of a trip:
| Part | Chapters | What it covers |
|---|---|---|
| Getting started | 1–5 | Orientation, installation, the interface, core terms, purchase model |
| Setting up records | 6–11 | Countries, people, pets, vehicles, templates, home |
| Planning a trip | 12–24 | From creating the trip to reminders |
| On the road | 25–30 | Today, calendar, map, recording, journal, quick actions |
| Keeping an overview | 31–33 | Overview, alerts, country statistics |
| Sharing, printing, backing up | 34–37 | Exports, backup, storage, iCloud |
| Security and privacy | 38–39 | App lock, how your data is handled |
| Settings at a glance | 40 | Every setting explained |
| Appendix | 41–45 | Calculations, FAQ, glossary, what’s next, legal |
You don’t have to start at the front. To get going, Installation and first launch and Core concepts are enough; after that you can jump straight to the chapter that describes the problem you have right now.
Two conventions run through the whole manual: paths through the app are written with arrows (“More → Help → Getting started”), labels of buttons and fields in bold. Wherever Etappe does the math — walking times, budget status lights, deadlines — the formula is in How Etappe does the math. Unfamiliar words are explained in Glossary, and if something gets stuck, FAQ and troubleshooting will help.
2. Installation and first launch#
Etappe needs no account and no sign-in: download the app, open it, get going. On the very first launch, a short assistant walks you through the basics. This chapter shows what it does, how to skip it, and how to start from an existing backup instead.
2.1 Requirements: iPhone, iPad, iOS version, storage needs#
| Requirement | Value |
|---|---|
| Devices | iPhone and iPad (one app for both) |
| System | iOS 17.0 or iPadOS 17.0, or later |
| Account | none needed — no login, no registration |
| Internet | only for map tiles, the country download, exchange rates on demand, and the purchase |
| iCloud | optional, to sync between your devices |
The app itself is small; what takes up space is mostly what you attach — photos, document scans, GPX files. How much space goes where and how to clean up is covered in Storage and files.
On the iPhone you work with a tab bar, on the iPad with a sidebar and a detail column — the differences are explained in Finding your way around.
2.2 Downloading and opening the app#
Etappe comes from the App Store. After installing, tap the icon and you first see the launch screen with the wordmark “etappe” and the line “Your travel companion” — it fades out by itself after about two seconds.
Then one of two things happens:
- Your data is empty (no trips, no people, no countries): the Getting started assistant opens automatically.
- There is already data — for instance because your second device has synced via iCloud: you land straight in the Trips list.
The first launch also starts the trial. It runs for 14 days and unlocks everything; after that you decide on the full version. All about it in Trial and full version.
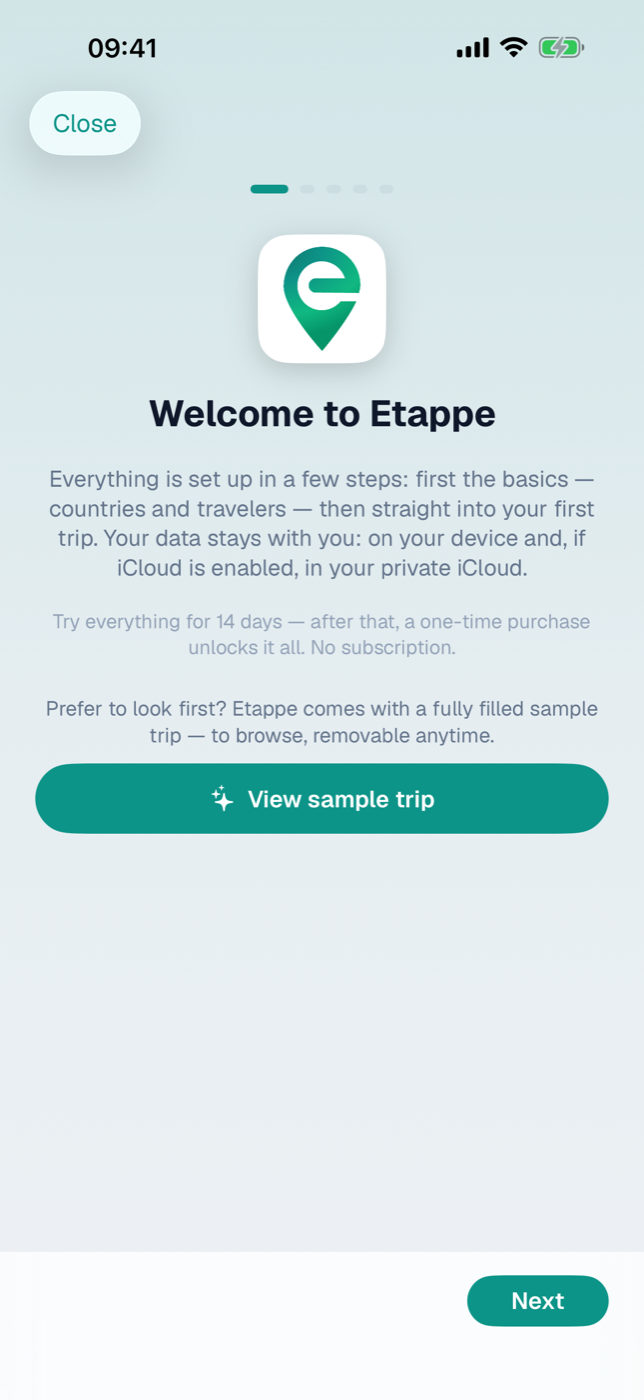
2.3 The Getting started assistant: Welcome → Countries → Travelers → Vehicle → first trip#
The assistant has five pages. Five bars at the top show where you are; at the bottom right, Next takes you forward, and from the second page on, Back at the bottom left takes you back again. On the last page the button is called Done.
- Welcome. A greeting with the note that your data stays with you — on the device and, if iCloud is turned on, in your private iCloud. Below that is the sentence about the trial: you can try everything for 14 days, then a one-time purchase unlocks everything — no subscription. Below that is the button View sample trip — the way to browse before you type anything yourself (section 2.4). Otherwise: Next.
- Load countries. Countries provide entry rules, currencies, and checklists. First, the page asks two things that don’t need any loaded countries: your Home country and your Base currency. Tapping Home country opens a list of every country in the world with flag and search field; the default is the country of your device region. Embassies, emergency numbers, and travel advice in the country data depend on your home country (Home). The Base currency is also prefilled from the region and follows the home country as long as you don’t choose it yourself — pick Switzerland and you get CHF. The choices are the currencies of the ECB rate list (euro, franc, pound, krone, dollar …) plus the currency of your home country if it’s missing there; such entries carry the suffix “no automatic exchange rate”. Both can be changed later under More → Settings (All settings). Then tap Load countries from etappe.app: the app fetches the maintained country file from the web, checks its digital signature, and only then imports it. While loading, the button reads “Loading …”. If countries already exist, a green line with their count appears instead. If the server can’t be reached, the app falls back to the records bundled with the app package — same file, same signature check. Below the green line, a note then shows the date of this data and asks you to check later under More → Records → Countries whether newer data is available on the server. The error message Country import not possible only appears when both routes fail. Right after the import, Etappe fetches the current exchange rates of the European Central Bank once and applies them to the countries; if that fails — say, without a connection — a note appears below the green line, and you fetch the rates later with Refresh Rates (Countries, section 6.8). You can also catch up on the import itself at any time under More → Records → Countries, see Countries.
- Who’s coming along? Here you add yourself and your companions — Add person opens the person form, Add pet the one for dogs, cats, and the like. ID documents, vaccinations, rabies status, and deworming treatment deadlines go in there; later they are the basis for the alerts. The assistant confirms every person and pet you add with a green line. Details in People and Pets.
- Your vehicle. Optional. Add vehicle takes a car, motorhome, or bicycle with dimensions, consumption, and documents — more in Vehicles. If you don’t use a vehicle of your own, just tap Next.
- Your first trip. Start trip assistant opens the guided creation assistant: it asks for destination country, title, companions, pets, dates, vehicle, budget (in your base currency), and cover photo; only country and title are required, everything else can be skipped with Don’t know yet. After saving, you choose Open sketch or Open trip: both assistants close, and the app jumps straight to the Sketch or the trip page (on the iPhone it switches to the Trips tab to do so). The trip assistant is also available later via the plus on the Trips page, see Creating a trip.
Each of these add buttons writes data. If the trial has expired and the full version hasn’t been purchased, the purchase prompt appears instead of the form.
2.4 Skipping the assistant and reopening it later (More → Help)#
Close is always at the top left. It puts you straight into the app. Whether the assistant shows up again on its own afterwards depends on how far you got:
- Closed immediately, still on the Welcome page: on the next launch with empty data, the assistant appears one single more time — in case the first dismissal was an accident. Close it again on the first page, and it stays away from then on.
- Moved on by at least one page: the assistant counts as shown and no longer starts on its own — not even if your data is still empty.
Both apply per device. You can bring the assistant back at any time:
- On the iPhone: More tab → Help. On the iPad: sidebar → Help.
- Tap Getting started there.
As long as no trip has been created, the empty Trips list also offers the row Open getting started beneath Create trip and Add manually — the same assistant, just without the detour through Help.
The assistant remembers nothing from the last round: what has already been created it shows as a green line, the rest you can catch up on. In the same Help area you’ll also find the links Guide on etappe.app and Website.
Viewing the sample trip#
On the Welcome page is the button View sample trip. It creates the sample trip “Tuscany with dog” and opens it right away — a fully filled trip with travelers, dog, vehicle, accommodations, journeys, activities, journal, and budget. That way you see what a set-up trip looks like before you type anything yourself. The Alerts tab fills up with it too, because the sample data deliberately includes a few deadlines that are getting tight.
It’s always recognizable: inside the trip, a permanent bar reads “Sample trip — to try things out”, and in the Trips list its card carries the Sample pill. Made-up data can never be confused with yours.
Remove in that bar clears it out completely — including travelers, dog, and vehicle. Your own data stays untouched: if you’ve since attached one of the sample records to a trip of your own (the country Italy, say), that particular entry stays. Afterwards the Getting started assistant comes back, because now you’re starting for real.
You can load the sample trip again at any time — via More → Help → Getting started and there View sample trip again. If it’s already loaded, you won’t get a second copy.
2.5 Starting from an existing backup instead of from scratch#
If you’ve already used Etappe on another device, you don’t have to type anything again. Two routes get you there:
- Via iCloud, if both devices are on the same Apple ID: syncing happens by itself, see iCloud sync.
- Via a backup file, if you specifically want to transfer or restore your data.
Here’s how to import a backup file:
- On the old device, create an export under More → Backup and share the JSON file to the new device (AirDrop, Files, Mail).
- On the new device, open More → Backup.
- Tap Import backup … and select the file.
- Confirm the prompt Replace all data? with Import.
Important: the import deletes all existing data and replaces it with the contents of the file. That’s why it’s easiest on a fresh device — close the Getting started assistant and import before you create anything. If there’s already something in there that you want to keep, create an export of your own first.
After the import, Etappe lists what arrived: one line per area with a count, and the total below. Everything else about formats, file sizes, and exporting with or without attachments is in Backup.
3. Finding your way around#
Etappe has two levels. On the outside are the collections that apply to all trips: your trips, the travelers, open alerts. On the inside is the single trip with its sixteen sections — from the sketch to the journal. Once you have understood this split, everything else falls into place.
3.1 Layout on the iPhone: the four tabs Trips, Travelers, Alerts, More#
| Tab | What you find there |
|---|---|
| Trips | The overview of all trips. The starting point for almost everything. |
| Travelers | People and pets as photo tiles. |
| Alerts | Everything that needs attention — with a number on the icon. |
| More | Overview, Records, and all settings. |
A number sticks to the Alerts tab as soon as something is open: expired documents, overdue reminders, deadlines for pets and vehicles. When nothing is open, it disappears (Alerts).
Under More you find: Overview, Records (Countries, Vehicles, Packing list templates), Reminders, Settings, Storage & files, Backup, Help, About this app. At the very top is the note about the full version (Trial and full version).
3.2 Layout on the iPad: sidebar, detail column, landscape and portrait#
On the iPad, a sidebar replaces the tab bar. It lists everything one below the other: Overview, Trips, Alerts, Reminders, Travelers, Countries, Vehicles, Packing list templates, Settings, Storage & files, Backup, Help, About this app. To its right is the detail column.
When you open a trip, the iPad behaves differently depending on its orientation:
- Landscape: The sidebar becomes the trip’s command center. At the top are “Trips” and “Overview”; below them, under the trip title, the trip’s own “Overview” and all sixteen sections; the selected entry is highlighted.
- Portrait: The trip appears as a full trip page, just as on the iPhone, with a “Trips” back button at the top left.
A large iPhone in landscape deliberately keeps the tab bar — otherwise the navigation would jump back when you rotate the device.
3.3 The trip page: hero, tiles, section navigation#
The trip page starts with the hero: cover photo or color gradient, on top of it the flags of the trip’s countries, the status pill, title, period and — during the trip — “Day 3 of 12”. If the trip is still ahead of you, it says “in 47 days”. The flags lead to the country overview, the avatars to the travelers. At the top right, Edit opens title, period, travel party, countries, cover, and budget.
Below that are three shortcut tiles — Today, Calendar, Sketch — followed by the overview:
- A small map with the accommodations and activities that have a location (and, if set, your home location); the footer (“4 places”) leads to the large Map, which also shows journeys, outdoor activities, and journal places. Without an accommodation or activity that has a location, the small map does not appear at all.
- Six stat tiles: Journeys, Accommodation, Activities, Outdoor activities, Journal, Budget. Each leads to its section. On the Accommodation tile, the number (“2/3”) turns yellow as long as not all accommodations are booked; the Budget tile carries a status-light dot.
- Notes for this trip — the alerts for exactly this trip, with a way to the Entry checklist. When nothing is open, a green confirmation appears there; if no travelers have been assigned to the trip yet, a neutral note instead says that there is nothing to check yet.
- Next steps with the three most important open to-dos and the packing list progress.
- For completed trips, additionally your Verdict, if you have written one.
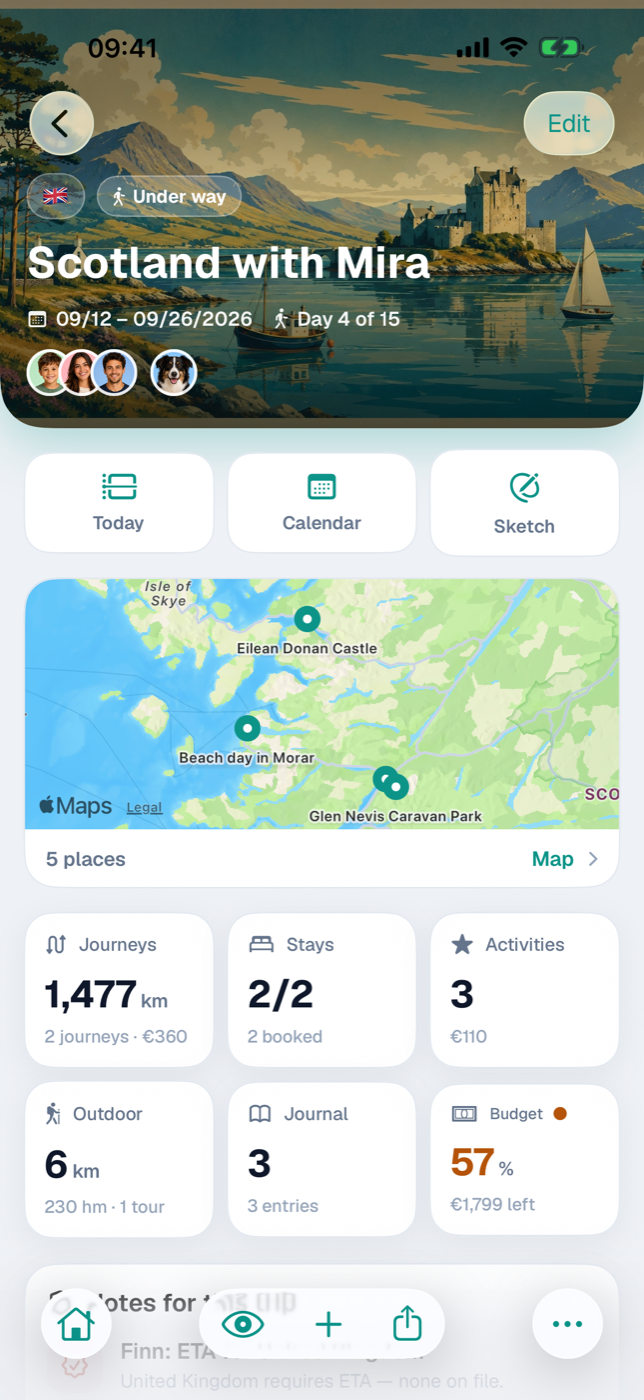
3.4 The bottom toolbar: house, eye (sections), plus (Add new), Share, More#
Inside a trip, the tab bar gives way to a toolbar of its own:
| Icon | Name | Effect |
|---|---|---|
| House | To trip overview | Back to the list of all trips. |
| Eye | View sections | Grid with all sections of the trip. |
| Plus | Add new | Grid with everything that can be created here. |
| Arrow | Share | Menu with the output formats. |
| Three dots | More | Edit trip, settings. |
The eye shows the thirteen sections that are not already shortcut tiles at the top: Accommodations, Journeys, Activities, Outdoor activities, Budget, Journal, Packing list, To-dos, Checklist, Research, Reminders, Documents, Map. Most tiles carry their count, for the packing list as “7/23”, for the to-dos the number of open ones. Empty sections show no number, and Checklist and Map never carry a count at all.
The plus creates directly: journey, accommodation, activity, outdoor activity, journal entry, budget item, to-do, research item, reminder — without going through the section.
Behind Share are Events as calendar (.ics), Sketch as PDF, Itinerary as PDF, and Journal as PDF. Sketch and Journal are grayed out as long as there is nothing to print; “Photo book” is marked as an upcoming feature (Exports and printouts).
3.5 Working with lists: search, filter, sort, swipe, press and hold#
The trips overview has filter chips at the top: All, Under way, Making arrangements, Planning, Bucket list, Considering, Past, Archive. “All” shows trips that are under way and the next upcoming one as large cards, everything else as compact squares.
Lists inside a trip sort themselves — by date, then by name. Entries without a date gather under “No date yet”. There is deliberately no sort option. Filtering is available where it helps, for example in the packing list by person via the filter icon. A search exists only in the country selection.
Three gestures repeat everywhere:
- Swipe left deletes a list entry.
- Swipe right opens the edit form — in the packing list, to-dos, budget, reminders, and sketch.
- Press and hold opens the context menu: on a trip card “Archive” and “Delete trip”, on a person tile additionally the validity status of their documents.
Deletions that affect more than one row ask first and tell you what goes with them.
3.6 Forms: required fields, Cancel, Save#
Forms open as a sheet over the view: Cancel at the top left, Save at the top right, and the fields in sections in between. Cancel discards all changes made in the form.
Required fields are rare — usually a name or title is enough. If it is missing, “Save” stays grayed out. Everything else you may leave open and add later.
Periods and additional fields sit behind switches (“Set period”, “Set departure/arrival”) so that a form does not get longer than your plans. Selection lists for people, pets, or countries open as a page of their own with checkmarks and are closed with Done.
3.7 Light and dark, text size, accessibility#
Under More → Settings → Display you choose the Appearance: System, Light, or Dark. “System” follows the device, including the automatic switch in the evening. Both modes are designed as equals, not just recolored.
The text size comes from the iOS settings (Display & Brightness → Text Size). Body text, lists, and forms grow with it; a few very compact labels on tiles and pills keep their size so that the numbers remain readable side by side.
Every button has a name, even when only an icon is visible — VoiceOver reads out “Add new” or “To trip overview”. Instead of emojis, the app uses system symbols throughout; the only exception is the country flags, because they are a data field.
Also under Display is Names in checklists: first name only, or first and last name. All other switches are explained in All settings.
4. Core concepts#
Etappe follows a few rules that apply everywhere. Once you know them, you don’t have to learn each area on its own: everything hangs on a trip, every trip has a status, and the app keeps intentions apart from facts.
4.1 The trip as the frame: what belongs to a trip#
The trip is the frame around everything. Sketch, calendar, accommodations, journeys, activities, outdoor activities, budget, journal, packing list, to-dos, checklist, research, reminders, documents and map all hang on it. Every entry belongs to exactly one trip.
That is why deleting a trip takes its contents with it: journal, photos, budget, attachments. The confirmation dialog says so and points out that the trip also disappears from Where I’ve been. If you only want it out of the way, archive it — it moves into the “Archive” filter and stays intact.
Records are not part of the trip: people, pets, vehicles and countries are only assigned to it. Research items may also exist without a trip (Research).
How trip status, sketch and research fit together is explained in 4.6 Idea, sketch or research? Three zoom levels of planning.
4.2 Trip status: Considering, Bucket list, Planning, Making arrangements, Under way, Past#
Every trip carries exactly one status. It determines the color of the pill, the grouping in the trip list and whether the date may move the status forward.
| Status | Meaning |
|---|---|
| Considering | An idea, nothing more. |
| Bucket list | Someday, with no time frame. |
| Planning | In progress, but nothing is binding yet. |
| Making arrangements | Getting serious: the dates are set, bookings are being made. |
| Under way | The trip is happening right now. |
| Past | Finished — time to look back and take stock. |
In the trip list, the filter chips run the other way around: trips under way first, “Past” last. You set the status in the trip form under Edit.
4.3 How the status moves along on its own#
At app launch and whenever you open the trip list, Etappe checks whether a status still fits the dates — and corrects it by fixed rules:
- The trip needs a Start date and must not be archived.
- Only Making arrangements and Under way are moved forward. Considering, Bucket list and Planning are left untouched — when a plan gets serious is your call.
- Before the start date the status is “Making arrangements”, from the start day up to and including the end day it is “Under way”, after that “Past”. If there is no end date, the start day is the last day.
- “Past” is the end of the line: even changed dates don’t bring the trip back — by hand you can change the status at any time.
Once you set a trip to “Making arrangements”, it reports itself as under way on departure day, shows “Day 3 of 12” and files itself away after the last day.
4.4 Participants: people, pets and vehicles travel along#
Who is coming along is set under Edit → Travel party: participants, pets and one vehicle. The assignment is more than decoration:
- People and pets appear as avatars in the hero and on the trip card; a tap opens the list of travelers with their role (“Companion” by default; change it with a long press on a person).
- The Packing list can be kept, filtered and printed per person.
- The Entry checklist checks the participants’ ID documents and the pet rules of the destination countries.
- The vehicle is available for selection in the journey form (Vehicles).
If you later delete a person or a pet from the records, the name stays on the trip — with the note “No longer in records”. A past trip never loses its cast. Someone who simply no longer travels with you is better archived: archived entries no longer appear in new selection lists but stay wherever they are already assigned.
4.5 Why attachments are only possible after saving#
Documents, receipts and photos are attached to a stored entry. As long as that entry does not exist yet, there is nothing to attach them to — which is why the Documents card never appears in the form, only in the detail view. The steps:
- Create the entry and store it with Save.
- Tap the entry in the list — the detail view opens.
- Scroll to the Documents card and add a file or photo.
The exceptions are images that are fields in their own right: the trip’s cover photo, profile pictures in the records, scan and PDF in the ID document form (Documents and receipts).
4.6 Idea, sketch or research? Three zoom levels of planning#
At first glance, trip status, sketch and research look like three similar lists. But they are the same plan at three resolutions — from coarse to fine.
| Tool | Level | Question |
|---|---|---|
| Trip with status “Considering”/“Bucket list” | the whole trip | Where to, at all? |
| Sketch | the sequence | In what order? |
| Research item | a single find | Which one exactly? |
At the very top is the trip itself: with “Considering” or “Bucket list” you only note that the place appeals to you at all (Creating a trip). One level down, the sketch orders the sequence — ferry first, then three nights on the coast — and deliberately carries no dates, only order and duration (Sketch). The finest level is the research item: an entry has an address, phone number, opening hours and price, and means exactly this one hotel (Research).
Each level leads down into the next: a sketch block of type Note becomes a research item via “Create entry”, and a research item becomes an accommodation, an activity or a journey via “Turn into”. You don’t have to start at the top, though — if you already have a particular hotel in mind, create a research item right away.
Not to be confused: activities have their own status “Idea”. It only says how firm a single item on the program is and has nothing to do with the trip status (Activities).
4.7 Planned, booked, actual — how Etappe keeps the three levels apart#
A trip covers the same ground three times: as an intention, as a booking, as an experience. Etappe keeps these apart.
| Level | Where it shows |
|---|---|
| Planned | Sketch, planned budget, drawn route, status “Considering” |
| Booked | Booking status, booking number, receipt as attachment |
| Actual | Journal, logged expenses, recorded route |
Accommodations and journeys have the booking stages Planning, In progress, Booked, Confirmed, Completed and Discarded; activities Idea, Planned, Booked and Completed; outdoor activities Planned, In progress and Done. The accommodation tile adds “Booked” and “Confirmed” together and colors its number yellow as long as something is still open.
Money works the same way: you set the budget, Etappe adds up the expenses from the actual items (Budget). For journeys, the planned route sits as a dashed line next to the one you drove (Recording a journey).
4.8 Dates, times and time zones#
The trip period consists of plain days without a time. The end date is never before the start — if you move the start later, the end moves with it.
Events additionally have a time: check-in and check-out, departure and arrival, the start of an activity. The date picker shows its own calendar, which starts on Monday and highlights the trip period. Events outside it are allowed — the ferry the evening before is part of the trip. When you save one, Etappe asks “Extend trip period?” with the buttons Extend period and Save date only. If the trip has no period yet, the suggestion is called Apply period.
All times are in your device’s time zone. The only exception is the journey: there you switch on “Destination in another time zone” and set the offset in half-hour steps up to ±14 hours. You enter the arrival as local time at the destination; the detail view labels it “Arrival (local time)”, names the destination’s time zone and factors the offset out of the duration (Journeys).
4.9 Overnight stays: why Etappe counts in nights#
Accommodations think in nights. In the form you enter the check-in day, the number of Overnight stays (1 to 90) and the check-out time; Etappe calculates the check-out date from that and shows it right away.
What is counted are the calendar days between the check-in and the check-out day — the times deliberately play no part. Arrive Friday evening and leave Monday morning, and you are booking three nights.
The trip duration, on the other hand, counts both edge days: Friday to Monday is four travel days. That is why the hero says “Day 1 of 4” while the accommodation shows three overnight stays — both numbers are right, they measure different things (Accommodations, How Etappe does the math).
5. Trial and full version#
Etappe is free to download and can be tried out in full for fourteen days. After that, you decide: buy once and keep planning — or do nothing and still keep, read and export your data. There is no subscription, no user account and no feature that will later lock you out of your own records.
5.1 Testing everything for 14 days#
The trial starts the first time you launch the app and runs for 14 days. The day of the first launch counts; on day 15 it has expired. Nothing is restricted during this time: every section, every trip, as many entries as you like.
The start date is stored in your device’s keychain, not in the app’s settings. It therefore survives deleting and reinstalling the app — the trial cannot be extended by reinstalling. Setting the device clock back doesn’t help either: Etappe never counts more than the full 14 days.
How much time is left is shown as a status line in the places described in 5.7 Where to find the purchase status (More → Etappe Full Version), for example “Trial — 6 days left”.
5.2 What still works after the trial without a purchase (reading, searching, exporting)#
If the trial expires without a purchase, the app is not locked. It switches to a read-only mode:
| Stays free | Needs the full version |
|---|---|
| View all trips, records, journal entries, maps, calendar and alerts | Create new trips, accommodations, journeys, activities, outdoor activities, to-dos, reminders, people, pets, vehicles, countries |
| Tick off items in the packing list and to-dos | Edit existing entries, apply templates, attach photos or documents |
| Generate and share PDF output | Import a backup |
| Create and save a complete JSON export |
So export stays open in both forms: the printouts from Exports and printouts and the complete backup from Backup. Only the reverse direction, the import, is locked there.
This keeps the most important principle intact: your data belongs to you and you can get at all of it at any time — even without a purchase. If you tap a locked button, the purchase view opens instead of the form; nothing is lost, and when you close it you’re back where you were.
5.3 Buying the full version — once, no subscription#
- Open More and tap Etappe Full Version at the very top. On the iPad, the same row is at the top of the sidebar.
- The purchase view summarizes what the full version includes.
- Tap the One-time … button showing the price.
- Confirm the purchase as usual with Face ID, Touch ID or your App Store password.
- After the purchase, a thank-you view appears in the same place — the app is permanently unlocked.
Below the purchase button is the sentence “Never a subscription. Promise!”. That is meant literally: a one-time purchase, no follow-up costs, no renewal you would have to cancel.
If the button only says Buy instead of showing a price, Etappe couldn’t load the price information from the App Store — usually there is no internet connection. The purchase button then tries again; if it still doesn’t work, a notice appears.
If a payment is initiated but not confirmed, Etappe deliberately does not unlock and asks you to tap Restore Purchases later. Nothing is charged twice.
5.4 Restoring the purchase on other devices#
The purchase is tied to your Apple ID, not to the device. On a new iPhone or iPad — or after a reinstall — signing in to the App Store is usually enough; Etappe recognizes the purchase on launch by itself.
If that doesn’t happen, open More → Etappe Full Version and tap Restore Purchases. Etappe then checks with the App Store and unlocks. Two responses are possible:
- “No previous purchase found.” — The full version wasn’t bought with this Apple ID. Check that the same account is signed in to the App Store.
- “Restore canceled or not possible.” — The sign-in was canceled or there is no internet connection. Just try again.
If you buy on a second device while the app is open on the first, that one unlocks as well without you doing anything, as soon as the information arrives.
5.5 Redeeming a code#
Codes for the full version are not redeemed in Etappe but in the App Store itself — that is how Apple requires it. The purchase view has the Redeem code link for this; it opens the App Store’s redemption page.
- In the purchase view, tap Redeem code.
- Enter the code in the App Store and confirm it.
- Switch back to Etappe. The unlock arrives via the App Store; the status refreshes by itself when you return to the app.
If the status doesn’t change, Restore Purchases from 5.4 Restoring the purchase on other devices helps.
5.6 Family Sharing and “Ask to Buy”#
If “Ask to Buy” is set up for your account — for example on a child’s account in Family Sharing — the purchase isn’t completed immediately but sent to the family organizer for approval. Etappe then shows a notice that the purchase is awaiting approval.
You don’t need to do anything after that: as soon as approval is given, the unlock arrives and Etappe unlocks automatically — even if the app was closed in the meantime.
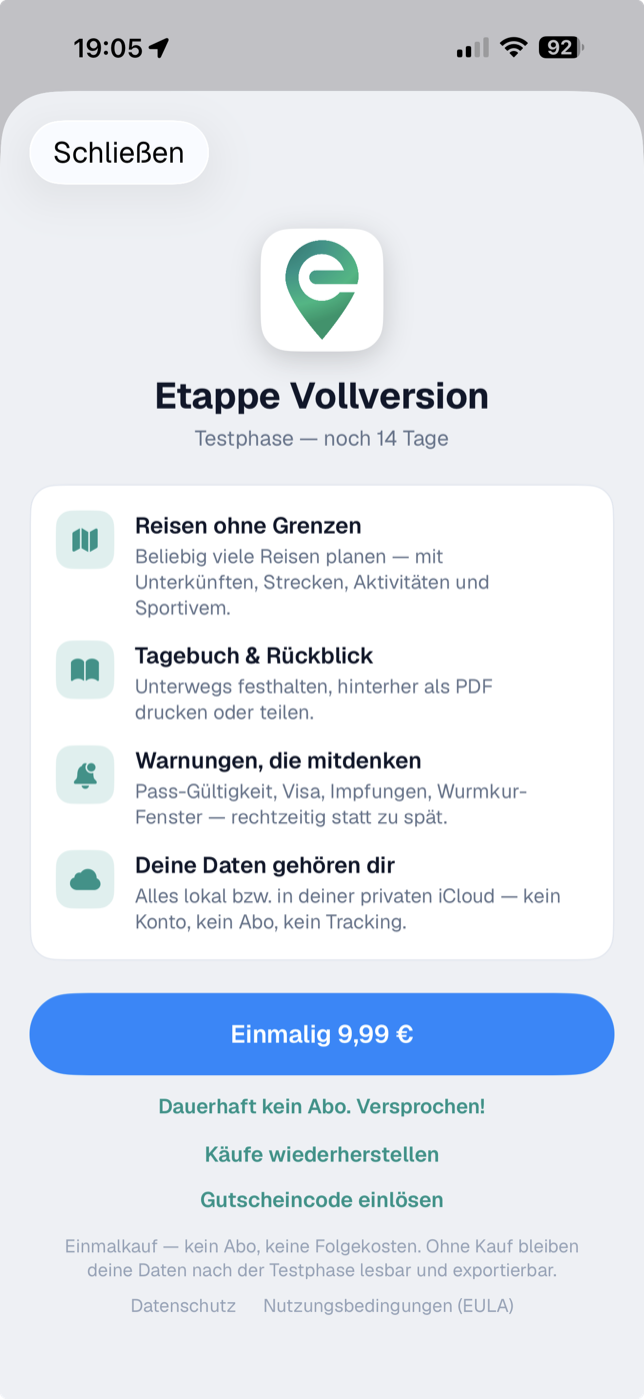
5.7 Where to find the purchase status (More → Etappe Full Version)#
You can see the current status in two places:
- More → Etappe Full Version (on the iPad, at the top of the sidebar): the prominent row with the status text and, before the purchase, the one-time price. Tapping it opens the purchase view.
- More → Settings → “Full version” section: the same information as a row in the settings (All settings).
The status text is always one of three:
| Status text | Meaning |
|---|---|
| Trial — N days left | Trial running, everything can be used |
| Trial expired — reading & export remain free | Read-only mode, see section 5.2 |
| Full version unlocked | Purchased, permanently active |
After the purchase, the row’s icon changes to a green seal, and the purchase view shows the thank-you instead of the price and buttons. More about what happens to your data and what Etappe does not transmit is in Your data.
6. Countries#
In Etappe, a country is more than a name on the map: it carries the details that the entry checklist and the alerts are built from — ID document, passport validity, deworming treatment, currency. You reach the list via More → Records → Countries; on the iPad, Countries sits in the sidebar.
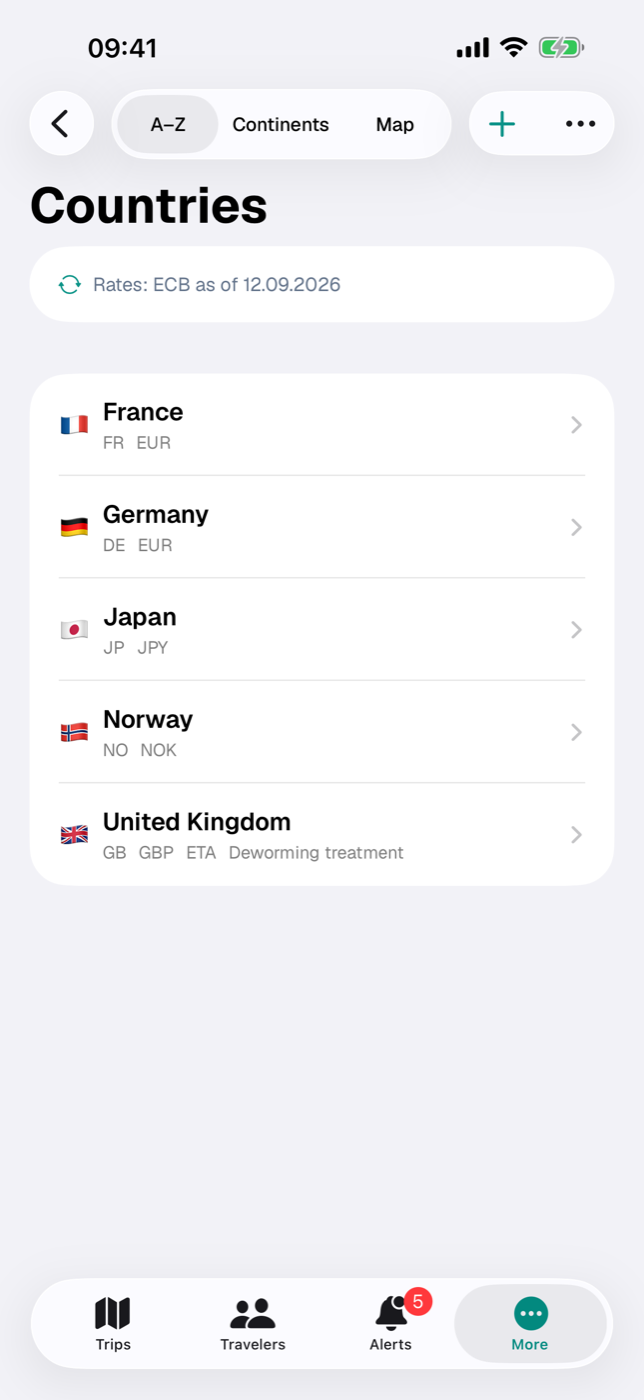
6.1 What the country list is for#
You assign countries to a trip as a whole (edit the trip, section Countries) and additionally to individual entries such as accommodations or budget items. From this come the country sections of the Entry checklist, notes on passport, ETA, visa and deworming treatment (Alerts), the flags in lists and the statistics under Where I’ve been.
At the top you switch between three views:
| View | What you see |
|---|---|
| A–Z | all countries alphabetically; only here can you delete by swiping left |
| Continents | fixed order Europe, Asia, Africa, North America, South America, Oceania, Antarctica; unknown ISO codes under “Other” |
| Map | one flag pin per country, tap to open the detail |
The grouping comes from a built-in mapping of the ISO code, not from the imported field; the same mapping also supplies the Continent row in the detail. Only countries with a known ISO code appear on the map; with an unknown code, the continent row in the detail is missing as well. Each list row shows flag and name, and below them ISO code, currency and the short notes ETA, Visa, Deworming treatment. At the very top of the A–Z and Continents views there is a status line for the exchange rates — Rates: ECB as of … or No rates loaded yet (6.8 Maintaining exchange rates).
6.2 Importing countries from etappe.app — and what the signature check means#
The most convenient way to get maintained country data is to import a signed file from etappe.app. As long as the list is empty, this route sits right on the start screen: the main button is Load countries from etappe.app, and below it Add country leads to the manual route (6.3 Adding or completing a country by hand).
- In the empty list, tap Load countries from etappe.app — or, once countries already exist, tap the three-dot menu in the navigation bar and there Import from etappe.app.
- Confirm the prompt “Import countries from etappe.app?” with Download & verify.
- Etappe loads the file — deliberately without a cache, so that you get the current version — and verifies it with a built-in public key; while the download is running, a small car drives across the screen.
- Only when the signature matches is the file read; then the Country import preview appears.
- Check Add new, Update and Skipped and tap Import — or Cancel, and everything stays as it was.
- Finally Etappe reports: “X countries added, Y updated.” In the background, Etappe then fetches the current ECB rates once and lays them over the countries; you see the result in the status line at the top of the list (6.8 Maintaining exchange rates).
The check is not a formality: if the file has been modified or does not come from etappe.app, the import stops with a message about the invalid signature.
Without a connection to the server, the import still works: Etappe then falls back to a bundled version of the country data, signed in the same way. A note line in the preview points out that it comes from the bundled records, together with their creation date (as of). After importing, the closing message adds: “No connection to the server — the countries were taken from the bundled records (as of …). Check later under More → Records → Countries whether newer data is available on the server.” A later import with a connection therefore brings in the current data. Only when neither the server nor the bundled file can be used does the import stop with an error message.
Matching runs on the ISO code (two letters, case doesn’t matter): known code — update, otherwise add. If a code appears twice, the first row counts. Rows without a valid code or name are reported under “Skipped” with their row number.
| Overwritten | Left untouched |
|---|---|
| all fields of the template: names, ISO codes, flag, continent, currency, exchange rate, language, hemisphere, entry and pet rules, vaccination recommendations, embassy, links | banner image, your notes and everything linked to the country: trips, places, accommodations, activities, documents, journal entries |
The file is the truth: an empty cell clears the field. A note of your own on a country is therefore gone after the import if the template has nothing there — anything important is better kept on the trip. Missing continents are created by the import. Only for the exchange rate does the file not have the last word: immediately afterwards, the ECB rate table lays over its value (6.8 Maintaining exchange rates).
6.3 Adding or completing a country by hand#
- In the country list, tap the plus at the top right (New country); in the still-empty list, Add country sits below the main button.
- Name and ISO code are required — Save stays inactive as long as the name is missing or the code isn’t exactly two letters.
- Fill in the rest and tap Save.
You change existing countries via Edit in the detail. Adding, editing, importing and Refresh Rates require write access (Trial and full version).
6.4 The fields in detail: flag, continent, currency, language#
| Field | Note |
|---|---|
| Name | required |
| Name in local language | shown in the detail below the name |
| ISO code (e.g. GB) | automatically uppercase; key for import and map |
| ISO 3 code (e.g. GBR) | for information only |
| Flag (emoji) | if it is missing, Etappe shows a white flag |
| Language | free text |
| Hemisphere | Not specified, North or South |
Then there is the Banner image section: a photo of your own replaces the automatically generated cover in the detail. There is no field for the Continent in the form — the row under General comes from the built-in mapping of the ISO code (6.1 What the country list is for); the imported continent field is only stored.
6.5 Entry: ID document, minimum passport validity, ETA, visa#
In the Entry section you set what the country demands:
- ID document — Not specified, National ID card, Passport or Both.
- ETA required and Visa required — each creates a checkable item in the checklist (“Apply for ETA”, “Apply for visa”) and an orange “required” pill in the detail.
- Quarantine — in the detail as a red “Observe regulations” pill.
- Minimum passport validity in months: if this says 6, Etappe warns you when the passport of a traveling person doesn’t reach that on the day of entry.
- Entry requirements — free text, shown in full in the detail and in the checklist.
Whether someone has the required document on file and how long it is valid, Etappe checks against the details under People.
6.6 Health: vaccination recommendations, rabies and the deworming treatment window#
The Vaccination recommendations section offers switches for Hepatitis A, Hepatitis B, Typhoid, Rabies, Yellow fever, Cholera, Japanese encephalitis and Meningococcal, plus a More field. Recommendations that are set appear as a single line in the detail and in the checklist — notes, not medical advice.
The Pets section controls the rules from Pets:
- Rabies vaccination required — Etappe checks for each animal whether the vaccination was given before the trip starts and is valid until the trip ends.
- Deworming treatment required — then two fields appear, in hours before the border crossing: Earliest (the larger value) and Latest (the smaller one). The note gives the example of the United Kingdom: 120 / 24, meaning deworming treatment 24 to 120 hours before the border crossing.
From both numbers and the entry date, Etappe calculates the permitted window for the checklist; if, conversely, the time of the deworming treatment is fixed, the permitted period for the border crossing follows from it. If the fields stay empty, 24 to 120 hours apply; swapped entries are quietly put in order by the app.
6.7 Embassy, emergency contact and further links#
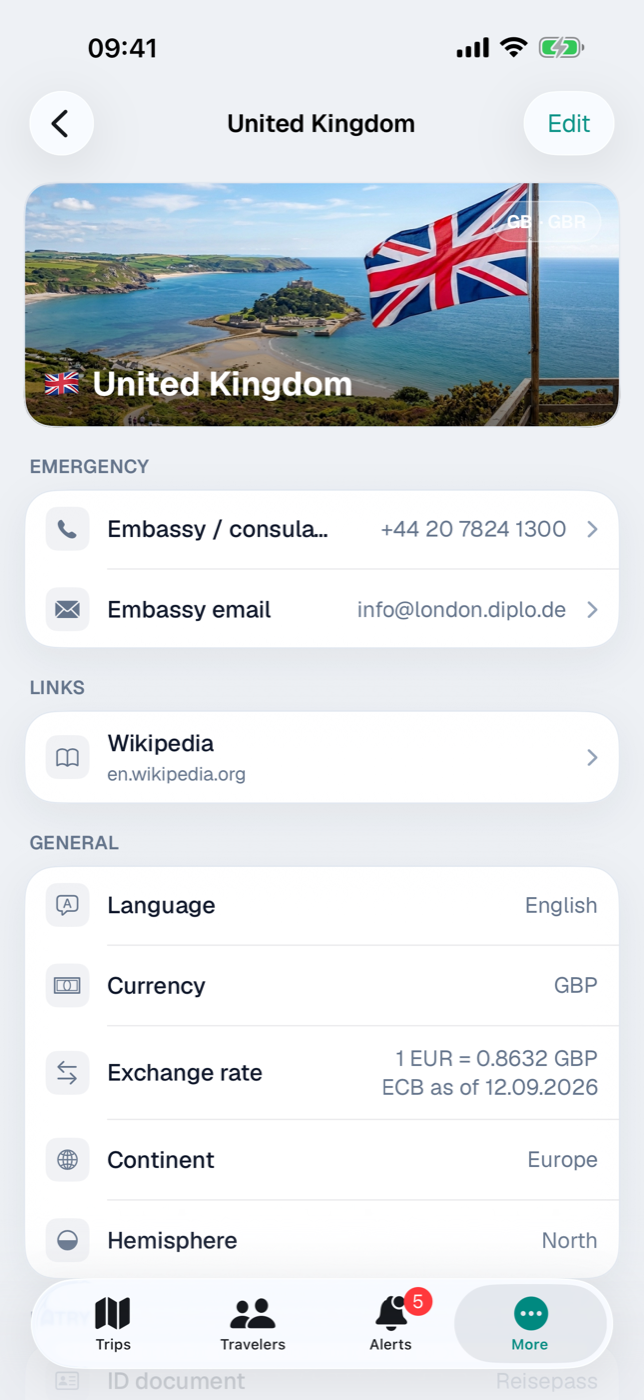
The Emergency & links section takes Embassy emergency phone, Embassy email, Wikipedia URL and Travel advice URL (foreign ministry).
In the detail, phone and email sit at the top of the Emergency card — the “Embassy / consulate” row dials the number, “Embassy email” opens a new message. The addresses appear in the Links card with the hostname as a second line. Below that, On trips lists all trips with this country, most recent first.
6.8 Maintaining exchange rates#
In the Currency section of the form you enter the three-letter code; it is automatically converted to uppercase. If it says anything other than EUR, Exchange rate (1 EUR = ? GBP) appears — the amount of foreign currency for one euro; the detail shows “1 EUR = 0.85 GBP” in the number format of your language, with two to four decimal places. Set back to EUR, Etappe discards the rate.
You rarely need to do this by hand. Etappe fetches the reference rates of the European Central Bank — via the frankfurter.dev service — and lays them over all countries with a matching currency. Only you trigger the fetch:
- via Refresh Rates in the three-dot menu in the navigation bar of the country list,
- once after every country import, including in the Getting started assistant (Installation and first launch),
- via the Refresh button next to the rate line in a trip’s budget (Budget) and in the settings (All settings).
At app launch or in the background, Etappe loads nothing — it sticks to the principle “network only when you tap” (Your data).
Where the rates stand is shown by the first line of the country list in the A–Z and Continents views: Rates: ECB as of Sep 12, 2026 or, as long as nothing has ever been loaded, No rates loaded yet. If a fetch fails, a single line with the reason appears below it — such as “No connection — the rates could not be loaded.” — never a dialog; the previous data stays. The loaded rate table travels to your other devices via the iCloud key-value store (iCloud sync).
A few rules so the numbers stay traceable:
| Case | What Etappe does |
|---|---|
| Country with the euro | no rate — the field stays empty |
| Currency in the ECB list (CHF, GBP, NOK, USD …) | rate from the table; the detail adds “ECB as of …” as long as the rate matches the table value |
| Currency outside the ECB list (such as MKD in North Macedonia) | stays manual — the fetch doesn’t touch the field, and the detail shows no ECB date |
| Country import from etappe.app | the file is the truth, then the ECB table lays over it — so an old rate from the file never overwrites a fresh daily rate |
The reading direction is “1 EUR = X” everywhere. If your base currency is not the euro, the country detail additionally shows “1 CHF = 0.91 GBP” — the rate from your base into the country’s currency (Glossary).
Budget items and research items have a field of their own with the reverse reading direction — EUR factor (1 GBP = ? EUR) (Budget, Research). Etappe prefills it as soon as a currency is chosen and the field is empty: from the ECB table with six decimal places, otherwise with the reciprocal of the country rate, rounded to four places:
| Rate | Prefilled EUR factor |
|---|---|
| 1 EUR = 0.85 GBP (ECB table) | 1 GBP = 1.176471 EUR |
| 1 EUR = 11.60 NOK (maintained on the country only) | 1 NOK = 0.0862 EUR |
A factor you entered or adjusted yourself is never overwritten — each item keeps its rate as a snapshot, even if the rates change later. The same goes for accommodations, journeys, activities and the trip budget: their rate to the base currency is frozen when saving (Budget).
Keep in mind: the next import from etappe.app also overwrites the exchange rate — with the value from the file, which the ECB table immediately lays over again. A rate you maintained by hand therefore holds, for currencies in the ECB list, only until the next Refresh Rates or import; for currencies outside the list, until the next import. Amounts already saved keep the rate they took over at the time.
7. People#
Anyone who travels with you is set up once and is then available everywhere: as a participant in a trip, as the owner of a packing list line, as the person whose passport the entry checklist checks. Etappe keeps their ID documents and vaccinations on file and lets you know when a document expires before the end of a trip.
You’ll find people in the Travelers tab, in the People group.
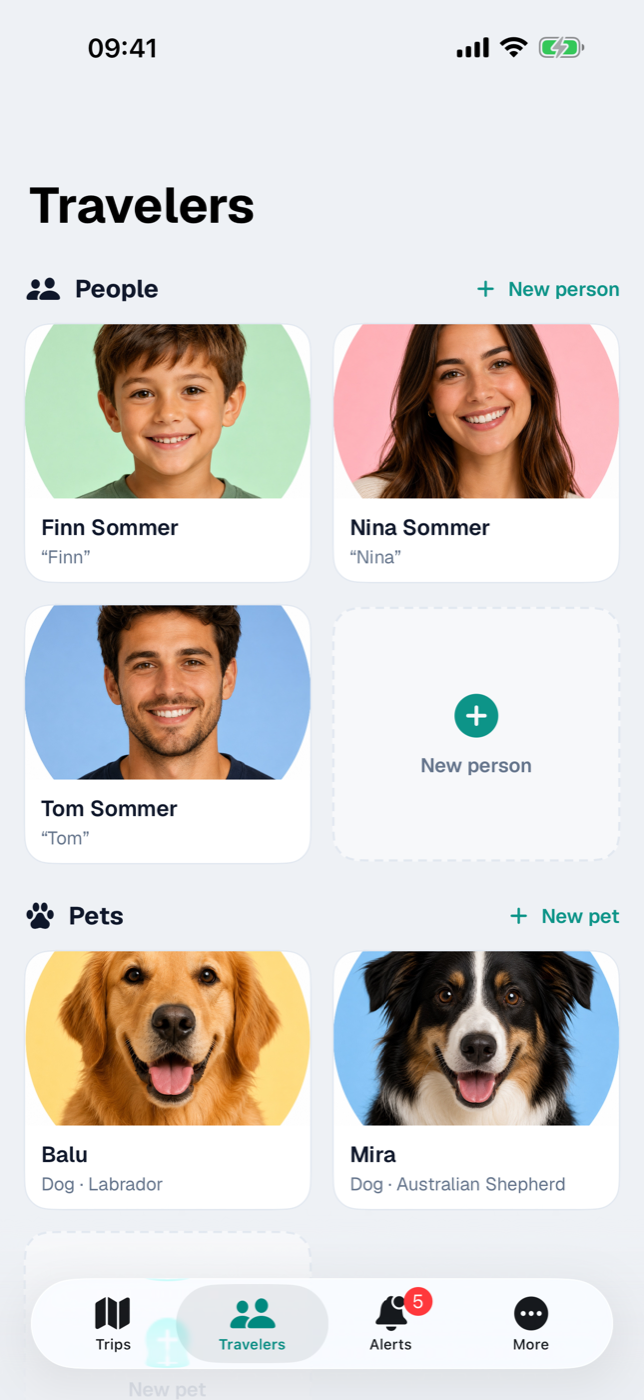
7.1 Adding a person, setting a profile picture#
- Open the Travelers tab.
- Tap New person to the right of the People heading, or tap the dashed tile at the end of the grid.
- Enter at least the First name — without it, Save stays inactive.
- Add Last name and Nickname as needed.
- Save.
The profile picture sits at the very top of the form. Choose photo opens your photo library; once a picture is selected, the button reads Change photo, with Crop (square, with zoom and pan) and Remove below it. Etappe reduces the image size before saving.
Without a photo, the tile shows a person symbol, and the detail view shows an avatar with the initials. Below the name — where entered — you’ll see the nickname in quotation marks and the age, for example “Momo” · 41 years.
7.2 Basic details: date of birth, nationality, contact#
The remaining fields are spread across four sections of the form:
| Section | Fields |
|---|---|
| Contact | Email, Phone |
| Date of birth | Set date of birth toggle, then Born on |
| Personal | Nationality |
| Notes | free text field |
Everything is optional. In the person’s detail view, the Personal card shows only what’s filled in; the email address and phone number there are tappable.
Whether packing lists and checklists show just the first name or first and last name is up to you, under Settings → Display → Names in checklists (All settings).
7.3 Adding an emergency contact#
The Emergency contact section takes a Name and a Phone number — meant for the case that someone else has to look at your phone while you’re on the road. In the detail view, both appear on one line, separated by a middle dot; if a number is on file, tapping the line dials it directly.
7.4 ID documents: national ID card, passport, driver’s license — with scan#
The ID documents card in the person’s detail view collects all their papers. + Add opens the form; tapping an existing line edits it.
For people, the choices are: National ID card, Passport, Driver’s license, Health insurance card, Vaccination record, ETA, Visa, and Other. Then there are Number (converted to uppercase), Place of issue, and Notes.
Validity has three toggles: Issued on, Permanently valid, and Valid until. Note the hint in the form: without an expiry date and without “Permanently valid”, a document counts as invalid in every check — Etappe doesn’t guess.
This determines the status pill on the right of the line:
| Pill | Meaning |
|---|---|
| Permanently valid | Permanently valid toggle is on |
| Valid | expires in more than 6 months |
| Expires soon | expires within 6 months |
| Invalid | expired, or no validity information |
Each document can carry two attachments: an image under Scan / photo (Add photo of the document) and a PDF or image file under File (PDF) (Add PDF / file). Both can be replaced and removed. A long press on the line in the detail view offers Show document, Show scan, and Delete.
Expiring documents automatically show up in Alerts. If the validity doesn’t last until the end of a planned trip, the alert becomes critical and also appears as a red box at the top of the person’s detail view. If a destination country requires a minimum remaining validity for the passport, Etappe checks that too (Countries, Entry checklist).
Receipts, bookings, and other files relating to a person belong in the Documents card below instead (Documents and receipts).
7.5 Recording vaccinations and keeping track of boosters#
The Vaccinations card works like the ID documents. In the form, you enter the Type; the small arrow symbol next to it offers common travel vaccinations — Rabies, Hepatitis A, Hepatitis B, Typhoid, Yellow fever, Cholera, Japanese encephalitis, Meningococcal, Tetanus, TBE, and COVID-19. Typing freely works just as well. Then there are Practice / doctor, the Vaccination date and Valid until toggles, and Notes.
The list is sorted by vaccination date, most recent first. Etappe shows a status pill only when a Valid until date is on file: Valid, Expires soon (6 months or less), or Expired.
Unlike ID documents, people’s vaccinations do not trigger an automatic alert. For a booster, your best bet is to set up a reminder (Reminders). For pets, on the other hand, the rabies vaccination is checked (Pets).
7.6 Archiving people#
Someone who no longer travels with you doesn’t have to be deleted. In the person’s detail view, open the More menu at the top right and choose Archive; in the Travelers tab, a long press on the tile is enough.
Archived people move to the Archive group at the bottom of the screen, faded and with the “ARCHIVED” banner. They are no longer offered when you select the participants of a trip or assign a packing list line to someone, and their ID documents no longer trigger alerts. Everything else stays: profile, documents, and the assignment to existing trips — wherever the person is already entered, they remain visible in the selection.
Reactivate in the same menu undoes this at any time.
7.7 Deleting people without losing the memory of past trips#
Deleting removes the record for good — but not the trace in your trips. The way there: in the person’s detail view, More → Delete …, or a long press on the tile → Delete …. A confirmation follows with the name and the sentence: “Documents, vaccinations, and photo are deleted. Only the name remains in past trips.”
That’s exactly what happens. Before Etappe deletes the person, it writes their name as a snapshot into every trip participation. In a trip’s list of travelers, a gray line with the name and the note “No longer in records” then appears; the name also stays among the participants in the itinerary PDF.
| Archive | Delete | |
|---|---|---|
| Profile, photo, contact details | kept | gone |
| ID documents, vaccinations, documents | kept | gone |
| Name in past trips | kept with profile | kept as a gray entry |
| Selection for new trips | hidden | no longer available |
| Alerts | go quiet | dropped |
| Undo | anytime | only from a backup |
Packing list lines that were assigned to this person remain and are then left without an owner — you can reassign or remove them (Packing list). Deleting can only be undone from a backup made beforehand (Backup).
8. Pets#
When an animal travels along, it comes with more paperwork than any person: microchip, EU pet passport, rabies vaccination, and for some countries a deworming treatment within a narrow time window. You set the animal up once, and Etappe works out the deadlines for every trip from that.
The area is called Travelers — in the tab bar on iPhone, in the sidebar on iPad. Below People you’ll find the Pets group there.
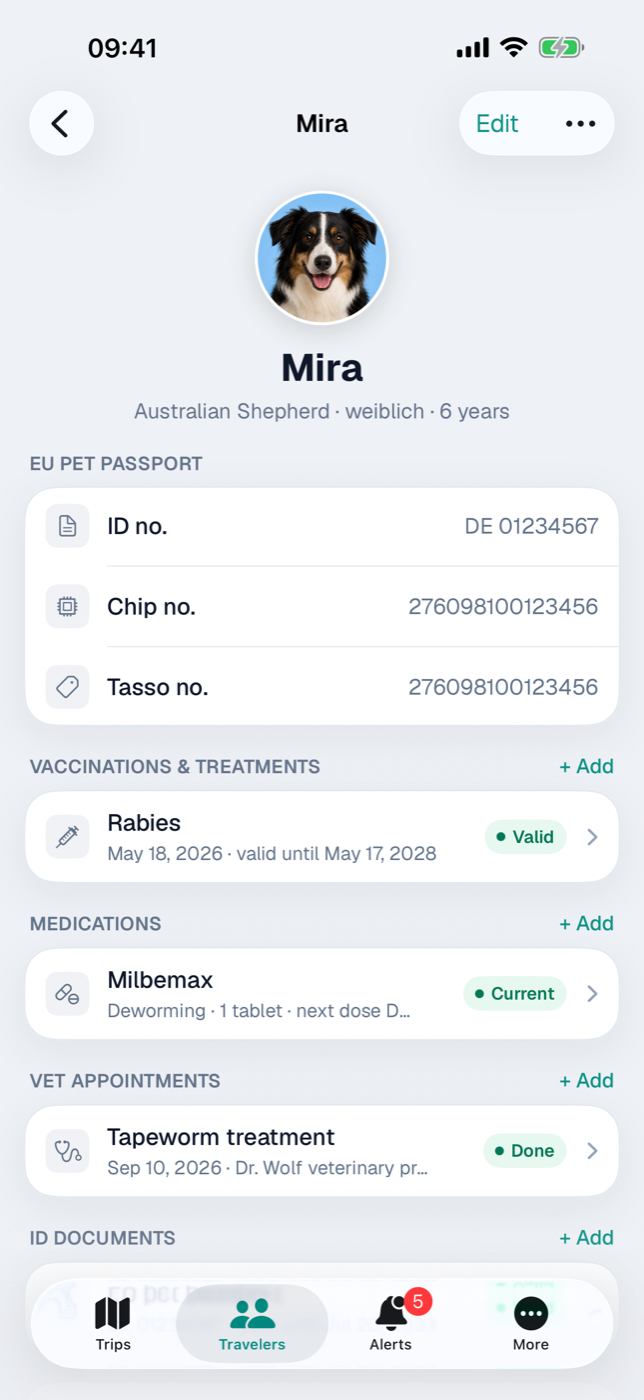
8.1 Adding a pet (species, breed, profile photo)#
- In the Travelers tab, tap New pet to the right of the Pets heading — or the tile with the plus sign in the same group.
- Choose photo takes a profile photo from your photo library; after that, Crop and Remove are available. Without a photo, Etappe shows a paw.
- Enter the Name. Without it, Save stays inactive.
- Choose Species (Dog, Cat, Other) and Sex (Not specified, Male, Female, Unknown); Breed is a free text field.
- Under Date of birth, switch on Set date of birth and choose Born on. Etappe derives the age in years from it.
- Save.
Below the name in the detail view you then see the breed — or the species, if there is no breed —, sex and age; you can change all of it via Edit.
For an animal to show up in a trip, you link it there: trip → Edit → Travel party section → Pets row. Only that enables the rabies and deworming treatment checks (Creating a trip).
8.2 EU pet passport, chip and Tasso numbers#
The numbers go in the form under Documents: Chip number, EU pet passport no., Tasso no. and Tax number. Filled-in fields appear in the detail view as the EU pet passport card; empty ones Etappe hides.
You also add the passport itself as a document: + Add in the ID documents card. As Type, animals get EU pet passport (preselected), Pet passport, Vaccination record and Other; plus number, place of issue, Issued on, Valid until or Permanently valid, a photo and optionally a PDF file.
The row carries a status pill:
| Pill | Meaning |
|---|---|
| Permanently valid | “Permanently valid” checked |
| Valid | expires in more than 180 days |
| Expires soon | in 180 days or less |
| Invalid | expired — or neither a date nor the permanent checkmark |
Remember that last row: a document with no validity information counts as invalid in every check, not as unknown. Etappe also reports expiring ID documents in the Alerts.
8.3 Rabies vaccination and the validity status light#
You add vaccinations in the Vaccinations & treatments card. Any entry whose Type contains “Rabies” or “Tollwut” counts as a rabies vaccination; the suggestion button inserts “Rabies” directly. Both date fields matter: Vaccinated on and Valid until.
The check runs against the trip period, and only for trips with a country that requires rabies vaccination (Countries):
| Status light | Reason |
|---|---|
| green | vaccination was before the trip starts and is valid until the trip ends |
| red | no rabies vaccination on file |
| red | expired — or expires in the middle of the trip |
| orange | vaccinated only after the trip started |
| orange | validity unknown or vaccination data incomplete |
So green doesn’t mean “vaccinated at some point” but valid without a gap for the whole trip. The status light appears in the Entry checklist and on the Overview; red cases also at the top of the pet’s page and as a critical alert.
8.4 Deworming treatment: the time window before entry, setting the border crossing manually#
If a destination country requires a deworming treatment, it only counts within a time window before the border crossing. The hours are stored with the country; without a value of its own, Etappe uses 24 to 120 hours (the UK window). To try out dates, there is the Deworming treatment calculator under More → Help: from a planned border crossing it works out the time window for the vet visit — or the other way round, from the vet appointment the permitted entry window.
The deworming treatment isn’t managed here but per trip in the Entry checklist: one row per pet and deworming country with the calculated window, the Deworming treatment (…) checkbox, the Deworming treatment on field and the Set border crossing (leaving the EU) button. The manually set border crossing, from date and time, replaces the trip start as the reference point — the normal case as soon as you know the ferry time.
Two alerts follow from this. On the pet itself they appear only when they are critical; in the window leading up to that, they show in the alerts inbox:
- Deadline approaching. Etappe alerts you when the end of the window is at most 14 days away; from three days on — and once it has passed — critical.
- Crossing outside the window. If the deworming treatment is checked off and its time entered, Etappe works backward to when you may enter with it. If the planned crossing falls outside that, the alert is critical immediately.
All of this applies per pet and trip, not globally.
Calendar and Today also show the permitted entry window after the deworming treatment as the notes Earliest and Latest border crossing — calculated from the deworming treatment checked off in the checklist, or failing that from a vet appointment recognizable as a deworming treatment (see 8.7 Vet appointments).
8.5 Other vaccinations and treatments#
The same card takes all other vaccinations. The suggestion button next to the Type field offers Rabies, Leptospirosis, Distemper, Hepatitis, Parvovirus, Kennel cough and Lyme disease for animals; free text works too. Add Practice / doctor, Vaccinated on, Valid until and notes.
The list is sorted by vaccination date, newest first. If there is a “Valid until”, the row shows the pill Valid, Expires soon (180 days or less) or Expired. Tap the row to change it; press and hold offers Delete.
8.6 Medications and the next dose#
Tick treatments, deworming, long-term medication go in the Medications card: Name, Purpose, Dosage and, via Plan next dose, the Due on field. This date produces the pill and the alert:
| Pill | next dose | Alert |
|---|---|---|
| Current | in more than 7 days | none |
| Due | in 7 days or less | Upcoming |
| Overdue | in the past | Critical |
Sorted by next dose; entries without a date go at the end. After a dose you set the date to the next one by hand — Etappe doesn’t advance it itself. Unlike rabies and the deworming treatment, medications aren’t tied to any trip: they always apply.
8.7 Vet appointments#
The Vet appointments card records vaccination appointments, check-ups and the deworming treatment dose: Date, optionally Set time, Type (say, vaccination or deworming treatment), Vet / practice, a lead time in days under Reminder, the Done switch and notes.
Sorted by date, latest appointment first. A completed appointment gets the green Done pill, an open one with a past date the red Overdue. If there is a lead time under Reminder, Etappe notifies you at 9:00 AM on the lead day — just like with Reminders. Completed appointments stay silent; without a lead time there is no notification.
The appointment itself doesn’t appear in the trip calendar — it usually falls before the trip. But an appointment whose Type contains “worm” (say, “Deworming treatment” or “Deworming”) supplies the deworming time for the Earliest and Latest border crossing notes in Calendar and Today (Calendar and day view).
Invoices and findings go in the Documents card (Documents and receipts).
8.8 Archiving and deleting pets#
An animal that no longer travels with you, you archive via the tile’s context menu or in the detail view via More → Archive. The tile gets the Archived banner, fades and moves to the Archive group. An archived animal is no longer offered for new trips — but stays where it is already entered — and no longer triggers any alerts, whether for rabies, deworming treatment, medications or documents. Reactivate undoes that.
Delete … in the same menu removes the record for good. The dialog spells out what goes with it: documents, vaccinations, appointments and photo. In past trips the Name remains, so the travel party of the time stays complete. The same principle applies to people — see People.
9. Vehicles#
If you travel in your own vehicle, you need its key figures again and again: the height at the entrance to the underground garage, the length when booking the ferry, the expiration date of the vignette at the border. All of that lives here in one place — and Etappe lets you know on its own when a document is about to expire. On the iPhone you find the section under More → Records → Vehicles, on the iPad directly in the sidebar.
9.1 Creating a vehicle: type, license plate, year of manufacture#
- In the vehicle list, tap the New vehicle tile or the plus at the top right.
- At the very top, Choose photo lets you add a picture; Crop straightens it up and Remove deletes it again.
- In the Vehicle section, enter the Name — without it, Save stays grayed out. Then come Type, License plate (automatically converted to uppercase), Color and Year of manufacture.
- Save creates the vehicle.
The Type determines the symbol on the tile and the cover card:
| Type | for |
|---|---|
| Car | passenger car, station wagon, van |
| Motorhome | converted vehicle with a living area |
| Caravan | towed caravan |
| Trailer | cargo, boat and bicycle trailers |
| Motorcycle | motorcycle, scooter |
| Bicycle | bike, e-bike |
| Other | everything else |
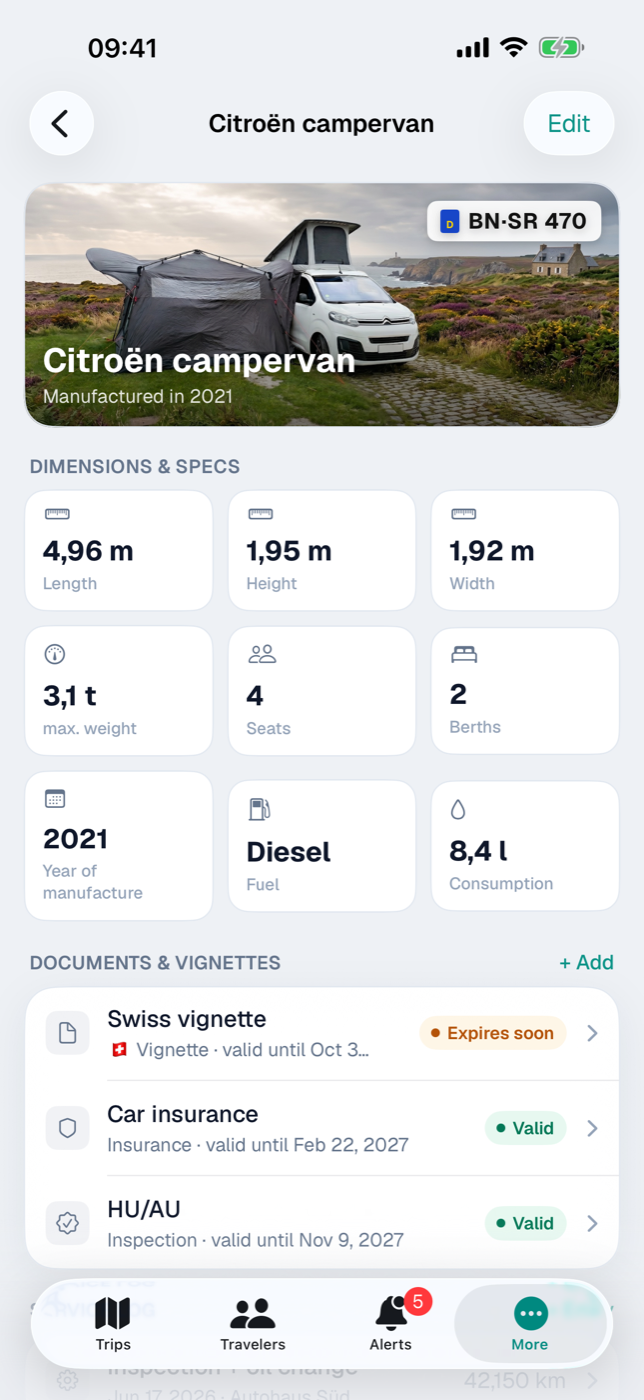
On the tile, a line below the name shows the type (omitted for “Car”), license plate and fuel type. In the detail view, the license plate sits as a badge at the top right of the cover card, with color and year of manufacture below it.
9.2 Dimensions and weights — important for ferries, tunnels and pitches#
The Dimensions & specs section of the form holds Length, Height and Width in meters as well as Max. gross weight in kilograms. Etappe doesn’t check these values against anything — they are there so you have them at hand when the ferry company’s booking form asks for the vehicle length.
In the detail view, the values you filled in appear in a grid of tiles; empty fields don’t appear at all. Etappe shows weights of 1,000 kg and above in metric tons with one decimal place (3.5 t), anything below in kilograms.
9.3 Seats and berths#
Also under Dimensions & specs are Seats and Berths. The seats tell you how many fellow travelers can ride along; the berths are meant for motorhomes and caravans. These two numbers, too, are only displayed, not compared with the number of participants.
9.4 Consumption and fuel type#
The Consumption section has two fields: Fuel type as free text (diesel, gasoline, electricity, LPG) and Consumption in l/100 km.
The consumption value is the only vehicle field Etappe does any math with: if a journey has a vehicle assigned and a route has been recorded and applied for that journey, the key figures bar in the Route recordings card — above the map view — shows approx. liters next to kilometers, driving time and average speed. The calculation is simple: kilometers driven × consumption ÷ 100. It is an estimate, not a measurement — details in Recording a journey. Without a stored consumption value, the figure is left out.
A vehicle is assigned in two places: to the whole trip (Creating a trip) and to individual journeys with the mode of transport Car or Other (Journeys).
9.5 Vehicle documents: inspection, registration, insurance, roadside assistance, emissions sticker#
In the Documents & vignettes card of the vehicle detail, + Add creates an entry. Only the Title is required (for example “Vehicle inspection (TÜV)”); in addition you choose the Type: Inspection, Registration, Insurance, Roadside assistance coverage, Emissions sticker, Vignette or Other.
Under Validity, switch on Set valid until and pick the date. The status pill next to the entry follows from it:
| Pill | Condition |
|---|---|
| Valid | more than 60 days remaining |
| Expires soon | 60 days or less |
| Expired | date is in the past |
Without a date, the row has no pill — and no alert. Because this is exactly the date the alerts engine reports (Alerts): an expired document is always critical, and so is one whose validity ends before the end of an upcoming trip with this very vehicle — the trip title then appears in the alert. Everything else shows up as an advance warning from 60 days remaining. Documents of archived vehicles no longer raise alerts.
Each document takes two attachments: under Scan / photo an image (Add photo of the document), under File (PDF) a file (Add PDF / file). A long press on the row then offers Show document, Show scan and Delete. For receipts that don’t belong to a particular document, there is the Documents card further down (Documents and receipts).
9.6 Vignettes per country with validity period#
If you choose Vignette as the type, an additional Country field appears. You can pick from your country records (Countries) or Not specified. The country then shows as a flag in front of the type in the row — with half a dozen vignettes, you can see at a glance which border is already covered.
You enter the validity period the same way as for any other document, via Valid until — for a 10-day vignette, that is the tenth day. The list is sorted by expiration date, the next one to expire at the top.
9.7 Service log: recording maintenance and repairs#
The Service log card collects what has been done to the vehicle. + Entry creates a new one:
- Service: title (for example “Inspection & oil change”), Date and Workshop
- Details: Odometer and Costs — your base currency appears next to it as the unit; the value is for information only and is never converted anywhere
- Notes for everything else
In the list, entries are ordered by date, the most recent at the top; below the title run date and workshop, on the right the odometer reading. Tapping opens the entry for editing; a long press offers Delete.
The costs stay in the log — they don’t flow into the trip budget (Budget). The log answers the other question: when was the car last at which workshop, and what was the mileage then?
9.8 Archiving, deleting and “On trips”#
A vehicle you have sold doesn’t have to go. A long press on a tile offers Archive; the vehicle moves to the INACTIVE section, wears the Inactive banner and is no longer offered for selection in new trips and journeys. In past trips it remains visible. Its detail view then starts with the note This vehicle is inactive and a Reactivate button.
Delete from the context menu removes the vehicle for good, together with its documents, service entries and attachments; trips and journeys remain and are left without a vehicle from then on. When in doubt, archiving is the better choice.
At the very bottom of the detail view, the On trips card lists all trips with this vehicle, with month and year — a tap jumps to the trip.
10. Packing list templates#
Typing the same things again for every trip would be pointless. Templates are packing lists that belong to no trip: you maintain them once and apply them to a trip’s packing list with one tap. Whatever you check off, change or delete there afterwards leaves the template untouched.
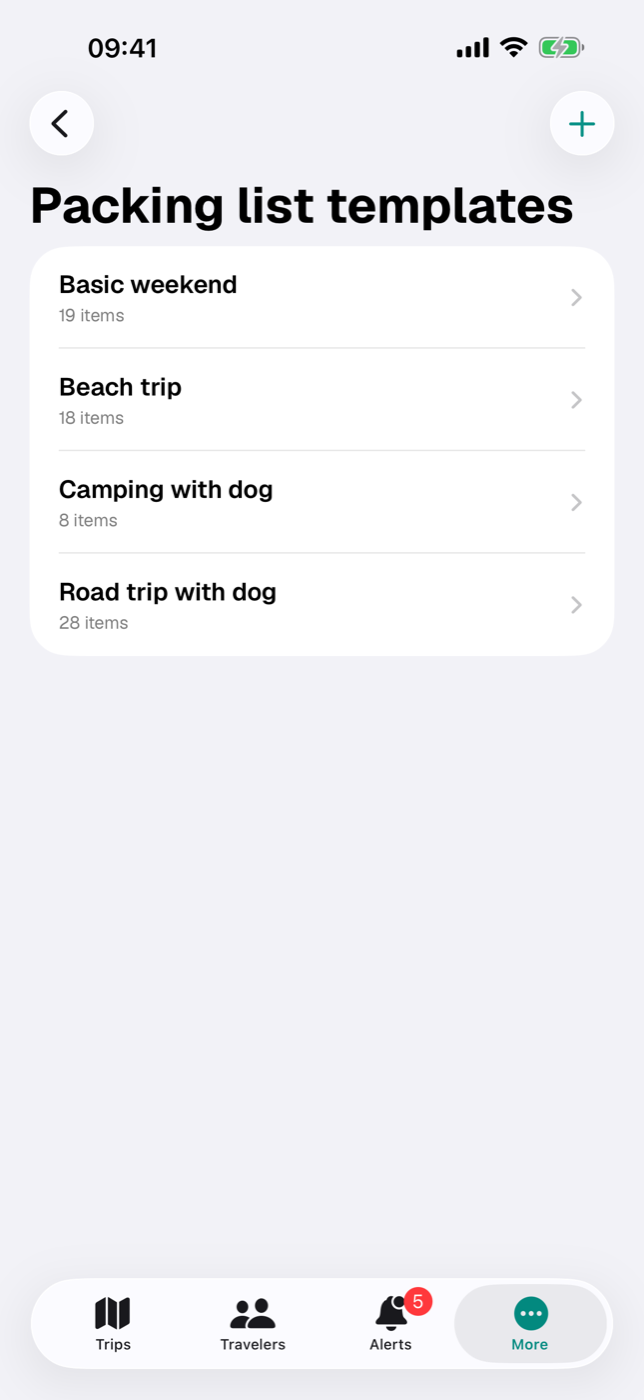
You find the section under More → Records → Packing list templates, on the iPad via the entry of the same name in the sidebar. For each template the list shows the name and, below it, the number of its items, such as “19 items”.
10.1 The built-in default templates#
On first launch, Etappe creates three templates — the same ones as in the web version:
| Template | Categories | Items |
|---|---|---|
| Basic weekend | Documents, Clothing, Toiletries, Electronics | 19 |
| Road trip with dog | Documents, Clothing, Toiletries, Electronics, Pet supplies, Car | 28 |
| Beach trip | Documents, Clothing, Toiletries, Beach | 18 |
They are deliberately plain: passport, health insurance card, phone + charging cable, toothbrush — and for the road trip also EU pet passport, bowl, leash, poop bags, plus safety vest, first-aid kit and warning triangle for the car.
These three are not special cases: you can rename, extend, trim and delete them like any template of your own. One detail is worth knowing — the launch routine only creates them as long as no template at all exists. So if you delete all three, they are back the next time the app starts; if you delete only two, that is how it stays.
If you use Etappe on two devices, both may create the default templates before the first sync runs. Etappe cleans that up itself at launch and keeps exactly one copy per name — the same one on both devices.
10.2 Creating your own template#
- Open More → Records → Packing list templates.
- Tap the plus at the top right (New template). If the list is empty, the Add template button in the middle also leads to the same form.
- Enter a Name. Without it, Save stays grayed out.
- Optionally a Note over several lines — for instance what the template is meant for. It later appears in the selection sheet below the name and helps you tell similar lists apart.
- Save.
The new template starts out empty and greets you with “Template is empty” and the Add item button.
New templates and changes require write access. Once the trial has expired, the purchase notice appears instead of the form — see Trial and full version.
10.3 Managing items, quantities and categories#
Inside a template you add items via the plus at the top right (New item):
- Name — what needs to come along. Without text, Save stays inactive.
- Category — a free text field. Via the picker symbol next to it you take over a category already used in this template; in addition, Documents, Clothing, Toiletries, Electronics, Pet supplies, Car and Beach are available. If you leave the field empty, the item ends up under “Other”.
- Quantity — set with minus and plus, from 1 to 99, preset to 1.
- Save.
The list groups the items by category, with the sections in alphabetical order. Within a category, the order in which you created the items is kept. A quantity above 1 appears on the right as “× 3”; at quantity 1 the row stays plain.
Tapping a row opens it for editing. Swiping from right to left deletes the item without asking.
Category and quantity carry over when the template is applied to a trip’s packing list. There is no assignment to a person in templates — you set that in the trip itself (Packing list).
10.4 Renaming, extending and deleting templates#
Rename — the toolbar menu of an open template offers Rename. It opens the same form as when creating, note included.
Delete — in the template list, swipe the row from right to left. The template disappears along with its items and without asking. Packing lists of your trips that have already been filled are not affected.
There is no function to copy or duplicate a template — and it is rarely needed: templates can be stacked when applied, because items with the same category and the same name are not added twice. So instead of a “Beach trip with dog”, you apply the Beach trip and then the Road trip with dog to the same packing list, one after the other. How that works in detail is covered in Packing list.
Changes to a template are not retroactive: a packing list that has already been filled stays as it is. If you apply the changed template again, only the new items are added.
Templates and their items are part of the backup and are exported and imported with it (Backup).
11. Home#
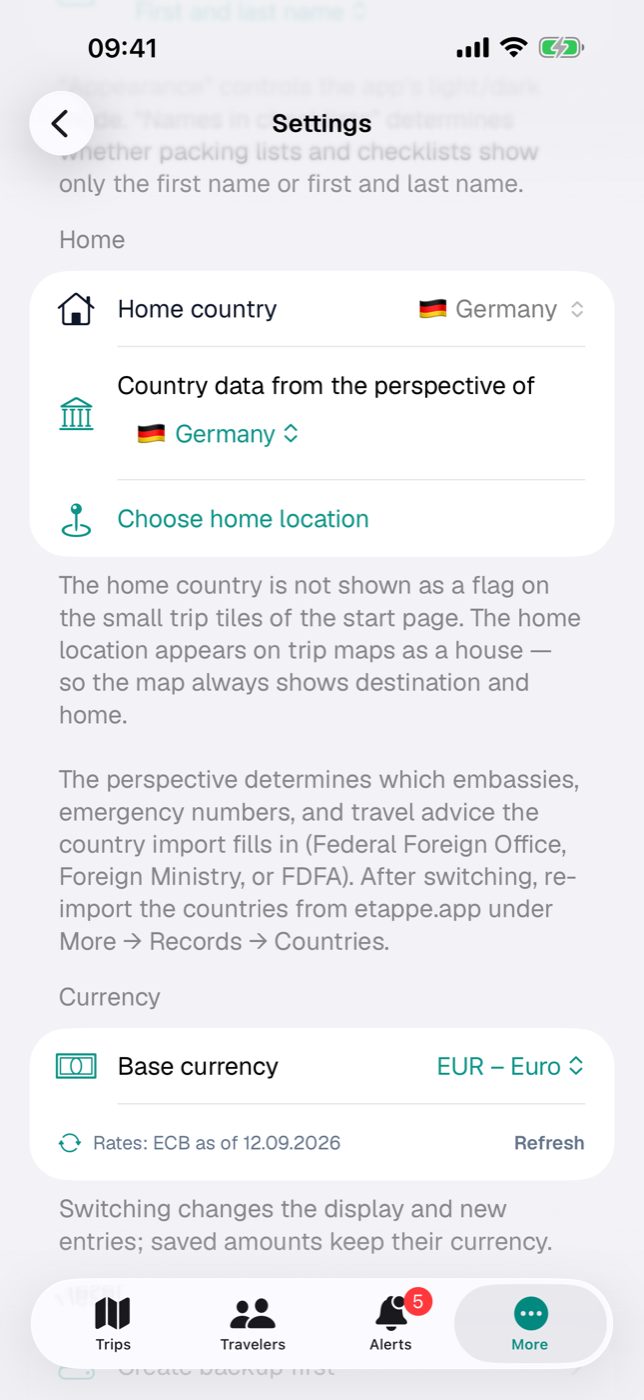
Etappe doesn’t need to know where you live. Two settings, though, make the app fit better, keep it calmer, and make its maps more meaningful: the home country and the home location. Both live under More → Settings in the Home section; on the iPad under “Settings” in the sidebar. The Getting started assistant also asks for the home country on the very first launch (Installation and first launch). You set it once and never have to think about it again — not even on your second device, because both travel with you via iCloud (11.4 Home and base currency travel between your devices).
11.1 Setting the home country — and why it gets no flag on trip tiles#
Tapping Home country opens a list of every country in the world with flag and name — not just the countries in your records — plus a search field (name or country code) and, at the very top, the entry Not specified. You don’t need any loaded countries for this; in the Getting started assistant, the country of your device region is preselected.
The setting has three effects. The first concerns the perspective of the country data: the country import enters embassies, emergency numbers and travel advice from the perspective of your home country — Germany, Austria or Switzerland (Liechtenstein counts as Switzerland). There is no dedicated perspective for any other home country; in that case the perspective of your device region applies, usually Germany, and Settings says so with a note: “There is no dedicated perspective for France — embassies and travel advice show the perspective of Germany.” If you deliberately want a different one, choose it below under Country data from the perspective of; changing the home country resets this override. After a change, import the countries from etappe.app once more so the data of the new perspective arrives (Countries).
The second effect concerns the trip list: in the All view, trips under way and the next one appear as a large card, all others as square mini tiles in a grid. On these mini tiles, Etappe shows the flags of the trip’s countries at the top right, six at most — and leaves out the home country. The third: on the world map Where I’ve been, the chosen home country appears in gold; without a selection, there is no golden country there.
On the first launch, the base currency also follows the home country as long as you don’t choose one yourself — it has its own Currency section in Settings (All settings).
The reason for the missing flag is a practical one: almost every trip starts and ends at home, so the home country is part of almost every trip. As a flag on the tile, it says nothing and only crowds out the flag you are actually interested in. If your home country is the only country of a trip, the tile has no flag pill at all.
The large trip cards are not affected — there is enough room there, and all countries of the trip are shown, the home country included. If you switch the trip list to a status filter or to the archive, you also see large cards with all flags.
11.2 Choosing the home location on the map#
The home location is a point on the map, not an address. This is how you set it:
- In the Home section, tap Choose home location. If one is already set, the button reads Change home location.
- Choose location opens. The map starts over Central Europe, or over the location already set.
- Tap the map — that’s where the marker lands. Another tap moves it. The current coordinate is shown at the bottom with five decimal places.
- Alternatively, tap Current location. The first time, iOS asks for permission to use your location. While the position is being determined, the button reads “Determining location …”; if Etappe gets no position within eight seconds — or permission is missing — the marker simply stays where it is.
- Apply at the top right saves. The button is only active when a marker is set. Cancel discards the selection.
Afterwards, the Home location row shows the saved coordinates with four decimal places. Remove home location deletes them again; the row and the remove button then disappear.
Only the pair of numbers is stored — on your device and, if iCloud is turned on, in the key-value store of your Apple ID, so that your second device knows it. It is not transmitted to anyone else, and it does not appear in any export — see Your data.
11.3 Where the home location appears#
The home location appears on the maps of your trips as a white house on a green circle, labeled “Home” — deliberately different from the teal dots of the trip places. You’ll see it in two places: on the small map card in the trip overview and on the large trip map (Map). On the large map, the house always stays visible, even when you hide places with the type filters or use the day slider.
More interesting than the marker is what the home location does to the map section. Etappe decides based on how many places of its own the trip has at all:
| Places in the trip | Map section on opening |
|---|---|
| none | the large trip map centers on your home (the map card in the overview doesn’t appear at all) |
| one | home is included in the frame — you see the destination and the starting point |
| two or more | only the trip; the house stays a marker with no influence on the zoom |
That is intentional. A map with a single point says little — together with home, it immediately becomes “from here to there”. But as soon as the trip has several places of its own, a far-away home would stretch the map across half the globe and shrink the trip area to a postage stamp. A minimum section also makes sure the map doesn’t zoom in too far when places lie close together.
If you haven’t set a home location, both are dropped: no house, and the section follows the places of the trip alone.
11.4 Home and base currency travel between your devices#
Home country, home location and base currency are settings, not trip data. So they don’t live in the synced database — but they don’t stay stuck on one device either. Etappe stores them in the iCloud key-value store of your Apple ID and mirrors them locally as well:
- On your second device, the three values are there by themselves after syncing; the same goes for the most recently loaded rate table (iCloud sync).
- If different things are changed on two devices, the last change wins.
- Without iCloud — not signed in, turned off — the values stay local on the device and apply there as normal.
- They are not part of the backup; an import doesn’t overwrite them (Backup).
- Delete all data in Settings clears them too — including in iCloud (All settings).
The override Country data from the perspective of, appearance, name format, route planner and the app lock, on the other hand, stay purely on the device. All the app’s other switches are collected in All settings.
12. Creating a trip#
The trip is the bracket around everything else: accommodations, journeys, budget, journal. To create one, all you need is a title — everything else can be added at any time.
12.1 Add manually or let the assistant guide you#
In the Trips overview, the plus sits at the top right. It opens a small menu with two entries:
- Add manually opens the complete form on a single page.
- Add with assistant asks you one question per screen.
If you don’t have a trip yet, the empty view offers both routes directly: the Create trip button starts the assistant, and Add manually below it leads to the form. You can also reach the assistant from the “Getting started” help.
The assistant pays off for vague plans, because it lets you skip anything unclear with Don’t know yet. The form is faster if you know the key facts — and it can do things the assistant doesn’t ask about: place/region, status, rating, and verdict. Creating and editing require write access in Etappe (Trial and full version).
12.2 The trip assistant step by step#
A bar along the top shows how far you’ve come. Back lets you correct things at any time; Cancel discards everything.
| Step | Question | Required? |
|---|---|---|
| 1 | Where are you headed? (countries) | yes, at least one |
| 2 | What should the trip be called? | yes |
| 3 | Do you know who’s coming? | no |
| 4 | Are the pets coming along? | no, skipped if there are no pets |
| 5 | Do you know when? | no |
| 6 | Are you driving yourself? | no, vehicle optional |
| 7 | Do you already have a budget in mind? | no |
| 8 | Would you like a cover photo? | no |
| 9 | Everything right? (summary) | — |
A few finer points:
- The country list has a search field. If a country is missing, Country missing? Add it creates an empty entry with the name you typed, which you fill in later under Records; if you also enter the two-letter country code (e.g. FR), the country shows up on maps and in the statistics as well. If you cancel the assistant or deselect the country again, that entry disappears again.
- If there are no countries in Records at all — for instance because you skipped the initial setup —, the first step offers Load countries from etappe.app directly and, as an exception, can be skipped with Don’t know yet; you can assign countries to the trip at any later time. Without an internet connection, the bundled records step in (more in Countries).
- At Are you driving yourself?, Next only becomes active once you have chosen Yes or No; if you’re undecided, Don’t know yet still moves you on. If you say Yes and exactly one vehicle is on record, it is preselected.
- If there are no people in Records yet, you create the first one right in step 3: enter a first name (last name optional), Add person — the entry is selected immediately, after which the normal selection list appears. The same in step 6: if there is no vehicle, a name and Add vehicle are enough. You add the details later under People or Vehicles. As with the countries: if you cancel the assistant or deselect the entry again, it disappears again.
- In the summary, each row with the pencil icon takes you back to exactly that question; Apply brings you straight back to the summary.
Create trip saves; the new trip starts with the status “Considering”. You then choose between Open sketch (see Sketch — planning before the dates are fixed), Open trip, and Close.
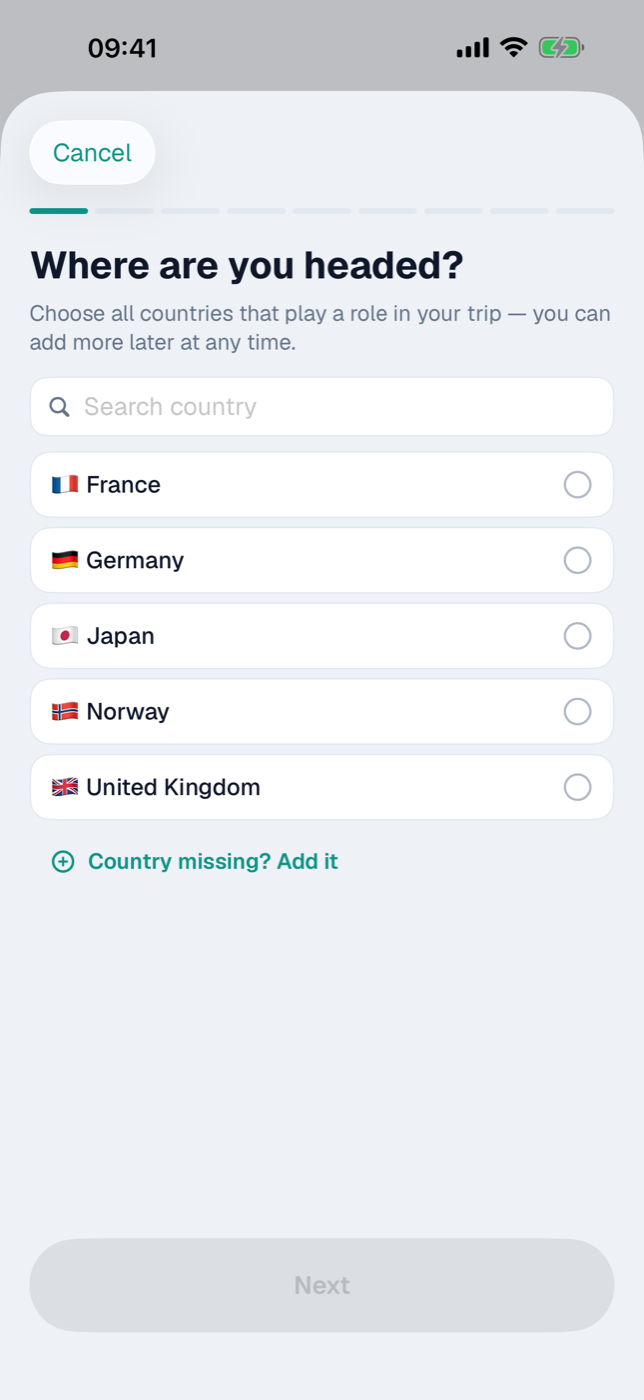
12.3 Title, region, period, status#
The form is divided into sections. At the very top:
- Title — the only required field; without a title, Save stays grayed out.
- Place / region — free text, shown in small type beneath the title on the trip card.
- Status — determines the color and the grouping in the overview:
| Status | meant for |
|---|---|
| Considering | loose ideas |
| Bucket list | far-off destinations without a date |
| Planning | getting concrete |
| Making arrangements | booked, departure is coming up |
| Under way | happening right now |
| Past | finished |
From Making arrangements onward, Etappe advances the status itself as soon as a period is set: to “Under way” when the trip begins, to “Past” after the trip ends. Considering, Bucket list, and Planning are left untouched, and “Past” is never reset automatically.
In the Period section, the Set period switch reveals the two date fields. The end date can never be before the start date — if you move the start later, the end moves with it. Without a period, the trip remains usable; only the calendar, the travel-day count, and deadlines need one.
Further down: Available budget in your base currency (the basis for the budget status light, see Budget), Stars for the rating — tapping the same star again clears it — and, once the status is “Past”, the multi-line Verdict field in the Retrospective section.
12.4 Setting or cropping a cover photo, or keeping the duotone artwork#
Without a photo of your own, Etappe draws a duotone image that stays the same for a given trip. If you want your own picture, use the Cover photo section:
- Choose cover photo opens the photo picker; the image is reduced to a maximum edge length of 1,600 pixels.
- Crop opens the Choose crop editor: zoom with two fingers (up to 6×), move with one finger. The white frame shows the 16:9 section, which is saved at 1,600 × 900 — Apply writes it back, Cancel discards it.
- Remove deletes the photo; the duotone image returns.
The cover appears on the trip card, on the mini tile, and as the header image in the trip detail. How much space the images take up is covered in Storage and files.
12.5 Setting the trip’s countries#
The Countries section leads to a searchable list of all country records with flag and name; you select with a checkmark, and Done closes it. The form row then shows the codes of the chosen countries.
The flags then appear on the trip card and in the trip header. Tapping them opens the trip’s countries overview with the embassy’s phone number and email (both tappable) plus the entry notes: required ID document, ETA, visa. The same countries feed the Entry checklist and Where I’ve been. On the mini tiles, the home country set in the settings stays hidden (Home); details on the country data are in Countries.
12.6 Assigning participants: people, pets, vehicles#
In the Travel party section, you choose Participants and Pets by multiple selection, plus a Vehicle (or None).
Archived people, pets, and vehicles are no longer offered; if one of them is already assigned, it stays visible so that past trips can still be edited. If a list is empty, Etappe points out that the records need to be created first — see People, Pets, and Vehicles.
The assignment has knock-on effects: pets bring rabies and deworming checks into Alerts, the vehicle supplies consumption figures for Journeys, and people can be addressed in the Packing list. In the trip detail, the avatars beneath the title lead to the Travelers view with photo, role, and species; a tap opens the records.
Each person carries a Role there per trip: Companion (the default), Organizer, or Guest. A long press on the row opens the Role menu, where you change it — the choice applies to this trip only; the same person can have a different role on another trip.
Deleted people and pets remain in the Travelers view as a gray row “No longer in records” — the trip doesn’t forget who was there.
12.7 Editing, archiving, deleting a trip#
Edit: Open the trip and tap More → Edit trip in the floating bar — the same form as when creating.
Archive: In the Trips overview, press and hold a trip and choose Archive. It disappears from the status groups, remains reachable via the Archive filter chip, and comes back with Restore from archive. Archived trips do not take part in the automatic status updates.
Delete: The same context menu holds Delete trip. Etappe asks for confirmation, naming the trip’s title, and points out that all its contents — journal, photos, budget, and the rest — go with it and that the trip also disappears from “Where I’ve been”. This cannot be undone: if you’re unsure, create a Backup first, or archive instead of deleting.
13. Sketch — planning before the dates are fixed#
A trip rarely starts with a date. It starts with an idea: ferry first, then three nights on the coast, then on south. The sketch is the place for exactly this sequence — no times, no bookings. Once it fits, you turn it into real entries with a single action.
13.1 What the sketch mode is for#
You reach the sketch through the Sketch tile on the trip page, right next to Today and Calendar. Inside is a list of blocks in the order you have in mind.
At the top is the summary: how many days the sketch covers and — if the trip already has dates — the period calculated from that. Below it, Etappe compares the two: “Fits exactly into the 12 trip days”, “3 days to spare” or, highlighted in orange, “2 days more than the trip”. The last line counts how many blocks have already been turned into entries. Without trip dates, the sketch simply counts relative days.
The sketch is the middle of three zoom levels of planning — between the trip status and the individual research item (Core concepts).
13.2 Creating blocks: accommodation, journey, activity, outdoor activities, note#
The plus at the top right opens a menu with five block types plus the day boundary.
A sketch that is still empty first asks: Roughly how many days do you plan to travel? If the trip already has a period, its length is filled in. Create sketch with N days builds the day structure from it — the days, separated by day boundaries — which you then fill. The number is not binding: you can extend or shorten the structure at any time by adding or deleting day boundaries. If you prefer to start freely, tap Start without a day structure instead and create the first block right away.
Every block has a title, a type, a duration and, optionally, notes. In addition:
- Journey gets a mode of transport and its own Route section with start place, start country, destination place and destination country. In the list this appears as “Bonn → St. Ives” with flags.
- All other types have a single Country field. Only the countries assigned to the trip are available (Countries).
- Note is the catch-all for anything that has no shape yet — the block type, not the notes field that every block has anyway.
- All types except the note can carry a research item — in the list and in the form it appears with the symbol of its category and opens directly when tapped (Research).
When a block is created, Etappe sets a default duration:
| Block type | Default |
|---|---|
| Accommodation | 1 night (24 h) |
| Journey | 4 h |
| Activity | 3 h |
| Outdoor activities | 5 h |
| Note | not specified |
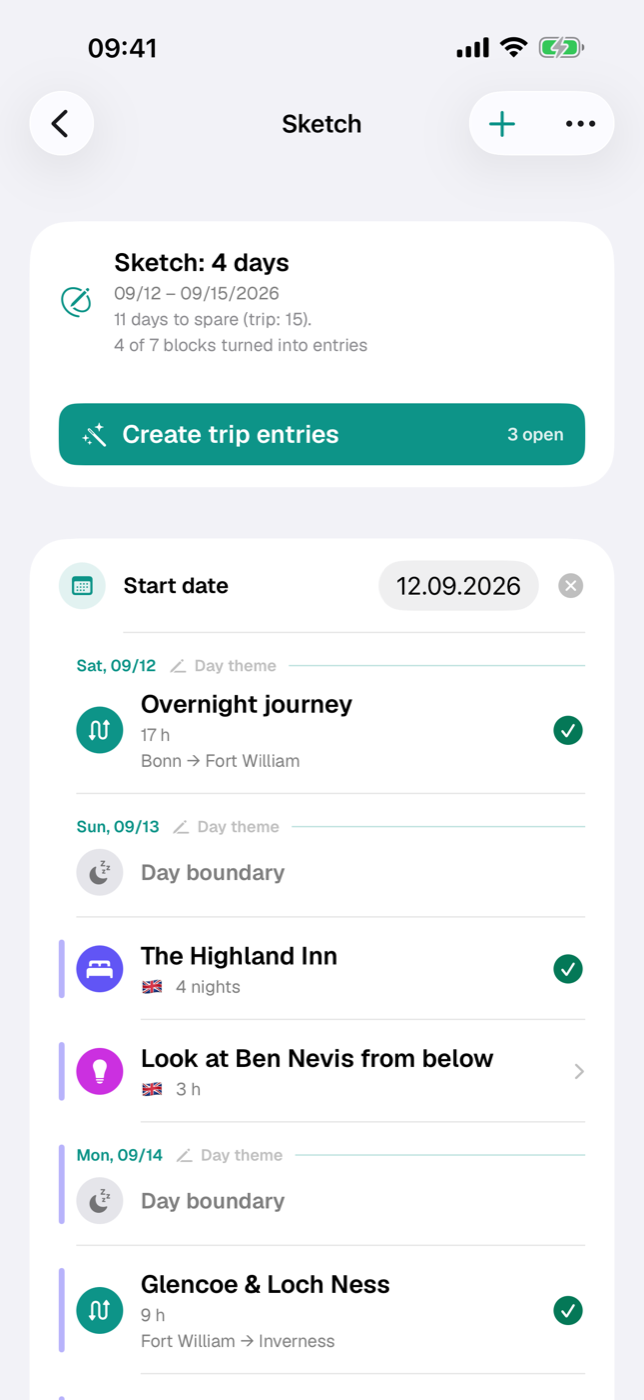
13.3 Duration in hours, order by dragging#
The duration is purely for orientation, in hours (0 to 96; Etappe shows “0” as “not specified”). It has no influence on which day a block falls on — that is determined solely by the day boundary.
Accommodations are the exception: they count in overnight stays (1 to 60), because these later become check-in and check-out.
To sort, press and hold a row and drag it. Swiping left deletes the block.
13.4 Day boundaries and overnight stays in the bar#
A new day begins only where you insert a Day boundary. The sketch is therefore as long as 1 plus the number of your day boundaries. Above the first row and above every day boundary, Etappe inserts a day header; several day boundaries in a row skip ahead the corresponding number of days — handy for days that are meant to stay empty for now.
To the left of the rows runs a colored bar for each overnight stay: it starts at the accommodation block and ends with the day boundary into the check-out day. If two stays overlap, each gets its own lane — an accommodation that follows another one on the same day, however, gets no bar.
13.5 Setting the start date — Etappe works out the dates#
Above day 1 sits the row Choose start date. As soon as a date is set, the day headers become real calendar days (“Sat, 07/05” instead of “Day 2”), and the sketch can assign dates.
For the trip’s end date:
- If the trip has no end date yet — or it lies before the new start — Etappe sets it to the start date plus the sketch days minus 1.
- If an existing end date matches the calculated one, everything stays as it is.
- If it differs, Etappe asks under Adjust end date? whether the calculated or the previous date should apply.
The cross next to the date removes the trip’s start and end again. It is the same date as in the trip form (Creating a trip) — change it here and it changes there too.
13.6 Turning a block into a real entry#
Swipe a row to the right or press and hold it and choose Create entry. The real entry is created from the block; the block stays in the sketch with a green check mark.
| Block | becomes | Date (with start date) |
|---|---|---|
| Accommodation | Accommodation (Accommodations) | Check-in 3 PM on the day, check-out 11 AM after the number of nights |
| Journey | Journey (Journeys) | Departure 10 AM, arrival after the duration in hours |
| Activity | Activity (Activities), status “Planned” | from 10 AM, end after the duration |
| Outdoor activities | Outdoor activity entry (Outdoor activities) | date of the day, duration in hours |
| Note | new research item (Research) | no date |
Whatever is in the notes field always comes along; so does the country for accommodation, journey, activity and note. For outdoor activities the country stays empty — add it in the new entry if you need it. If a research item is linked, its data comes along as well (Research). Without a start date, the entries are created without a date.
Once a start date is set, the button Create trip entries appears above the list. After a confirmation, it turns all blocks that are still open into entries at once — in sketch order and with the dates from the day assignment.
13.7 Back to planning: turning an entry back into a sketch block#
For a block with a green check mark, the action is called Back to planning. After a confirmation, the created entry is deleted and the block counts as open again; a research item that was turned into an entry in the process returns from the archive and is “Open” again. This way each block can only ever have exactly one entry — no duplicates are created.
13.8 Duplicating and deleting blocks#
The context menu holds Duplicate. The copy lands directly below the original, without a green check mark. Title, type, duration, mode of transport, country, notes and, for journeys, the start and destination places with their countries are carried over — but not the link to a research item (that can only be turned into an entry once).
Delete removes only the block from the sketch. An entry that has already been created stays in the trip.
13.9 Sharing the sketch as a PDF#
Via Export as PDF in the sketch — or via the trip’s share menu as Sketch as PDF — Etappe lays out the planning status on A4 pages: a header with the trip title, flags, period, progress and timestamp, below it the blocks with day headers, duration, route, notes and a box for each linked research item.
The PDF opens in the preview, from where you can share or print it — like the other outputs in Exports and printouts.
13.10 Entering a day theme#
Every sketch day can have a heading — “North coast and Kronborg”, “Copenhagen”, “Return trip”. To do this, tap the small pencil in the day header row or the existing theme. A short text is enough; left empty, the theme disappears again.
The theme is attached to the number of the trip day, not to the date. If you move the start date later, it moves with it. It appears everywhere a day is shown: here in the sketch, in the Calendar, in the day view and in Today — and can be changed there in the same way.
14. Research#
Between “That looks good” and “Let’s book it” there are usually weeks. Research is the holding area for that stretch: a place for links, addresses, prices and notes that you later turn into an accommodation, a journey or an activity with a single tap.
Research always belongs to a trip. You reach it on the trip page through the section picker (eye symbol) under Research; the trip’s plus button creates a new item directly via Research. If nothing has been collected yet, the empty list says what it is for: “Collect hotels, restaurants, sights — with address, price, and phone. Whatever fits later becomes an accommodation, activity, or journey.”
A research item is thus the finest of the three zoom levels: it always means a specific place, not the order of the day and not the destination (Core concepts).
14.1 Collecting hotels, restaurants and sights (link, price, rating)#
The form is deliberately broad — only the Topic is required.
| Section | Fields |
|---|---|
| Research | Topic, Category (with a suggestion list: Accommodation, Restaurant, Activity, Transport, Hike, Vet, Other), Subcategory, Status, Priority |
| Find | Link (URL), Source, Content / description |
| Place | Place, Country, coordinates via Choose on map |
| More details | Address, Phone, Opening hours, Connection / directions, Capacity, Check-in from, Check-out by |
| Costs | Amount, Currency (picker), EUR factor, Equals |
| Rating & notes | Rating (1 to 5 stars), Notes |
The Country field offers the trip’s countries; if the trip has exactly one country, it is already set for new research items.
For the costs, enter the amount in the currency shown on the website. The Currency field is a picker: your base currency (preselected), euro, the currencies of the trip’s countries and the currencies of the ECB rate list; Other … unlocks a text field for any other code. If that is not EUR, the EUR factor appears below (“1 GBP = ? EUR”). Etappe prefills the empty field — from the ECB rates, otherwise from the exchange rate of the selected country or of a country with that currency (Countries) — exactly as for a budget item (Budget); the prefill never touches a value you entered yourself, and when you change the currency it only replaces a factor that was set automatically. The Equals line shows the euro amount and, if your base currency is not the euro, “≈ CHF 107.50” alongside. Only with the factor can Etappe work out the euro value — and only then does the amount count toward the trip’s budget once it has been turned into an entry.
In the list, each row shows the topic, a pill with the priority — or “Turned into entry” —, plus flag, category, place and stars. The category carries its own symbol: the bed for accommodation, cutlery for a restaurant, the hiker for a hike; categories you make up yourself get the research magnifier. The list is sorted by priority, then alphabetically. Swiping left deletes a research item.
The detail view shows status, category, stars and the description at the top, and below that every field you have filled in — the costs in their own currency and, if your base currency differs, with “≈ …” in the base. An address you have entered can be tapped and opens your route planner; Open link brings up the source in the browser. If coordinates are stored, a small map with a marker sits at the bottom.
The detail view also carries a Documents card: this is where you attach menus, offers or screenshots directly to the find — file and photo attachments work the same as everywhere else (Documents and receipts).
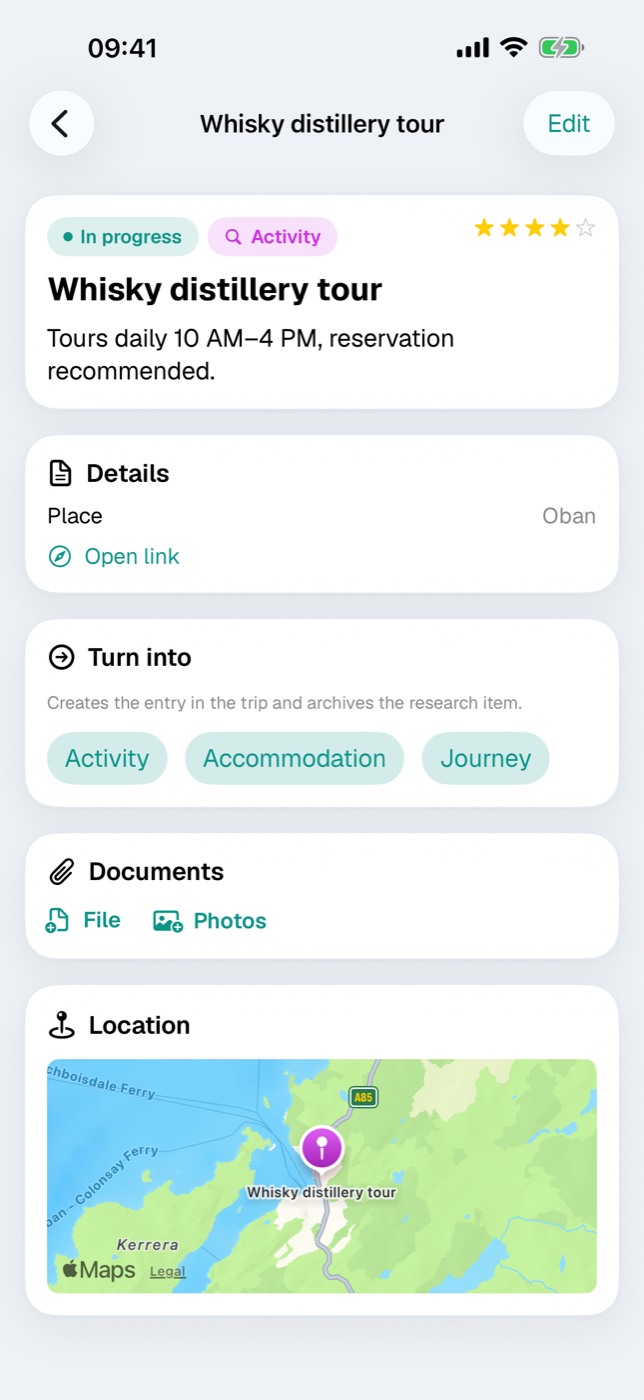
14.2 Status: Open, In progress, Done, Discarded#
The status describes how far along you are with a find:
| Status | meaning |
|---|---|
| Open | not looked at yet |
| In progress | under review, quote requested, comparison under way |
| Done | checked off — set automatically when the item is turned into an entry |
| Discarded | reviewed and dropped |
The status is purely a note for you; Etappe derives no deadlines or alerts from it. Separately, the Priority (High, Medium, Low) controls the order in the list.
Above the list sits the Active / Archive switch. A research item does not go into the archive by hand, but only by being turned into an entry. It only comes back via the route from the sketch, where the entry that was created is deleted (see Sketch).
14.3 “Turn into”: a research item becomes an activity, accommodation or journey#
As long as a research item has not yet been turned into an entry, the detail view shows the Turn into card with three buttons: Activity, Accommodation and Journey. One tap is enough — Etappe creates the entry in the trip and reports back that the research item has been archived. There is no confirmation prompt, and the step cannot be undone here — you delete a surplus entry in the respective section.
The new entry has no date yet. You add date and time afterwards in the respective section — or you take the route via the sketch right away, which does both in one go: 14.5 Creating research items from the sketch.
14.4 What carries over when turning into an entry, and what is archived#
What carries over is whatever fits the target:
| Target | details carried over |
|---|---|
| Activity | place, address, country, coordinates, phone, opening hours, adult/child admission, reservation required, costs, link, notes; status “Planned” |
| Accommodation | place, address, country, coordinates, costs, booking number, link as provider address, notes |
| Journey | costs, booking number, source as provider, link as route address, notes; means of transport “Other” |
For the notes, Etappe combines the research item’s description and notes. The costs arrive as entered — amount, currency and the EUR factor as a frozen rate; a euro amount stays euro. If the EUR factor is missing for a foreign currency, the cost field in the new entry stays empty; the amount is still there in the archived research item.
The research item’s attachments move along too: when the item is turned into an entry, they switch to the new entry and sit in its Documents card there. If you take back an entry created via the sketch (Sketch), the attachments return to the research item — including any that were only added to the entry.
Three things happen to the research item itself: the status jumps to “Done”, it moves into the Archive with a date, and the header from then on reads “Turned into …”. The Turn into card disappears so that one find does not accidentally become two entries. Editing and reading it remain possible.
14.5 Creating research items from the sketch#
Blocks in the sketch can carry a research item along. The block form has the Linked research section for this: the picker lists all research items of the trip that are still open and not archived — each with the symbol of its category —, and the New research item button creates one directly and links it.
Once a research item is selected, it appears below as its own row: tapping it opens it directly in the form, with all details, documents and the map. Next to it, All research takes you to the trip’s overview page — so you can browse in the middle of sketching without leaving the block. In the sketch list, too, the linked research item can be tapped under its block.
When you later create the entry for the block, the research item is turned into an entry in the same step — with all its data and, provided the trip has a start date, on the right day straight away. Which entry is created depends on the block type: Accommodation, Journey, Activity and Outdoor activities can link a research item. For the Outdoor activities type, Etappe takes place and coordinates as the start point and the link as the tour address.
It also works the other way round: a block of the Note type itself becomes a research item when its entry is created — that is where there is room to flesh out the vague idea.
15. Accommodations#
The Accommodations section is where you collect hotels, vacation homes, private apartments and campgrounds — with period, booking status, costs and address. From that, Etappe works out the nights, puts each place on the map and in the calendar, and pulls the costs into the trip budget.
The list has two parts: everything with a date at the top, sorted chronologically by check-in, and below it the section No date yet. Swiping left deletes an entry along with its camping details and attached documents.
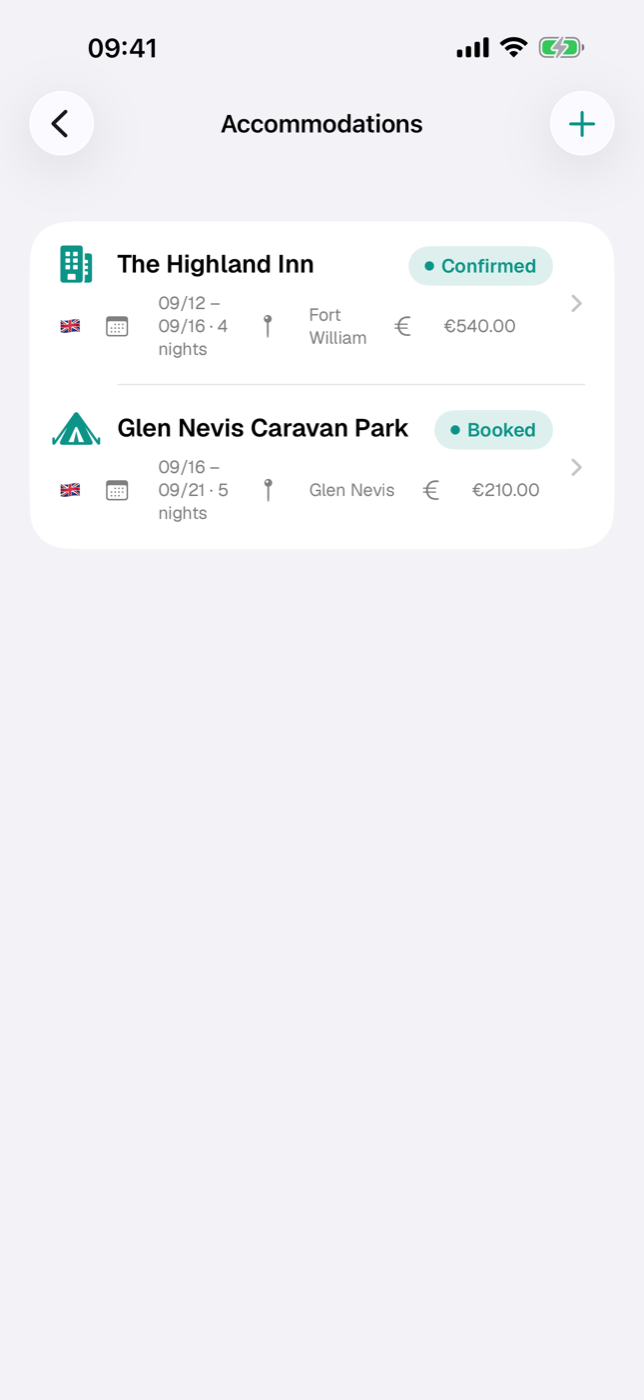
15.1 Adding an accommodation: type, address, period, nights#
You reach the form via the plus in the Accommodations list (New accommodation), via the Accommodation tile in the “Add new” plus sheet on the trip page (the metric tile of the same name above it leads to the list), from a research item via “Turn into …” (Research), when creating entries from a sketch (Sketch) or from the map — in that case, coordinate and date are already filled in.
- Enter a Name. Without a name, Save stays grayed out; everything else is optional.
- Choose a Type: Vacation home, Hotel, Bed & Breakfast, Private apartment, Caravan, Campground or Other. “Not specified” is allowed. The type determines the symbol in the list and, for “Campground”, unlocks the camping details.
- In the Period section, flip the Set period switch.
- Set Check-in with date and time (preset to 3:00 PM).
- Set Overnight stays with the stepper (1 to 90).
- Check-out at sets only the time (preset to 11:00 AM). Etappe shows the date below it as a calculated value: check-in day plus nights.
The key difference from other events: an accommodation thinks in nights. Check-out always follows from check-in day plus overnight stays — you can’t set its date independently, and the times don’t affect the number of nights. Three nights stay three nights, whether you arrive at 2 PM or at 10 PM.
In the Place section you enter place, country, address and, optionally, coordinates. The country picker shows the trip’s countries; if it has none yet, all are available (Countries). Choose on map opens a map where a tap sets the marker; Current location takes your position.
If the period lies outside the trip dates, Etappe asks after saving whether the trip period should be applied or extended; Save date only leaves the outlier as it is (Creating a trip).
15.2 Booking status and booking number#
The booking status records how binding things are. The default is “Planning”.
| Status | What it means in practice |
|---|---|
| Planning | candidate, nothing done yet |
| In progress | inquiry sent, reply pending |
| Booked | firmly booked |
| Confirmed | confirmation received |
| Completed | stay is over |
| Discarded | sorted out, but kept as a note |
In the list, the status only appears as a badge if it differs from “Planning”; “Discarded” is shown in gray. In the detail view it always sits at the top next to the type.
You enter the booking number in the Booking section, together with Provider and Provider URL. In the detail view this becomes the row Open booking page, which opens the link in the browser.
One thing that otherwise catches people out: the status controls nothing else. Even a discarded accommodation stays in the expense total with its costs — anything that shouldn’t count, you delete or leave without a cost figure.
15.3 Costs and currency#
The Costs field records the total amount for the stay — not per night. Next to it, the unit shown is your Base currency (“€”, “CHF”, “£” …), which you chose in the Getting started assistant or under More → Settings (All settings). The amount is saved exactly as you typed it, together with its currency and the rate to the base currency, which Etappe freezes on saving — so a later rate change doesn’t make the figure drift. The amount flows into the trip’s expenses without any further action and appears in the budget view as a transaction (Budget); internally, the math is done in euros (How Etappe does the math).
Three cases you should know about:
- Existing entries from before the base currency — or from a different base: a saved amount keeps its currency. If you open such an accommodation, the costs field shows the saved currency as its unit, and below the section it says “Amount in EUR (as saved) — the base currency applies to new entries.”
- Base without a rate — a currency outside the ECB list for which no country carries a rate either: the field stays in euros and says so: “No rate for MKD — the amount is saved in euros. Refresh rates in the budget or under Countries.”
- Display: in the list and the detail view, the amount appears in its own currency; if that differs from the base, “≈ CHF 1,150.00” follows in the base currency.
There is no separate rate field here. If you paid in a third currency, convert it yourself or record the payment as a budget item — there you choose the currency freely (Budget).
15.4 Campground details: pitch, amenities, price per night#
If the type is set to Campground, the detail view offers the button Add camping details. The form has four sections:
- Contact — website, phone, email.
- Amenities — fourteen switches: Electricity, Fresh water, Waste disposal, Wi-Fi, Dogs allowed, Leash required, Showers, Toilets, Shop, Restaurant, Pool, Playground, Marked pitches, Shade.
- Pitch & price — pitch type as free text, width and length in meters, price per night and a currency of its own (three capital letters, such as GBP or DKK).
- Notes — free text.
In the detail view, the active features appear as chips with a symbol. If a price per night is stored and the accommodation has a period, Etappe adds a row Total (x nights): price times nights, in the campground currency. This projection is display only — it doesn’t go into the budget. Whatever should count belongs in the accommodation’s costs field (see 15.3 Costs and currency).
15.5 Contact details, check-in/check-out, notes#
The header card in the detail view shows type and booking status, the star rating on the right, and below that the name, the Worth repeating marker, check-in and check-out with date and time, and the number of overnight stays. You set stars and the marker in the form under Rating & notes; tapping the same star again clears the rating.
The Booking & place card brings together provider, booking number, costs, place and country. The address is tappable — it starts navigation — and can be copied to the clipboard via the symbol next to it. Campgrounds get a card of their own, Campground, with phone (call), website and email. Free-text notes get their own card as well.
Check-in and check-out appear as separate events in the calendar and can be moved there — never past each other, so that no negative nights arise (Calendar and day view). On days when the accommodation simply continues, Today shows it as an info card without a checkbox.
15.6 Attaching receipts and documents#
Every accommodation has a Documents card. File lets you choose something from the Files app, Photos up to five images from your photo library; tapping an entry opens the preview.
If you press and hold an entry, you can Mark as booking receipt or remove the mark. When creating the itinerary PDF, you can then decide whether these receipts are attached — the switch is off to begin with. More on this in Documents and receipts and Exports and printouts.
15.7 Checking on the map and opening a route there#
As soon as coordinates are stored, the detail view shows a small map with a marker at the bottom. On the trip map, all places fall under the Accommodations category; with the day filter, they stay visible across their whole period, from check-in to check-out (Map).
For navigation, tap the address in the detail view. Etappe opens the route planner you chose in the settings — Apple Maps, Google Maps, Waze or TomTom GO (All settings). If there is no address but there are coordinates, the row is called Plan route and navigates to the point.
16. Journeys#
A trip is not just a set of places; it is also the way between them. Under Journeys you record every movement: ferry, flight, train, the car leg from one accommodation to the next. Every journey has a start, a destination and a mode of transport — and, depending on that mode, its own fields for flight number, cabin or tolls.
16.1 Creating a journey: from, to, times#
- Open the trip and, inside it, the Journeys section.
- Tap the plus at the top right. If the trip is currently under way, a menu opens instead with Plan journey and Record journey (see Recording a journey).
- In the Journey section, give it a name (such as “Hoek van Holland → Harwich”) and choose the mode of transport and the booking status. Without a name, Save stays grayed out.
- Under From and To, enter place, country and, if needed, coordinates.
- Under Times, switch on Set departure/arrival and choose both with date and time. Then Save.
Next to the place fields sits a list icon with all places already recorded in the trip, grouped by Accommodations, Activities, Ferry ports, Airports, Train stations and Other journey places. One tap takes over name, coordinates and country in one go — handy when the return trip uses the same port. Alternatively, Choose on map sets the point with a tap on the map. For the country, the trip’s countries are offered (Countries).
The arrival moves along with the departure until you adjust it yourself, and it cannot be set before the departure. If the time lies outside the trip period, Etappe asks after saving whether the period should be extended — you may decline; the ferry on the evening before then simply stays an outlier.
In the list, dated journeys appear sorted by departure under Journeys, all others under No date yet. Swipe left to delete.
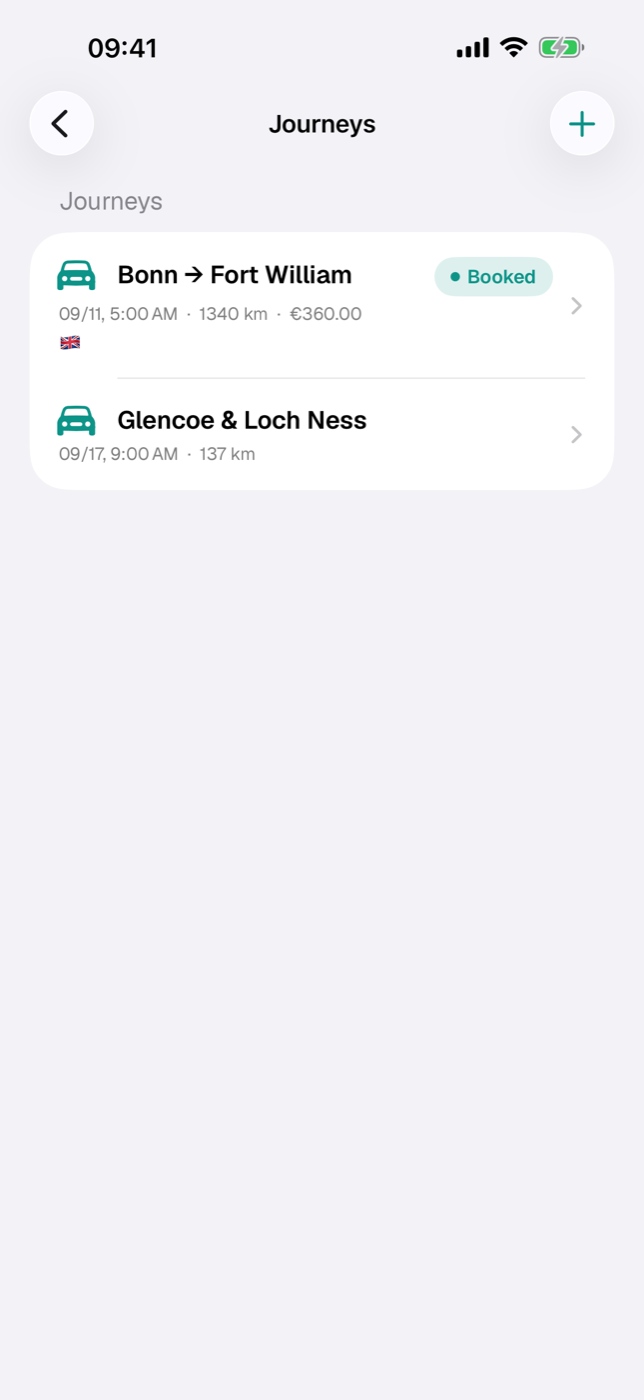
16.2 Modes of transport: car, rental car, ferry, plane, train, public transit, bicycle, on foot#
There are nine modes of transport to choose from: Car, Rental car, Ferry, Plane, Train, Public transit, Bicycle, On foot and Other. Each has its own symbol and determines which special section appears in the form. If you change it later, the details you have entered are kept — they are just no longer shown.
16.3 Fields per mode of transport (flight number, ferry port, carriage, license plate …)#
| Mode of transport | Section | Fields |
|---|---|---|
| Plane | Flight | Airline, Flight number, Departure terminal, Arrival terminal, Check-in counter, Booking code |
| Ferry | Ferry | Ferry company, Cabin, Pier |
| Train | Train | Train number, Class, Terminus, Seat reservation, Transfers |
| Public transit | Public transit | Line / route, Type (e.g. subway), Fare zone, Ticket type, Ticket valid from/until |
| Rental car | Rental car | Pickup station, Return station, Pickup, Return |
| Bicycle | Cycling route | Distance (km), Duration (min), Stopovers |
| On foot | Walk | Distance (km), Duration (min), Stopovers |
| Car, Other | Drive | Distance (km), Driving time (min), Toll costs, Fuel costs, Stopovers, Vehicle, Route URL |
The Drive section adds four switches: Motorway, Tolls apply, Emissions sticker required and Vehicle registration required. Switches that are on appear in the detail as a note line of their own — useful for countries where a vignette or sticker has to be bought before the border. Ticket validity and the rental period each sit behind a switch; the Times section also has Check-in by.
16.4 Assigning a vehicle#
The Vehicle field is in the Drive section, so it is available for Car and Other. Offered is the trip’s vehicle; if none is set, all non-archived vehicles from the records. If exactly one vehicle qualifies, it is preselected for new journeys; None removes the assignment.
It is more than documentation: only with a vehicle assigned does Etappe show the approximate fuel consumption for a recorded route (Vehicles).
16.5 Setting and ordering waypoints#
Without waypoints, the map connects start and destination with a straight line. Waypoints bend that line into the actual course — over the pass instead of through the mountain.
In the Route path section they appear as “Waypoint 1”, “Waypoint 2” … with their coordinates. The order follows the order in which they were set and runs from start to destination; you remove single points by swiping left, and to reorder them you set them again.
The line appears only if start and destination both have coordinates. If one side is missing, the waypoints stay saved, but the map shows nothing.
16.6 Drawing a route or importing it from GPX#
The Draw route on map button (later Edit route (n points)) opens the map editor:
- Each tap on the map sets the next point — 1, 2, 3 and so on. Start and destination are shown as a green flag and a red pin.
- At the top, the point count and route length update as you go; at the bottom are Remove last and Delete all.
- Done takes over the points, Cancel discards them.
The kilometers shown are the sum of the straight-line distances between the points, not a road calculation: the closer together you set the points, the nearer the value gets to reality. It is not copied into the Distance field automatically.
A finished track from another program comes in via Import route from GPX in the Recorded route card of the journey detail. Etappe reads track, route or waypoints, calculates the distance and stores the result as a recorded route — just as if you had recorded it yourself; very long tracks are thinned out to 200 points. Etappe then asks whether the route should replace the drawn draft.
There is only one recorded route per journey. As long as one exists, import and recording are locked; deleting it frees up both again (Recording a journey).
16.7 Time zone offset and border-crossing note#
When times are enabled, the Destination in another time zone switch appears. The stepper below it sets the offset in 30-minute steps between −14:00 and +14:00 hours.
The rule behind it: you enter the arrival as it reads on the clock at the destination. For the duration, Etappe takes the offset back out.
Departure at 8:00 PM in Hoek van Holland, arrival at 6:30 AM local time in Harwich, offset −1:00 h. The clock says 10:30 hours; you are on the road for 11:30 hours — and that is exactly what the detail shows under Duration.
The arrival line is then called Arrival (local time), and below it Destination time zone shows the offset you set.
If the start and destination countries are set and differ, Etappe marks the journey as a border crossing: in the list in orange next to the flags, in the detail as the line Crosses a border. It is just a note — what needs attention at the border is checked by the Entry checklist.
16.8 Costs: journey costs, tolls and fuel — what counts toward the budget#
| Field | Where | Counts toward the budget |
|---|---|---|
| Costs | Booking section, for every mode of transport | yes |
| Toll costs | Drive section (Car, Other) | yes |
| Fuel costs | Drive section (Car, Other) | no |
Fares, tickets or a ferry booking go under Costs; tolls, vignettes and tunnel fees under Toll costs. Both flow into the trip’s expense calculation — the same total appears in the “Journeys” tile in the trip detail.
All three fields use your base currency as their unit and share one exchange rate, which Etappe freezes when you save. An existing entry in another currency stays as it is — the form says so below the fields: “Amounts in EUR (as saved) — the base currency applies to new entries.” The rules are the same as for accommodations (Accommodations, section 15.3); in the list and detail, the amount appears in its own currency, with “≈ …” if the base currency differs.
Fuel is deliberately left out. You fill up on the road, and the fuel receipt ends up as a budget item of its own in the trip budget. If Etappe added the journey field on top, the same tank of fuel would appear twice in the calculation. The field is therefore a planning aid, not a transaction. How the expenses come together is described in Budget.
16.9 Booking status, tickets and receipts#
| Status | Meaning |
|---|---|
| Planning | idea, nothing arranged (default) |
| In progress | request under way |
| Booked | confirmation pending |
| Confirmed | confirmation received |
| Completed | done and settled |
| Discarded | kept for the record |
In the list, the status pill appears only from “In progress” onward, “Discarded” in gray. The Booking section holds Provider, Booking number and Costs; if a Route URL is stored, the detail offers the Open route button.
Tickets, boarding passes and booking confirmations are attached in the detail on the Documents card, via File or Photos. A long press on a document offers Mark as booking receipt; whether the marked receipts end up in the itinerary PDF is your decision at export time, via a switch that is off at first (Documents and receipts, Exports and printouts).
For everything that fits no field, there is Notes at the bottom of the form.
16.10 Duplicating a journey or creating the return leg#
A long press on a journey in the list — a right-click on the Mac — offers Duplicate and Create return leg; the same two commands are in the three-dot menu of a journey’s detail. Both first ask for the Departure: when duplicating, the original’s departure is prefilled; for the return leg, the last day of the trip period at the original’s departure time. You can switch off Set departure date and time, and the journey is then created without dates. With a date, arrival, check-in, ticket validity and the rental car dates move along, keeping the original’s intervals.
Carried over are mode of transport, places, waypoints, costs, driving time, vehicle, tags, notes and all fields of the mode of transport (flight number, train number, ferry, fare zone …). Not carried over are booking number and booking code, the attached receipts, budget items and recorded routes — the status is back to Planning. The copy is called “‹Name› (copy)”.
The Return leg swaps start and destination including coordinates, time zones and countries, mirrors the waypoints and reverses the time zone offset; a stored route URL is dropped because it shows the outbound route. Etappe calculates the arrival from the actual duration of the outbound journey. For a rental car, pickup and return stations stay as they are. If the journey is called “Hamburg – Copenhagen”, the return leg is called “Copenhagen – Hamburg”; without such a pattern, “Return leg: ‹Name›”.
17. Activities#
Accommodations and journeys form the skeleton of a trip; activities fill it in. Everything you want to do along the way goes here: the museum with a timed-entry ticket, the beach without a fixed date, the restaurant where it’s better to reserve. Each activity can have a date, a place, costs and a status — but none of these is required.
You reach the section from the trip via the Activities tile or via the floating actions at the bottom edge: eye symbol → Activities, plus symbol → Activity.
17.1 Adding an activity: type, place, period#
- Open the trip and then Activities.
- Tap + at the top right (or, in the empty section, Add activity).
- Enter a Name — without one, Save stays grayed out.
- Under Type, choose one of the fourteen categories: Beach, Museum, Gallery, City walk, City tour, Dining, Shopping, Groceries, Amusement park, Entertainment, Hiking, Arrival, Departure or Other. “Not specified” is also allowed. The type only determines the symbol in the list and the detail view.
- Turn on Set date when date and time are fixed. From and To then appear; the To date cannot be before the From date. As a default, Etappe uses today if it falls within the trip, otherwise the start of the trip.
- Under Place & costs, enter Address and Place and choose the Country. The choice is limited to the trip’s countries (Countries); if the trip has exactly one country, it is preselected.
- Choose on map lets you set a point. The row then shows the coordinates — that is the prerequisite for the activity to appear on the trip map later.
An activity without a date is not an error but the normal case early in the planning. The list collects such entries at the bottom in a separate section, No date yet, sorted alphabetically; the dated ones sit above them in chronological order.
If you set a date outside the trip period — or if the trip has no period at all yet — Etappe asks after saving whether the period should be applied or extended. Save date only deliberately leaves the outlier as it is.
17.2 Reservation, costs, participants#
There are three separate fields for money, and they don’t do the same thing:
| Field | Meaning |
|---|---|
| Costs | the amount this activity takes out of the trip’s funds |
| Adult admission | a note from your research, purely for information |
| Child admission | a note from your research, purely for information |
Only Costs goes into the Budget as a transaction in the “Activity” category and into the trip’s expenses. The two admission fields help with comparing and checking figures, but stay out of it.
All three fields use your base currency as their unit; when you save, Etappe freezes the rate to the base. Existing entries in another currency stay as they are, and the form says so below the section (“Amount in EUR (as saved) …”) — the rules are described under Accommodations (Accommodations, section 15.3). The admission fields are not converted in the process: in the detail view they simply show the currency the activity was saved in.
The Reservation required switch marks activities where nothing works without booking ahead. The detail view then shows an orange row, Reservation required. You enter the Booking number under “Contact & links”.
The Worth repeating switch is meant for afterwards: it highlights activities you would plan again on your next trip.
You set who is taking part in the form under Participants: the Assigned row opens a checklist with the trip’s companions (People) — tapping selects, tapping again deselects. Archived people are no longer offered; but if one is already assigned to the activity, they stay in the list and can be deselected. Assignments from an imported backup (Backup) also appear preselected, even if the person doesn’t belong to the travel party. The detail view shows the selected people under Participants; without an assignment the row is omitted. If the trip has no companions yet, the form points this out — you manage the travel party when editing the trip.
17.3 Status from idea to completed#
Each activity has exactly one of four statuses. It appears as a pill in the list and in the detail view:
| Status | What it stands for |
|---|---|
| Idea | collected, nothing binding yet |
| Planned | firmly scheduled, but not actually booked |
| Booked | ticket or reservation is in hand |
| Completed | done, behind you |
The status is entirely manual — Etappe doesn’t move it automatically, not even when the date has passed. New activities start at Idea; if a research item is turned into an activity, it starts at Planned (Research).
17.4 Opening hours, links and notes#
The Contact & links section holds what you really need on the road: Phone, Opening hours (as free text, multi-line — “Closed Mondays, last admission 5 PM” fits in here too), Website URL, Ticket URL and Booking number.
In the detail view these become tappable rows: Open website and Tickets launch the browser, the address opens your route planner with the destination and can be copied to the clipboard via the symbol next to it. Which maps app launches is something you set in the settings (All settings).
Under Rating & notes you give up to five stars — a second tap on the same star clears the rating again — and write free text to go with it. Receipts, tickets and photos are attached in the detail view via the Documents card (Documents and receipts).
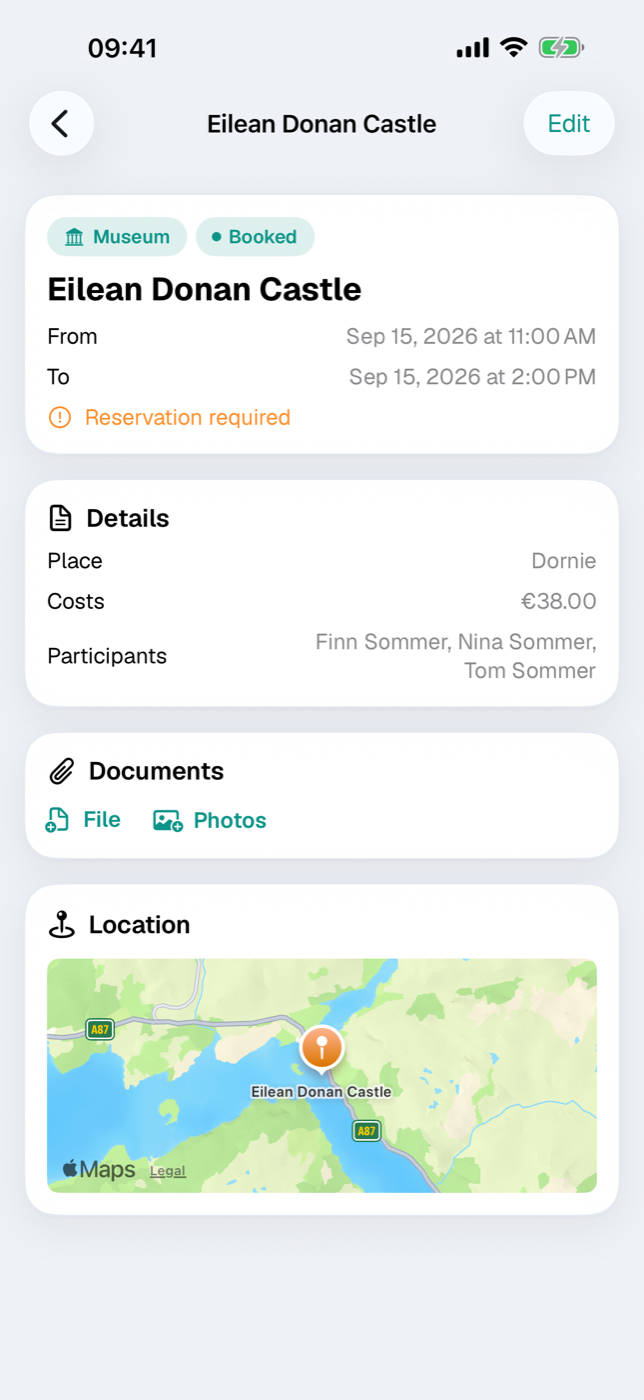
17.5 Where else activities show up#
An activity doesn’t live only in its list:
- Calendar: Dated activities appear in the day view and can be moved to another day there (Calendar and day view).
- Map: Activities with coordinates get their own pin. A long press on the map opens the New entry dialog — “Activity” is preselected there, you confirm day and place and get to the prefilled form via Next (Map).
- Budget: The costs amount appears as a transaction in the Journal (Budget).
- Sketch and research: Blocks and research results can be turned into activities, complete with place, address, admission prices and notes (Sketch, Research).
To delete, swipe the entry to the left in the list. Sporting outings with a route, elevation gain and a GPX track don’t belong here, by the way, but in Outdoor activities.
18. Outdoor activities#
A hike is not an activity like a museum visit: it has a distance, elevation gain, a difficulty level and a duration you can calculate. That is what the Outdoor activities section is for — everything you cover under your own power, on foot or by bike. You reach it in the trip through the Outdoor activities tile or the floating actions. Above the list is a summary with Distance, Elevation gain and Walking time.
18.1 The eight types: Hike, Long-distance hike, Mountain hike, Via ferrata, Bike tour, Mountain bike tour, Long-distance cycle route, City walk#
The Type sits at the very top of the form. It determines the symbol in the list and the detail view — and whether the walking time is calculated. On the map, all outdoor activities share the same pin.
| Type | Walking time (DAV) |
|---|---|
| Hike | yes |
| Long-distance hike | yes |
| Mountain hike | yes |
| Via ferrata | yes |
| City walk | yes |
| Bike tour | no |
| Mountain bike tour | no |
| Long-distance cycle route | no |
The DAV formula applies only on foot. For the three bike types, the detail therefore shows only Journey instead of “Distance & walking time”, and the trip’s total walking time leaves them out; enter the expected time there under Planned duration.
18.2 Key data: distance, elevation gain, route type, difficulty#
The descriptive fields are in the Entry section:
- Region and Country place the tour; the trip’s countries are available for selection (Countries).
- Route type has three values: Loop, Point-to-point, Semi-loop.
- Difficulty is Easy, Moderate or Hard and appears as a colored pill: green, orange, red. Without an entry there is no pill.
- Status is Planned, In progress or Done.
Start point and End point are text fields. The numbers are in the Distance section: Distance in km, Ascent in hm, Planned duration in hours. The descent comes exclusively from a GPX file (see 18.4 Understanding the walking time by the DAV formula).
A Date is optional; otherwise the entry lands under No date yet. With Set start time, the tour becomes a calendar event with a time — the end follows from the walking time including breaks; without a start time it counts as all-day (Calendar and day view).
18.3 Importing a GPX file — track, elevation profile and key figures#
If the tour exists as a GPX file, importing it is the fastest way to reliable figures.
- In the GPX section, tap Import GPX file.
- Choose the file (25 MB at most).
- Etappe reads the track and shows a From GPX line with distance, ascent and descent.
Track points are evaluated first; if there are none, Etappe falls back to route points and then to waypoints. From these it derives:
- the Distance as the sum of the gaps between all points,
- Ascent and Descent from the elevation values (all climbs and all drops added up, not the difference between the highest and lowest point),
- the Track for the map, thinned to 200 points at most,
- the Elevation profile, thinned to 48 values at most,
- the Start point for the pin on the trip map (Map).
Empty fields are prefilled: name, distance and ascent. Values you changed by hand stay as they are. If you replace the file later, Etappe also updates the fields that still came unchanged from the old track — not your own figures. It rejects unreadable files with “The file could not be read as GPX.”
The file is only stored when you tap Save. In the detail you then see the Elevation profile card (with lowest and highest elevation) and the Track card, and in the list the profile as a mini curve; the space it takes is shown in Storage and files. The route you actually covered on the way is handled by the recording on a journey (Recording a journey).
18.4 Understanding the walking time by the DAV formula#
Etappe calculates by the formula of the German Alpine Club (DAV, DIN 33466). It separates climb and distance and assumes that you handle both partly at the same time:
- Vertical time = ascent ÷ 300 + descent ÷ 500 (300 meters of elevation per hour up, 500 down)
- Horizontal time = distance ÷ 4 (4 km per hour on level ground)
- Walking time = the larger of the two values plus half the smaller
Example: 12 km with 800 m of ascent and descent give 2.67 + 1.60 = 4.27 h vertical and 3.00 h horizontal — so the walking time is 4.27 + 1.50 = 5:46 h.
Below that is With breaks (× 1.25): a 25 percent surcharge for rests and photos. The calendar also uses this value as the duration.
Two things matter:
- Manual values take precedence. If distance or ascent holds a figure of your own, Etappe calculates with it; the GPX value applies only when the field is empty.
- If the descent is missing, it is estimated. Without a GPX file, Etappe sets it equal to the ascent and says so: “Descent unknown — assumed equal to the ascent.” For a point-to-point route going downhill, the walking time comes out too long.
The walking time appears in the form as soon as distance or ascent is filled in; the derivation is in How Etappe does the math.
18.5 Dog-friendliness, notes and portal links#
The Dog-friendly switch is on by default. If it stays on, the detail shows a green line with a paw symbol; if you switch it off, it disappears. That way you see at once which tours work with a dog — via ferratas and ladder routes rarely do.
Under Hiking portal you store one Komoot link and one Outdooractive link. A missing “https://” is added by Etappe when saving; addresses with other schemes are discarded so that a link cannot launch a third-party app unasked.
Everything else — refreshment stops, parking, the bus stop at the destination — belongs in the Notes. An outdoor activity entry has no costs; a cable car or toll road goes in as a budget item (Budget).
18.6 Photos and rating after the tour#
After the tour, a second pass is worthwhile: via Edit you set the status to Done, correct distance and elevation gain to the actual values and give up to five Stars — tapping the same star again removes them.
You attach photos and files in the detail via the Documents card — File or Photos, up to five pictures at once (Documents and receipts). Experiences, weather and the mood of the day, on the other hand, belong in the Journal; the outdoor activity entry remains the factual description of the tour.
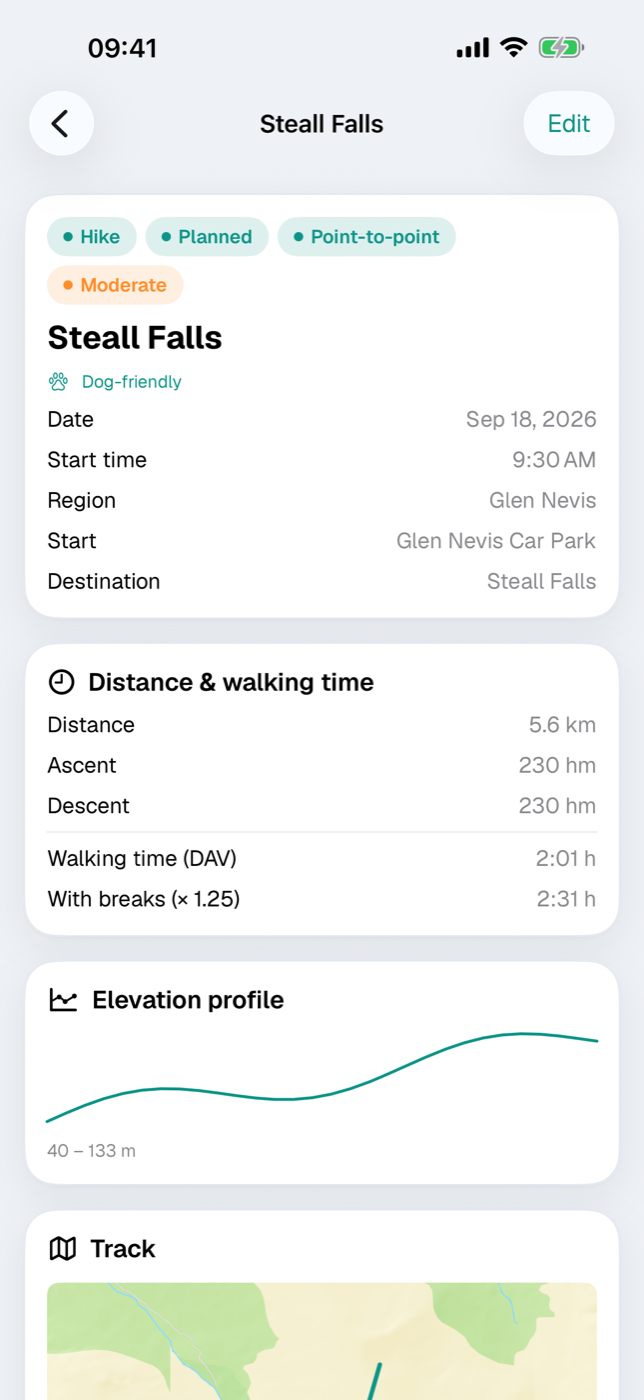
19. Budget#
Etappe doesn’t make you keep the books twice. A trip’s budget builds itself almost on its own: whatever costs you enter for accommodations, journeys and activities count automatically. On top of that come items of your own for everything that has no entry elsewhere — food, fuel receipts, the vet, insurance. Set a budget limit and all of this turns into a status light.
You reach the section via the Budget tile in the trip detail or via the trip’s section picker.
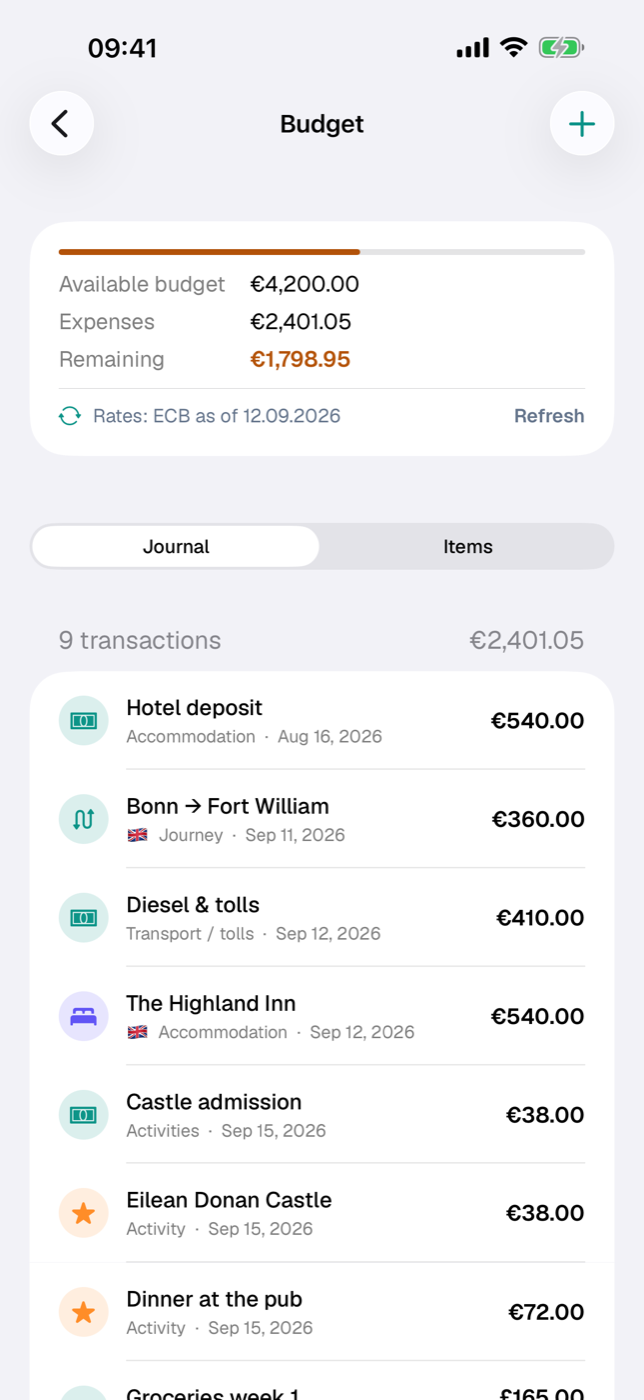
19.1 Setting the trip’s budget#
The limit is a single field on the trip, not on the Budget screen:
- Open the trip and tap Edit.
- Scroll to the Budget section.
- Enter the amount under Available budget. The unit shown beside it is your Base currency — euro, francs, pounds, whichever you chose in the Getting started assistant or under More → Settings (All settings).
If you create a trip with the assistant, it asks for the same field; the subtitle of that page names the currency (“Your total available budget in Swiss Franc …”) (Creating a trip).
The amount is saved together with its currency and the rate to the base, which Etappe freezes when you save. A limit from before the base currency existed — or from a different base — stays as it is: the form then shows its currency as the unit and, underneath, “Amount in EUR (as saved) — the base currency applies to new entries.” If your base has no rate, the field stays in euros and says so.
Without a limit, the Budget screen shows only the total of your expenses and a note that there is no status light until a budget is set. With a limit, the top of the screen shows a progress bar in the status-light color and three lines: Available budget, Expenses, Remaining. Below that — with or without a limit — sits the line Rates: ECB as of … with the Refresh button; more on that in 19.4 Foreign currency and exchange rate.
19.2 What counts automatically: accommodations, journeys, activities#
You don’t have to enter planned costs twice. The expense total includes:
| Source | What counts | Transaction date |
|---|---|---|
| Accommodation | “Costs” field | Check-in |
| Journey | “Costs” field | Departure |
| Journey | “Toll costs” field (own transaction) | Departure |
| Activity | “Costs” field | Start |
| Budget item | Amount, converted if needed | Paid on, otherwise Due on |
Two things are deliberately handled differently. A journey’s Fuel costs do not count — they are a planning estimate. What you actually spent on fuel goes in as a budget item; otherwise both would end up in the total. And Outdoor activities have no cost field at all; a lift ticket becomes an activity or an item of your own (Outdoor activities).
You enter the cost fields of accommodation, journey and activity in your base currency; Etappe freezes the rate to the base when you save, and an existing amount in another currency stays as it is (Accommodations, section 15.3). Only the budget item lets you pick the currency freely (see 19.4 Foreign currency and exchange rate).
19.3 Adding your own budget items#
- On the Budget screen, tap the plus at the top right (New item).
- Give it a Name — without one, “Save” stays disabled.
- Choose a Category: Accommodation, Ferry / Flight, Transport / tolls, Activities, Food & drink, Groceries, Vet, Insurance or Other.
- Optionally a Country. The choices are the trip’s countries; if the trip has only one country, it is already set for new items (Countries).
- Enter the Amount and choose the Currency — preselected is your base currency (see the next section).
- If needed, set Paid and a Due date. The calendar highlights the trip period.
- Save.
In the Items view you can later check an item off as paid by tapping the circle on the left — Etappe records today’s date as the payment date when you do. An unpaid item whose due date has passed shows its date in red. To edit, swipe the row from left to right; to delete, from right to left.
Whether an item is paid makes no difference to the total: planned and settled amounts both count as expenses.
19.4 Foreign currency and exchange rate#
The Currency field is a picker: your base currency (preselected), euro, the currencies of the trip’s countries and the currencies of the ECB rate list; Other … unlocks a text field for any other code (three letters, automatically uppercase). If it says anything other than EUR, the EUR factor field appears below. This is the value of one unit of the foreign currency in euros, not the rate in the other direction — the label says so literally: “1 GBP = ? EUR”.
| Input | Meaning | Result |
|---|---|---|
| 120 GBP, factor 1.17 | 1 GBP equals €1.17 | €140.40 |
| 250 NOK, factor 0.086 | 1 NOK equals €0.086 | €21.50 |
Once amount and factor are in place, the form shows the euro amount under Equals, rounded to two decimal places — and, if your base is not the euro, “≈ CHF 150.97” in the base after it (at 1 CHF = 0.93 EUR). The item list shows the original amount in its currency; if the base differs, “≈ …” in the base follows underneath.
You usually don’t need to know the factor yourself: Etappe prefills the empty field — from the ECB rates with six decimal places, otherwise with the inverse of the exchange rate on the selected country or on a country with that currency, rounded to four decimal places (Countries). The prefill only applies while the field is empty or still holds the automatically set value — a factor you entered or adjusted yourself stays, even if the rates change later. Every item keeps its rate as a snapshot.
If the factor is missing — for instance because the currency is in no rate list — Etappe cannot convert: the item remains visible but has no euro amount and counts neither in the total nor in the journal. Both the form and the Budget screen then point this out with a note. If you open the item again later, the factor is prefilled as soon as a rate is known.
The rates themselves come from the European Central Bank — at the press of a button. The line Rates: ECB as of … below the totals in the overview of the Budget screen shows the current state; Refresh fetches the latest reference rates via frankfurter.dev and applies them to the country records. Before anything has ever been loaded, the line reads No rates loaded yet; if a fetch fails, the reason appears as a line below it and the previous state remains. The button requires write access, because it writes to the countries (Trial and full version). What the rates do in detail and where else they appear is explained in Countries, section 6.8.
If your base currency is not the euro and Etappe knows no rate for it — because the currency is outside the ECB list and no country carries a rate — the same overview shows the note No rate for MKD — amounts in EUR: totals and status light then appear in euros until a rate is available.
19.5 Reading the status light: green, yellow, orange, red#
The status light on the Budget screen measures how much of the set limit is still left — as a percentage of the limit:
| Color | Remaining budget | Reading |
|---|---|---|
| green | more than 50 % | plenty of room |
| yellow | more than 20 % | half is gone |
| orange | 0 to 20 % | getting tight |
| red | below 0 % | budget exceeded |
The color tints the progress bar and the Remaining line. Once the budget is exceeded, the bar stays full and the remaining amount goes negative.
Expenses and Remaining are totals in your base currency: Etappe adds up all amounts in euros and converts the result into the base once, at the end — not each transaction individually, so that no rounding remainders pile up; rounding happens only at display time. The status light itself works in euros and therefore doesn’t depend on the day’s rate. Available budget stands as a single amount in its own currency — CHF 5,000 remain CHF 5,000.00 — with “≈ …” if the base differs (How Etappe does the math).
The Budget tile in the trip detail shows the share already spent as a percentage instead of the remaining amount — with the same status light and the same thresholds as here; underneath it says “CHF 1,200 left” or “CHF 350 over budget” in the base, without decimal places. Without a limit, the tile shows the expense total with the symbol of the base. The Overview also shows the remaining amount per trip in this color.
19.6 Journal and Items — the two views#
The switch below the overview offers two perspectives on the same figures.
Journal is the default view: all expenses across every source, in chronological order, each with symbol, country flag, category and date. Every transaction shows its amount in the currency it was saved in; if your base differs, “≈ …” in the base sits underneath. The header names the number of transactions and the total in the base. Entries without a date come last. An item moves to the position of its payment date as soon as you check it off.
Items shows only your own entries, grouped by category, with a subtotal per group in the base. Within a group, the items are ordered by due date. Ticking off, editing and deleting are only possible here; New item, on the other hand, is available at the top right in both views.
19.7 Receipts for expenses#
A budget item can hold files, too — the fuel receipt, the vet’s invoice. To do that, open the item for editing (swipe the row from left to right); at the end of the form sits the Documents card with file and photo import, just as in the detail views (Documents and receipts). When you create a new item, the card is not there yet: save first, then attach.
Receipts for the transactions that count automatically still go where the entry lives: on the trip, the accommodation, the journey or the activity — via the Documents card in the respective detail view.
There, the context menu of an attached document offers Mark as booking receipt. Only marked receipts end up in the appendix of the itinerary PDF when you switch on “Attach booking receipts” during export (Exports and printouts). The budget item has no such mark — its receipts stay in the app.
20. Packing list#
Every trip has its own packing list. You fill it with one tap from a template, add whatever belongs this time, assign individual items to your travel companions and check things off as you pack. At the end, you can export the list as a PDF — complete or for a single person.
You reach the Packing list section in the trip detail via the eye symbol (“View sections”) in the bottom bar. If the overview already shows a Next steps card, the line “Packing list x/y” takes you straight there.
20.1 Filling a trip’s packing list#
If nothing has been entered yet, the notice “Packing list is empty” greets you with the Apply template button. But you don’t have to start with a template — the plus at the top right creates an entry of your own at any time.
- Tap the plus. The New item form opens.
- Under “What needs to come along?”, enter what it is. Without text, Save stays grayed out.
- Set a Category. You can type freely or take over a category already in use via the small picker symbol next to it. The list additionally suggests Documents, Clothing, Toiletries, Electronics, Pet supplies, Car and Beach. If you leave the field empty, the entry ends up under “Other”.
- Set the Quantity if needed (1 to 99).
- Assign the entry in the Person section — or leave it at “General”.
- Save.
To edit an entry, swipe a row from left to right and tap Edit. Swiping in the other direction deletes the entry without asking.
New entries and changes require write access. Once the trial has expired, the purchase notice appears instead — see Trial and full version.
20.2 Applying a template#
Templates span all trips and are maintained under Packing list templates. Etappe comes with three ready-made ones: Basic weekend, Road trip with dog and Beach trip.
In the packing list toolbar menu, choose Apply template. The sheet shows all templates with their name, the number of their items and the stored note. Tapping a template appends its items to the packing list — with category and quantity, but always as “General”, that is, without an assignment to a person.
The rule in the footer matters: existing entries with the same category and the same name are not added twice (upper and lower case make no difference). That lets you combine several templates without the passports showing up three times in the list. If you apply the same template again later, only the entries you have deleted in the meantime or added to the template come in.
If you don’t have a template yet, the sheet reports “No templates” and points you to the Packing list templates section.
20.3 Assigning entries to a person#
Every entry either belongs to a person from your records (People) or counts as general — typical for things that only need to come along once, such as the first-aid kit or a travel adapter.
You set the assignment in the form under Person → Assigned. Archived people no longer appear there; one that is already assigned remains selectable so that old entries can still be edited. If no people have been created at all, the form points out that all entries count as general.
In the list, the name appears in small print below the label. Via Filter in the toolbar, you hide things selectively:
| Selection | Shows |
|---|---|
| All | the complete packing list |
| General (no person) | only entries without an assignment |
| A person’s name | only that person’s entries |
Only people with at least one entry assigned to them are available for selection. Whether the first name or first and last name appears there is set with “Names in checklists” under All settings.
20.4 Checking off, quantities, categories#
Tapping the row checks the entry off: the empty circle becomes a check mark, the text is struck through and turns gray. Another tap undoes it. There is no separate edit mode for checking off — the whole row is the switch.
The list is grouped by category, sorted alphabetically. On the right of the section header is the status of that category, such as “4/7”. Within a category, the entries appear in the order in which they were created or taken over from the template. Quantities above 1 appear on the right as “× 3”.
At the very top, a bar shows the overall progress with the line “x of y packed”. It follows the filter you have set: if you have filtered by a person, the bar counts only that person’s entries — handy when everyone packs for themselves.
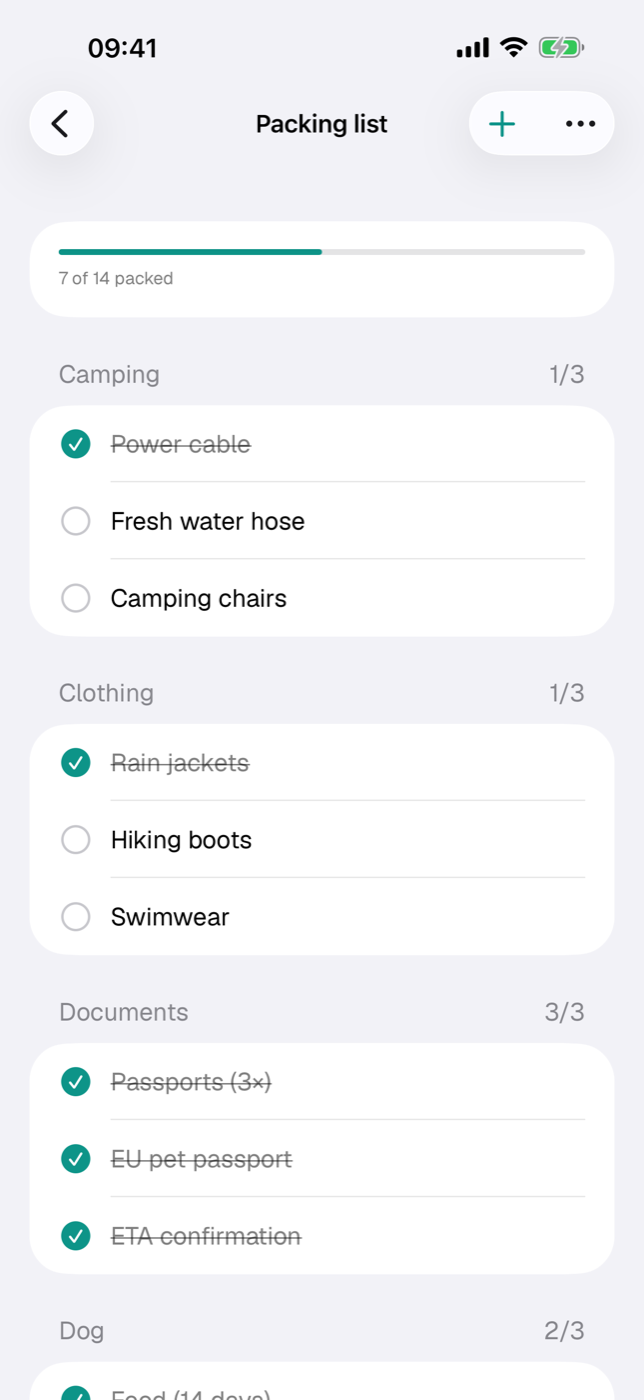
20.5 Packing list as PDF — complete or per person#
In the toolbar menu you find Export as PDF with two kinds of entries:
- The first entry exports the current view: without a filter the complete list, with a person or General filter set exactly what is currently visible — the menu item is then called Current view (…).
- For … with the name — one menu entry per person who has at least something assigned. This PDF contains that person’s items and all general entries.
The PDF is laid out in A4 format: header “Packing list · trip title” (in the per-person version supplemented by the name), below it “x of y packed” with the date of the printout. Then come the categories with checkboxes — items already checked off already carry the check mark, quantities are in parentheses after the name. Names appear in the PDF in the same format as in the list (“Names in checklists” setting).
After generating, the preview opens. From there you can save, print or send the PDF via the Share symbol. The file is only created temporarily; for a permanent copy, save it from the preview. The app’s other output formats are described in Exports and printouts, the complete backup of your data in Backup.
21. To-dos#
Every trip comes with things that have to be done beforehand: sort out health insurance for abroad, buy dog food, ask the neighbor about the flowers. The To-dos section collects exactly these tasks — with a priority, a “no later than” date and a progress bar.
To-dos are deliberately kept simple. They don’t remind you on their own. If you want a notification on your device for a date, use a reminder instead (Reminders).
21.1 Collecting tasks for the trip#
You find the section on the trip page via the eye symbol (“View sections”) in the bottom toolbar. The plus next to it is faster: “To-do” is listed there as its own item and opens the form directly.
If nothing has been entered yet, the section shows “No to-dos” with the Add to-do button. Otherwise you add to-dos via the plus at the top right.
- Enter the title under “What needs to be done?”. Without text, Save stays grayed out.
- Choose the Priority: High, Medium or Low. The default is Medium.
- If you need a deadline, switch on Set date in the No later than (NLT) section and pick a date. The calendar highlights the trip period, but you are not tied to it — preparations, after all, come before the trip.
- Notes has room for details, such as a phone number or the booking reference.
- Save.
The abbreviation NLT stands for “not later than” — to be done by that date at the latest. There is no time of day; what is stored is always the whole day.
To change a to-do, swipe a row from left to right and tap Edit. Swiping in the opposite direction deletes the to-do without asking. Creating and editing require write access — once the trial has expired, the purchase view appears (Trial and full version).
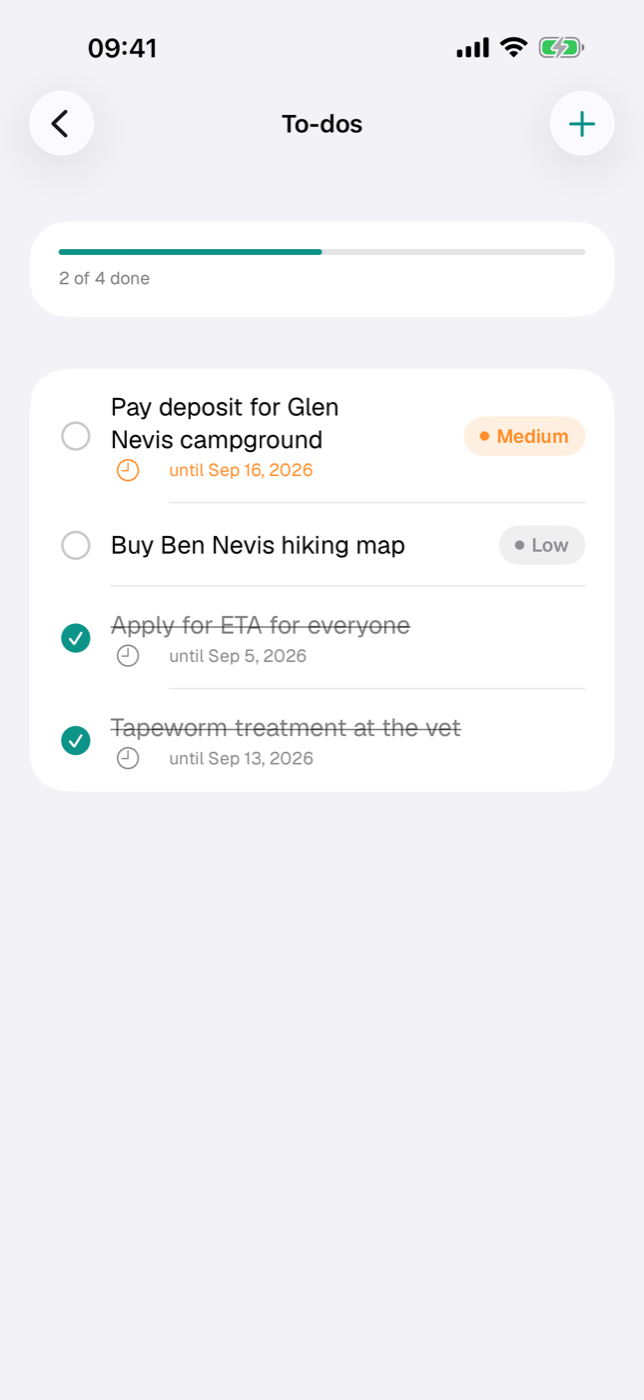
21.2 Due date, done, order#
Marking as done. A tap on the row checks off the to-do: the circle turns into a checkmark, the title is struck through and turns gray, the priority badge disappears. Etappe records the moment it was checked off. Another tap undoes it. Done to-dos stay in the list — they only move down. If you want them gone, delete them by swiping.
At the very top, a bar shows the status with the line “x of y done”.
Due date and color. If a to-do has a due date, it appears with a clock symbol under the title, for example “until Jun 12, 2026”. The color shows how urgent it is:
| Situation | Display |
|---|---|
| Date is in the past | red, with the suffix “— overdue” |
| today or within the next 3 days | orange |
| more than 3 days away | unobtrusive gray |
As soon as you check a to-do off, the coloring goes away — a done to-do can’t be overdue.
Priority. Open to-dos carry a badge on the right with the level: High (red), Medium (orange), Low (gray).
Order. The list sorts itself; you can’t reorder it by hand. The rule is:
- Open to-dos first, done ones after.
- Within that, by priority — first High, then Medium, then Low.
- With equal priority, by due date, the nearest one first.
- To-dos without a date come at the end of their priority group, among themselves in the order in which you created them.
The Next steps card in the trip’s Overview uses the same ranking: it shows the three most important open to-dos with a dot in the priority color and the date — a quick glance without opening the section.
To-dos belong to the trip: if you delete the trip, they go with it. They are included in the backup (Backup).
22. Entry checklist#
Every country has its own rules: national ID card or passport, ETA or visa, a rabies vaccination for the dog, a deworming treatment within a narrow time window. The checklist holds what you have stored in your country records against the participants of this trip and tells you what fits and what doesn’t.
You open it in the trip via the eye icon View sections and then Checklist. The To checklist button on the notes card of the trip overview also leads here.
22.1 What the checklist checks automatically#
The basis is the countries linked to the trip (Edit → section Countries). Without a linked country the page stays empty. The requirements come from the country records (Countries) — Etappe shows what is stored there and adds nothing from its own knowledge.
The layout is always the same: first one section per country (flag and name), then one section per pet. Per country, the following can appear:
| Row | appears when the country record contains |
|---|---|
| Status-light row per person | a required ID document |
| Apply for ETA | ETA required |
| Apply for visa | visa required |
| Observe quarantine regulations | quarantine |
| Recommended vaccinations | at least one vaccination recommendation |
| Free text | entry requirements |
If the trip has no start date, an orange note appears at the top: validity checks are then only partly possible because the comparison period is missing.
22.2 Documents per person and destination country#
If a country requires an ID document, every participating person gets a row with a status-light dot and a reason. To do this, Etappe looks through the person’s documents (People) for the matching types: for the requirement national ID card only national ID cards, for passport only passports, for “Both” both. Among the matches, the document with the latest validity counts; “Permanently valid” beats any date.
| Status light | Meaning |
|---|---|
| red | No matching document available |
| red | Document expired |
| red | Document expires during the trip |
| orange | Validity unknown (no “Valid until”, no Permanently valid checkmark) |
| green | valid until … or permanently valid |
The comparison is made against the end of the trip, failing that against the start of the trip. A passport that expires three days before the return journey is therefore red — not green.
Whether the first name or first and last name appears here is set under Names in checklists (All settings).
The minimum remaining validity that some countries additionally require (for example six months beyond entry) is not checked by the checklist but by the alerts engine — see 22.6 How the checklist and the alerts work together.
22.3 ETA and visa items#
If a country needs an electronic travel authorization or a visa, Apply for ETA or Apply for visa appears as an item you can check off. One tap on the row sets the checkmark, the date is saved with it, and the text is struck through. A second tap removes the checkmark.
These items apply to the trip and the country, not to individual people — they are a memory aid for the application. Whether the authorization is then in hand and valid long enough is something Etappe checks only once you add the document you received to the person as an ID document of type ETA or Visa, with “Valid until” or the “Permanently valid” checkmark.
22.4 Pet section: pet passport, rabies, deworming treatment#
A section per pet appears only if at least one destination country requires a rabies vaccination or prescribes a deworming treatment.
Rabies. The status light rates the animal’s vaccinations (Pets); it recognizes entries whose type contains “Rabies” or “Tollwut”.
| Status light | Reason |
|---|---|
| green | vaccination was before the start of the trip and is valid until the end of the trip |
| red | no rabies vaccination on file |
| red | expired or expires during the trip |
| orange | vaccinated only after the trip started |
| orange | validity unknown, vaccination details incomplete |
Without a trip period, instead of the status light there is only the note that the vaccination is required and the period is missing.
Deworming treatment. For every country with a deworming requirement there is a separate row with the calculated time window. The border crossing is taken as the most precise value known: a time you set yourself takes precedence over the arrival of the first journey whose destination is the deworming country (then “from journey: …” is shown next to it), which in turn takes precedence over the start of the trip. The window extends from “maximum hours before” to “minimum hours before” (if the country record has no entry: 24 to 120 hours).
If several countries with a deworming requirement are on the trip, the checklist points this out: only the first border crossing is taken into account — you check the other countries manually, for example with the deworming treatment calculator under More → Help.
- Tap Set border crossing (leaving the EU) if you want to set the date and time of departure yourself — the automatically determined value is already pre-filled there. The border crossing can be removed again via the row’s context menu.
- Check off the deworming treatment as soon as it has been given.
- Enter the actual time under Deworming treatment on.
- Below that, Etappe shows the resulting permitted border crossing as a period — green with a seal if your planned crossing falls within it, otherwise red with the note that it is outside the window.
Checkmark, treatment time and border crossing are saved per pet and trip. If several deworming countries are in the same trip, their rows therefore share the same entry.
The checked-off treatment time also feeds the notes Earliest and Latest border crossing in the Calendar and in Today — there it takes precedence over a vet appointment of the animal (Pets).
22.5 Adding your own items and checking them off#
Exactly the items that result from the country data can be checked off: ETA, visa and deworming treatment. You don’t create free checklist items in the checklist — for that there are To-dos for tasks with a due date and Reminders for notifications at the right time.
Whatever is missing from the checklist, you add at the source: requirements and entry texts in the country (Countries), documents and vaccinations in the person or pet. The checklist picks up the change immediately.
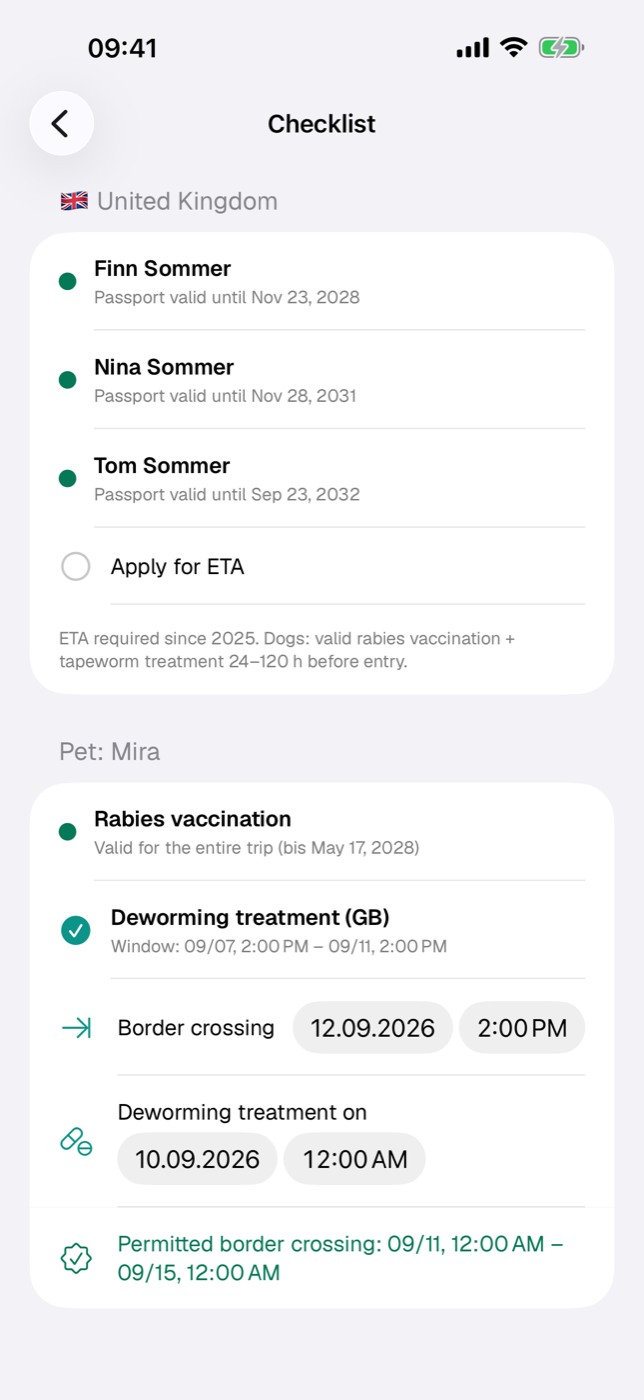
22.6 How the checklist and the alerts work together#
The checklist is the working view of one trip, Alerts the inbox across all trips. Both use the same data but check different things. Only in Alerts appear:
- the minimum remaining validity of the passport on entry, if the country requires it,
- missing or expiring ETA/visa documents per participant,
- document expirations in general, vehicle documents and medication doses.
Only the checklist, on the other hand, shows the vaccination recommendations, the quarantine note and the entry requirements in plain text.
Two things are worth remembering: a checkmark at “Apply for ETA” doesn’t clear an alert — that takes the document on file. And the deworming alert reports as soon as the latest end of the window is at most 14 days away; from three days it becomes critical. If the planned border crossing lies outside the permitted window, it is critical immediately.
23. Documents and receipts#
A trip comes with paperwork: the booking confirmation for the vacation home, the ferry ticket, the rental car invoice, the insurance certificate. In Etappe, none of that sits in a catch-all folder — it is attached directly to the thing it belongs to, and marked booking receipts can be carried over into the printed itinerary if you want.
23.1 Attaching a file or photo#
Wherever attachments are possible, you’ll find a Documents card with a paperclip icon and two buttons below it: File and Photos.
- Tap File to pick a document from the Files app. PDFs and images are allowed, several at once.
- Or tap Photos and choose images from your photo library.
- The attachment appears immediately as a row with its name and file size.
| Method | What goes in | Limits |
|---|---|---|
| File | PDF and image files | max. 50 MB per file, multiple selection possible |
| Photos | Images from the Photos app | max. 5 images per selection |
Photos are automatically downsized when attached (longest edge 2,000 pixels) and stored as JPEG — that saves a lot of space without making a ticket or an invoice unreadable. Files keep their name; photos get names like foto-1.jpg.
If a file is too large, a red note appears below the buttons with the file name, size and limit; the other selected files are still added.
Adding attachments counts as editing and therefore requires the trial or the full version (Trial and full version).
23.2 Scanning paper documents#
Etappe doesn’t bring its own scanner — that’s what the built-in tools of iOS are for. Photograph the document with the Camera app and then attach it via Photos. If you’d rather have a multi-page PDF, scan it with the iOS scan feature, save it in the Files app and bring it into the trip via File.
Two special cases have their own fields instead of the Documents card: ID documents of people and pets, and vehicle documents. Each of these has a Scan / photo section (one image of the document) and a File (PDF) section — described in People, Pets and Vehicles.
23.3 Preview and delete#
Tapping the row opens the iOS system preview: PDFs can be paged through, images zoomed. The preview file is only created temporarily, is readable only while the device is unlocked, and is cleaned up again the next time the app starts.
Press and hold a row and the context menu appears with Delete. The attachment disappears immediately, without confirmation — there is no trash.
Renaming attachments isn’t provided for; if the name matters to you, rename the file before attaching it.
If you delete the object an attachment hangs on — an accommodation, a journey, a whole trip — its documents are deleted along with it.
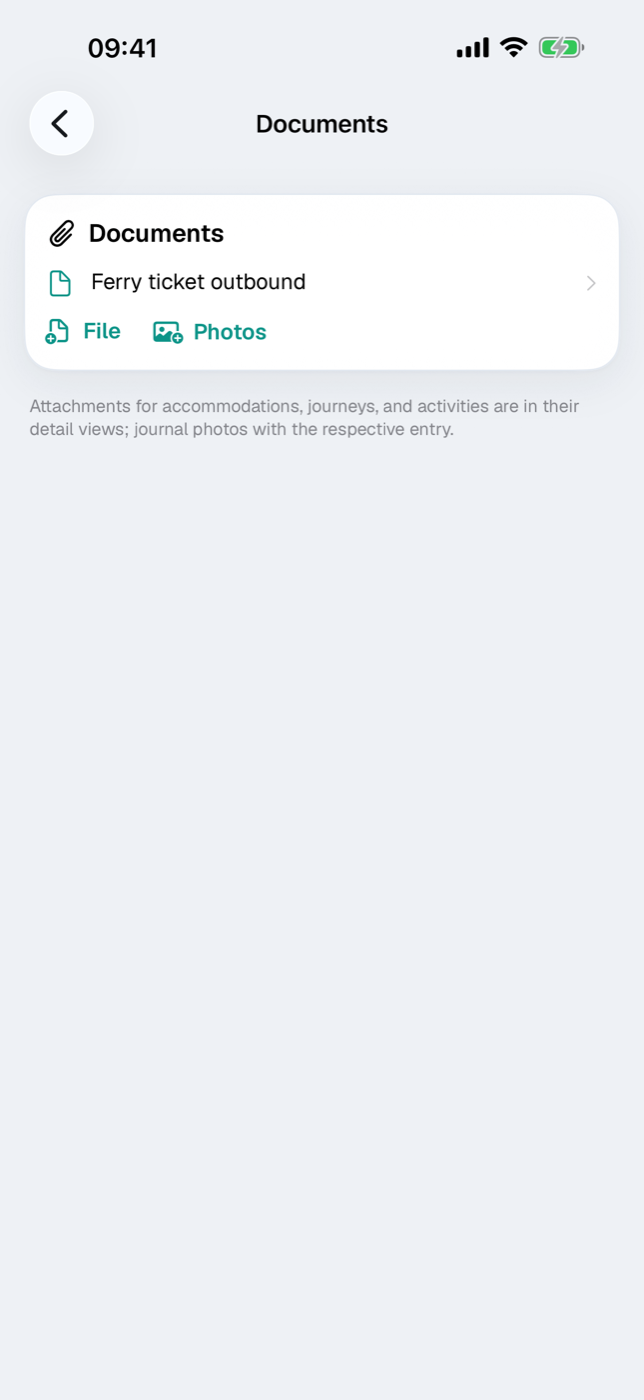
23.4 Marking a document as a booking receipt#
Press and hold an attachment and choose Mark as booking receipt. The row then carries the label “Booking receipt” with a seal icon; via the same menu you take the mark back with Remove booking receipt mark.
The mark exists only on the four planning blocks: accommodations, journeys, activities and outdoor activities. On trip documents, attachments in the records or journal photos, the menu item is missing.
The mark takes effect in the itinerary: in the trip’s Share menu, open Itinerary as PDF. If there are marked receipts, the Attach booking receipts switch appears with their number in parentheses. Turn it on, and each receipt lands right after the day page its booking belongs to.
| Receipt attached to | It lands after the day of |
|---|---|
| Accommodation | Check-in |
| Journey | Departure |
| Activity | Start |
| Outdoor activity | Date of the entry |
Receipts without a usable date — or ones whose day falls outside the trip period — are collected at the end, announced by a divider page “More booking receipts”. PDFs are taken over with all their pages, images as one page each. Receipts without file content are skipped.
More on the itinerary and the other output formats is in Exports and printouts.
23.5 Where documents can be attached#
You’ll find the Documents card in these places:
- Trip — in the “Documents” section, for documents concerning the whole trip
- Accommodation (Accommodations)
- Journey (Journeys)
- Activity (Activities)
- Outdoor activities (Outdoor activities)
- Research (Research) — when you turn it into an entry, the attachments move along to the entry that is created
- Budget item (Budget) — here the receipts card sits in the item’s edit mode
- Person, Pet and Vehicle in the records
There are also two special routes: journal entries collect their memory photos themselves (Journal), and ID documents and vehicle documents carry scan and file directly in their form.
As a rule of thumb: attach the document as close as possible to what it’s for. The booking confirmation belongs on the accommodation, not on the trip — only then can it later appear as a receipt in the right place in the PDF.
23.6 The trip’s documents overview#
The trip’s Documents section deliberately shows only the documents attached directly to the trip: insurance, travel health insurance certificate, general booking papers. Attachments of accommodations, journeys and activities stay in their detail views, journal photos with their entry — a note below the card reminds you of that.
How much space all of this takes up and how to tidy up if needed is in Storage and files. The files only go into the backup if you enable “Include files” when exporting (Backup).
24. Reminders#
Some things have to happen before the trip, and at a particular time: the deworming treatment at the vet, the balance payment for the vacation home, the online check-in. A reminder in Etappe consists of a due date and a lead time — and shows up as a notification on your device in good time beforehand.
Reminders are not to-dos. To-dos are a task list to check off (To-dos); reminders are dated events that draw attention to themselves.
24.1 Creating a reminder (title, due date, lead time)#
You reach the list in two ways: via More → Reminders for all reminders together, or from within a trip via the Reminders section — there you only see the ones belonging to that trip.
- In the list, tap the plus at the top right (New reminder). In an empty list, the Add reminder button appears instead. In the trip view, Add new → Reminder also brings you here.
- Enter a Title. Without one, Save stays grayed out.
- Choose a Type — it determines the symbol in the list, in the Overview and in the Alerts, nothing else. The notification itself shows no type symbol.
- Optionally a Description; it appears later in the text of the notification.
- Under Due on, set the date and time.
- Set the Lead time with the stepper — 0 to 30 days, the default is 3.
- The Notify from row shows you right away when the reminder will go off.
- In the Photo section, you can attach an image via Choose photo (the vaccination record or the invoice, say); it appears as a small tile at the right edge of the list row.
These types are available:
| Type | Intended for |
|---|---|
| Deworming treatment | deworming before the border crossing |
| Vet | appointments to do with your pet |
| Vaccination | boosters for people and pets |
| Document expiry | ID documents and papers about to expire |
| Check-in | arrival or online check-in |
| Check-out | departure day at the accommodation |
| Departure | setting off, ferry, flight |
| Payment due | deposits and balance payments |
| Other | everything else |
24.2 Allowing notifications and what happens at 9:00 AM#
The first time you save, iOS asks whether Etappe may send you notifications. If you say no, everything else still works — the reminder is in the list, in the Overview and in the Alerts — only the notification stays off.
Delivery follows a fixed rule: 9:00 AM on the day that results from the due date minus the lead-time days. The time of day of the due date plays no part in this; it only appears in the text of the notification.
| Due on | Lead time | Notification |
|---|---|---|
| Jul 20, 3:30 PM | 3 days | Jul 17, 9:00 AM |
| Jul 20, 3:30 PM | 0 days | Jul 20, 9:00 AM |
Vet appointments you have given a lead time follow the same rule, by the way (Pets).
If you create a reminder whose lead-time window is already running, Etappe doesn’t stay silent: the notification then arrives about a minute later — but only as long as the due day isn’t over yet. For dates that have already passed, nothing is delivered anymore; they show up as overdue in the Alerts instead.
The notification itself shows the title as its heading, below it “Due on …” and — for a trip-related reminder — the trip title. The description forms the message text.
Every change to the due date or lead time reschedules the notification; you don’t have to confirm anything extra.
24.3 Reminders for a trip or in general#
Where you create a reminder decides what it belongs to:
- Created from within a trip, it belongs to that trip. It appears in the trip’s list and in the overall list, there with the trip title in the accent color below the name.
- Created via More → Reminders, it is independent of any trip — suitable for ongoing matters such as a vaccination that is about to expire.
The trip assignment is set when you create the reminder and can’t be changed afterwards in the form. If you want to assign a reminder to a different trip, create it there anew and delete the old one. If you delete a trip, its reminders go with it.
Open reminders show up in two more places:
- In the Overview as a card of their own with the next three open dates; overdue dates are shown in red there (Overview).
- In the Alerts: as soon as the lead-time window begins, the reminder appears as “Soon”; once the date has passed, it is listed as critical (Alerts).
24.4 Completing, moving, deleting#
Completing: Tap the row. The circle on the left turns into a filled check mark, the title is struck through, and the scheduled notification is withdrawn. Another tap undoes it — the notification is then scheduled again, provided its time is still in the future.
Completed reminders disappear from the list. The Show completed switch in the toolbar menu brings them back into view.
Moving: Swipe the row from left to right and choose Edit. In the form, change “Due on” or the lead time; the notification adjusts accordingly.
Deleting: Swipe the row to the left and tap Delete. The scheduled notification is removed along with it.
If a date has passed and hasn’t been checked off yet, the time in the list is shown in red — so anything left undone catches your eye right away when you look through the list.
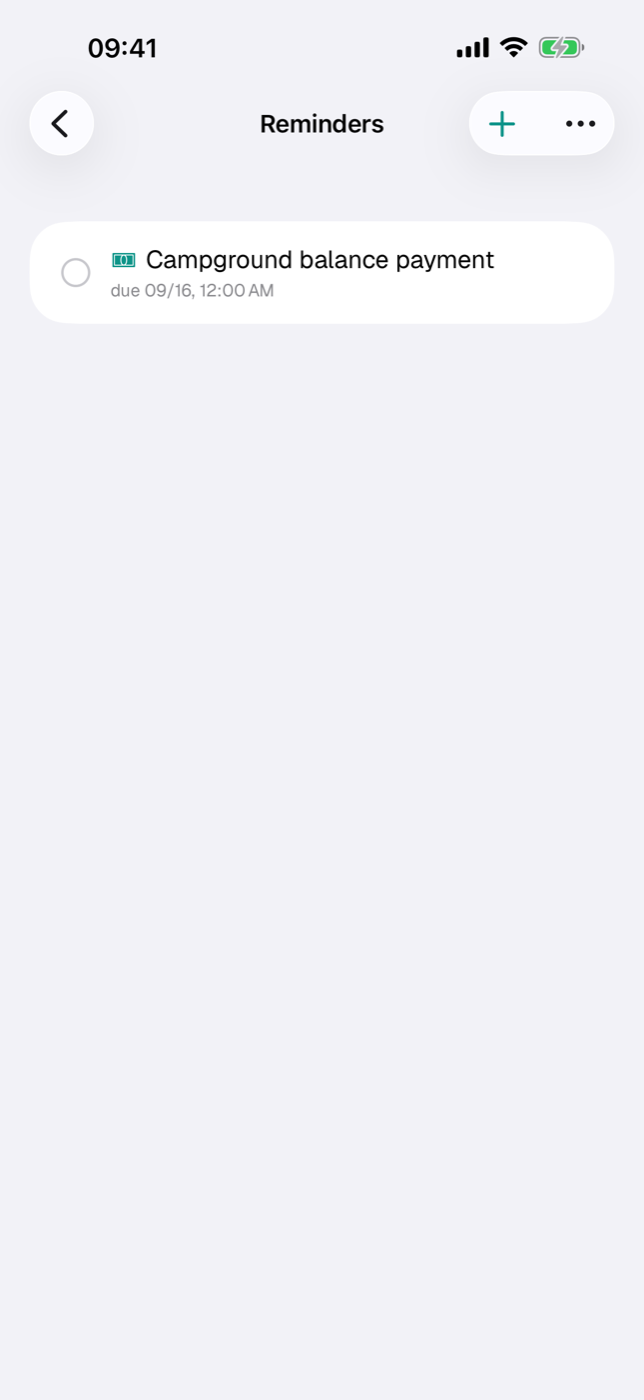
Reminders are included in the backup, but their photos only if you enable “Include files” when exporting (Backup).
25. Today#
On the road, only one day counts: this one. “Today” hides the rest of the trip and shows what is scheduled for today’s date as cards you can check off — along with the current overnight stay, the matching document, and the place marker that opens the route planner with the right destination.
You reach this area through the Today tile in the trip detail, where it sits next to Calendar and Sketch. From the Home Screen, a single tap takes you straight there (Quick actions from the Home Screen).
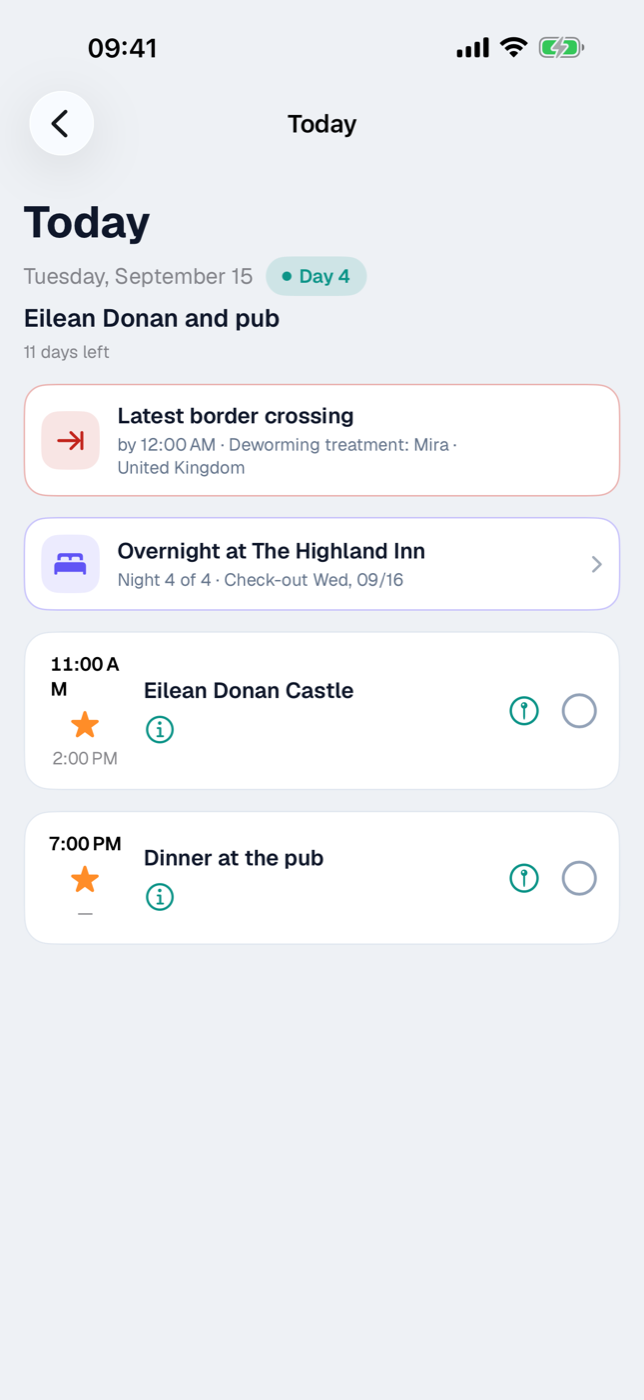
25.1 What the Today screen shows#
At the very top is today’s date with the weekday, next to it the Day N badge — which day of the trip today is, counted from the trip’s start date. If today is past the end of the trip, the badge is omitted. Below that, as long as there is time left, you see “X days left” until the end of the trip.
Next come — if a deworming border-crossing window begins or ends today — the note cards for it (see 25.6 Border-crossing window when deworming treatment is required), then the overnight-stay card (see 25.2 Overnight stay: “Night 4 of 12”), and below that the day’s scheduled items. They come from the same source as the calendar: check-in and check-out of accommodations, journeys, activities, and outdoor activities. Journal entries do not appear here — they are a look back, not a plan (Journal).
The order is the same as in the calendar: items without a time come first, then everything else in chronological order by start time. On the left of each card is the time column with start, type symbol, and end; if a time is missing, a dash appears instead.
Below the title sits the Details button; the remaining actions are on the right of the card. Which ones appear depends on the item:
| Symbol | Meaning |
|---|---|
| i in a circle (Details, below the title) | opens the full record — accommodation, journey, activity, or outdoor activity |
| Document | shows the first attached document in a preview |
| Place marker | opens the route to the destination in the route planner |
| Red dot | starts route recording (journeys only) |
| Circle / check mark | checks off the item |
The document symbol appears only if a file is attached to the record; the first one in sort order is shown (Documents and receipts). The red record button starts and stops recording the journey without a detour through the journey detail. It is grayed out if another recording is already running or a route has already been recorded for this journey (Recording a journey).
25.2 Overnight stay: “Night 4 of 12”#
On days when an accommodation simply continues — with neither check-in nor check-out due — a separate card with an indigo border appears at the top: Overnight at \<name\>. Below it the counter, for example “Night 4 of 12 · Check-out Fri, 07/31”.
The count refers to the coming night: on the first full day after check-in it says “Night 2”. The total is the number of calendar days between the check-in and check-out day; the times of day play no role (Accommodations).
This card deliberately cannot be checked off — there is nothing to do; tapping it takes you to the accommodation. If several accommodations run in parallel, they are listed alphabetically, one below the other. On arrival and departure days, the regular check-in or check-out item appears in the list instead.
25.3 Checking off items#
A tap anywhere on the card sets the check mark. The title is struck through, the card fades, and the circle on the right fills in. A second tap removes the check mark again.
The check mark belongs to that specific item, is kept permanently, and is included in the backup (Backup).
With Activities, more happens the first time you check one off:
- The activity’s status switches to Completed.
- A Completed sheet opens with the name and the question “How was it?”.
- You give one to five stars — tapping the same star again removes the rating.
- Done closes the sheet and saves.
The rating is the same as in the activity’s form and can be changed there at any time (Activities). If you remove the check mark later, the status goes back to “Planned” — the previous state is not stored, so correct it in the form if needed. There is no star rating for journeys, outdoor activities, or accommodations — there the check mark is only a memory aid.
25.4 Tapping the place marker and opening the route in the route planner#
The place marker appears as soon as Etappe can read a usable destination from the record. What is used depends on the type:
| Scheduled item | Destination, in this order |
|---|---|
| Check-in / check-out | Address and place, otherwise the coordinates |
| Journey | Destination coordinates, otherwise the destination place |
| Activity | Address and place, otherwise the coordinates |
| Outdoor activity | Start coordinates, otherwise the GPX start point, otherwise the start point text |
An address takes precedence over coordinates because it reads better in the route planner. If the record has neither, the symbol is missing as well.
Which app opens is set under Settings → External apps → Route planner (All settings). The choices are Apple Maps (default), Google Maps, Waze, and TomTom GO; apps that are not installed are marked “(not installed)”.
If the chosen app cannot be opened, Etappe tries the same app’s web link and falls back to Apple Maps as a last resort — so you are never left without a route. TomTom GO navigates to coordinates only; a plain address is resolved first. In each case, a driving route to the destination is started from your current location.
25.5 When nothing is scheduled today#
If there is no scheduled item, no ongoing overnight stay, and no border-crossing note for today, the list is replaced by the message Nothing planned today — “There is nothing scheduled in this trip for today.” This is also the normal case when you open “Today” for a trip that has not yet begun or is already over: the area always shows the real current date, never a day of the trip. For other days, use the calendar (Calendar and day view).
The Today quick action from the Home Screen, on the other hand, needs a trip with the status Under way: it prefers the one whose period includes today, otherwise the first trip with this status. If there is none at all, it reports “No current trip” with a note to set this status on the current trip.
Usually you don’t have to do anything for that: once a trip is set to Making arrangements, Etappe advances the status by date — to Under way on the start date, to Past after the end date. Considering, Bucket list, and Planning are left untouched; those are mere intentions (Creating a trip).
25.6 Border-crossing window when deworming treatment is required#
If a destination country requires a deworming treatment for a pet traveling with you and the time of that treatment is known, “Today” shows a note card on the relevant day: Earliest border crossing with a green arrow as soon as the permitted entry window begins today, and Latest border crossing with a red arrow when it ends today — each with the time (“from …” or “by …”), the pet, and the country.
Like the overnight-stay card, this card is purely informational and cannot be checked off. The treatment time is taken from the deworming treatment checked off in the Entry checklist, or failing that from a vet appointment whose type contains “worm” (Pets). The same notes also appear on their days in the Calendar.
25.7 Day theme#
Below the date is the day’s theme, if you have set one, and a tap lets you change it. It is the same theme as in the Sketch and the Calendar.
26. Calendar and day view#
Accommodations, journeys, activities, outdoor activities and the journal each live in their own list. The Calendar lays them on top of one another and shows what is due on which day — and the Day view goes one step further, spreading the events of a single day across a 24-hour timeline.
You reach it in the trip detail via the Calendar tile.
26.1 The trip as a day-by-day agenda#
The calendar shows one card per day, stacked vertically. Which days those are comes from two sources: the trip period (every day from start to end) and all dated entries. Anything outside the period — the ferry the evening before, a journal entry added later — still gets its own row. If neither exists, you see No period with a note to set the trip period first or to plan entries with a date (Creating a trip).
Above each card is the weekday with the date, next to it Day N within the trip and, on the current day, the additional Today pill. When you open the calendar, the list jumps to today automatically, provided that day belongs to the trip.
The card itself lists the day’s entries:
| Entry | Comes from | Time in the calendar |
|---|---|---|
| Check-in: … | Accommodation | Check-in time |
| Check-out: … | Accommodation | Check-out time |
| Journey name | Journey | Departure |
| Activity name | Activity | Start |
| Name of the outdoor activity | Outdoor activities | Start time, otherwise all day |
| Title of the entry | Journal | always all day |
All-day items come first, then everything else in chronological order by time. On the right is the time or the word all day. A tap opens the detail page of the underlying entry; a day without events simply shows No entries. As soon as at least one entry exists, the Day view button sits at the top of the card.
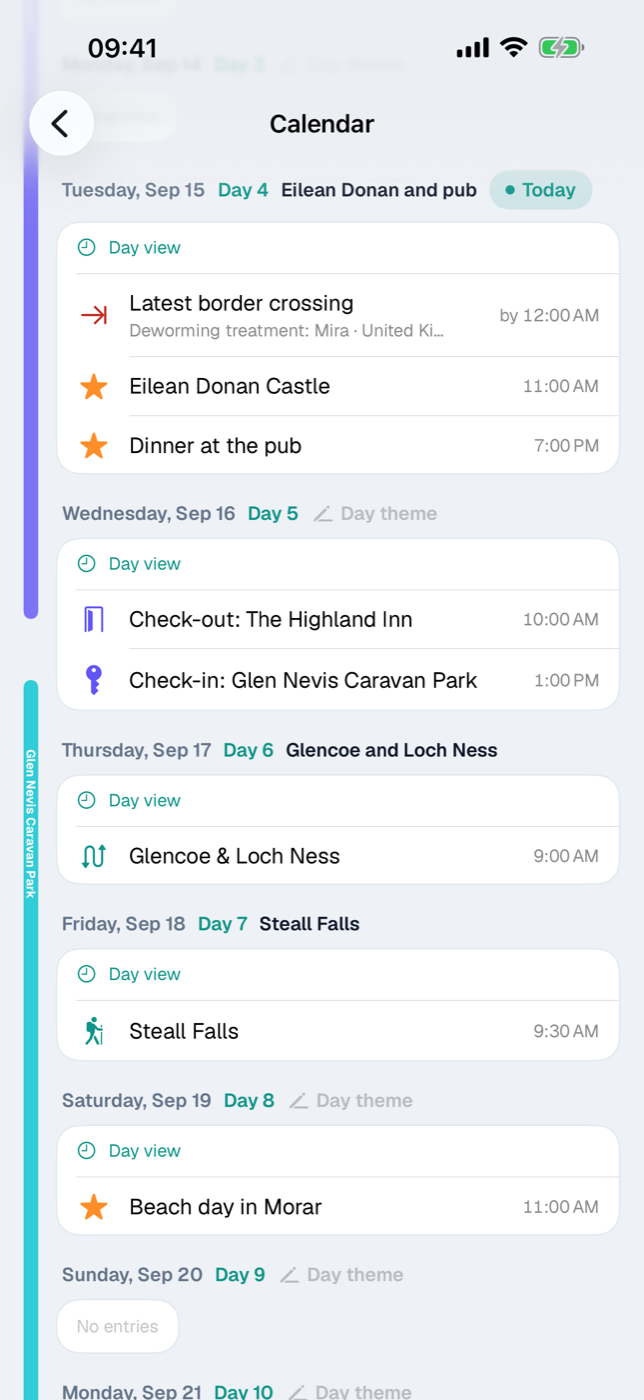
26.2 Reading the overnight bars#
To the left of the day cards, vertical colored bars run through: one per accommodation, from the check-in row to the check-out row. On the first day the bar starts with a rounded top at the height of the check-in entry, on the last day it ends with a rounded bottom at the height of the check-out entry — in between it runs without interruption. The name of the accommodation is written along the bar. So you see at a glance where you are staying and for how long.
If one accommodation follows another, both share a lane — even on the handover day: the old bar ends at the check-out row, the new one begins at the check-in row below it. Only when two stays actually overlap in time do the bars get separate lanes side by side. The colors cycle through indigo, turquoise, orange, purple and brown.
A bar only appears when both check-in and check-out are set and at least one night lies between them. Tapping the bar opens the accommodation (Accommodations).
26.3 Day view with timeline#
The Day view button in the day card opens the hourly grid for that day. At the top — if there is anything for it — sits the All day card with everything that has no time: journal entries and outdoor activities without a start time. Below it the timeline runs from midnight to midnight with a line for each hour.
Each event is drawn as a block: position and height follow from start and end, the block shows the title and the time span, and a colored strip on the left carries the color of the entry type. Depending on the type, the end comes from different fields:
| Type | End of the block |
|---|---|
| Journey | Arrival |
| Activity | End of the activity |
| Outdoor activities | Start time plus the likely total duration (walking time × 1.25) |
| anything without an end | 30 minutes after the start |
Events that overlap in time stand side by side in columns: Etappe groups overlapping blocks together and splits the width among them. If an event runs past midnight, the block ends at the end of the day. When opened, the view scrolls to the hour before the first event — so you don’t land in the middle of the night.
Above the timeline — provided an accommodation covers the adjacent nights — a small card shows the day’s overnight stay. It follows the same rule as the overnight bars in the agenda (26.2 Reading the overnight bars): if you spend the night before and the night after the day in the same accommodation, it reads Overnight: ‹name›. On arrival and departure days and when changing accommodation, the information splits into Night before and Night after — on the handover day you see both accommodations that way. Without an overnight stay in those nights, the card is omitted.
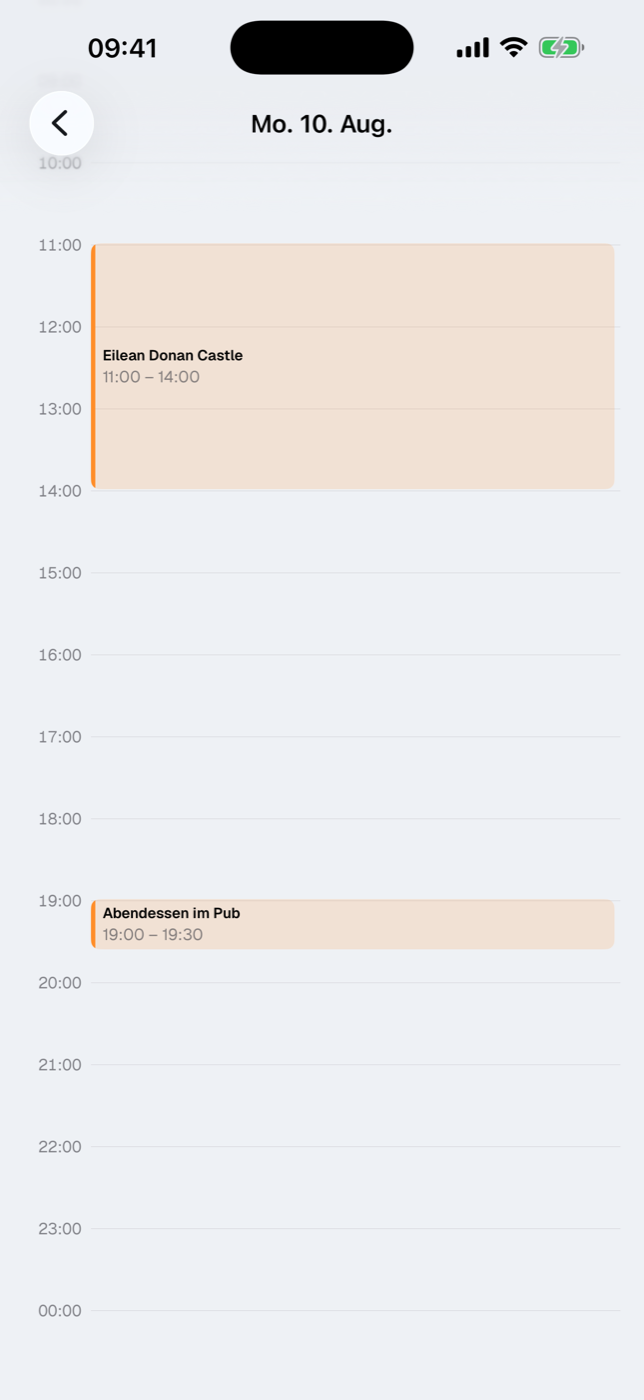
26.4 Moving entries to another day#
A long press on an entry — in the agenda as in the day view — opens the context menu with Move to …. In the sheet that appears, you pick the New day in the month calendar; for entries with a time, the Time field sits below it, preset to the current one — so you can push an event to “the day after tomorrow, 3:30 PM” in one go. Move confirms, Cancel leaves everything as it was. End times move along with unchanged duration; all-day entries stay all day.
This is how each type behaves:
- Journey — the departure lands on the new day at the same time, the arrival moves along by the same number of days. A night ferry stays a night ferry (Journeys).
- Activity — start and end move together (Activities).
- Check-in / Check-out — only the tapped event moves. Etappe doesn’t let the check-in slip past the check-out or vice versa; if you try, it is clamped to the other event so that no negative night count arises.
- Outdoor activities — the entry switches to the new day, the start time stays untouched (Outdoor activities).
- Journal — the entry is appended to the end of the target day. If something is already there, that is no problem: a day can hold several entries, and the moved one then comes last (Journal).
If the entry was deleted elsewhere in the meantime, Etappe reports Cannot move.
26.5 Extending or shortening the duration#
For journeys and activities, the context menu additionally offers 30 min longer and 30 min shorter. Both only move the end; the start stays put. If no end has been recorded yet, Etappe starts from a duration of one hour; below 15 minutes it won’t go — the event gets no shorter, no matter how often you tap. This is handy in the day view, where the block grows or shrinks immediately.
26.6 Editing and deleting from the calendar#
The same context menu takes you via Edit straight into the entry’s form — journey, accommodation, activity, outdoor activity or journal. So you don’t have to go back to the respective list first.
Delete asks Delete “Title”? first. For a check-in or check-out it says so explicitly: this deletes the entire accommodation — including everything attached to it. Everything else deletes only that one entry.
The context menu is the same in the agenda and the day view: Edit, Move to …, the two duration buttons and Delete are therefore also available on the timeline.
26.7 Border-crossing window when deworming is required#
If a destination country requires a deworming treatment for a pet traveling with you and the time of that treatment is known, the calendar adds two note rows: Earliest border crossing (green arrow) on the day the permitted entry window opens, and Latest border crossing (red arrow) on the day it closes — each with a time (“from …” or “by …”), pet and country. These rows are display only: they can’t be tapped, moved or deleted, and they only appear on days the calendar shows anyway.
The deworming time is taken first from the treatment checked off in the Entry checklist (Deworming treatment on); failing that, from a vet appointment of the pet whose type contains “worm” — such as “Deworming treatment” or “Deworming” (Pets). The window follows from the country’s hours; without a specific setting, 24 to 120 hours after the treatment (Countries). If either of the two times falls on today, the same note also appears in Today. Archived trips and archived pets are left out.
26.8 Day theme in the header#
Next to “Day 2” is the day’s theme, if you have set one — for example “North coast and Kronborg”. Tap the pencil or the theme to enter or change it; this only works for days within the trip period. The day view carries the same theme in its header below the date, so it stays put while you scroll; a tap opens the input there as well. Where the theme comes from and why it is attached to the trip day is explained under Sketch.
27. Map#
Lists tell you what belongs to a trip. The map tells you where it is — and whether the accommodation on day three really is next to the hike or two hours away. The Map section lays all the places of a trip on top of each other: accommodations, activities, outdoor activities, journeys, and journal entries.
27.1 All the places of a trip on one map#
You reach it through the trip, not through the tab bar: open the trip, then tap Map in the section grid. The trip overview also has a small map preview; its footer names the number of places and leads with Map into the large view.
Only what has coordinates makes it onto the map. An entry with a place name but no coordinates stays invisible. If the trip has nothing georeferenced at all yet, you see No geodata with a note that entries appear as soon as they have coordinates.
Besides the points, Etappe draws lines:
| Line | Meaning |
|---|---|
| dashed, charcoal | planned journey from the start via the waypoints to the destination |
| dashed, blue | journey with ferry as the mode of transport |
| dashed, yellow, as an arc | flight without a drawn route |
| solid, orange | recorded actual route of a journey |
| solid, charcoal | GPX track of an outdoor activity entry |
A journey line only appears when start and destination have coordinates; the waypoints in between bend it into shape (Journeys). Flights without waypoints of their own are drawn as an arc, as you know it from flight maps. If you have applied a recording as the definitive route, the dashed draft of that journey disappears and only the orange line remains (Recording a journey).
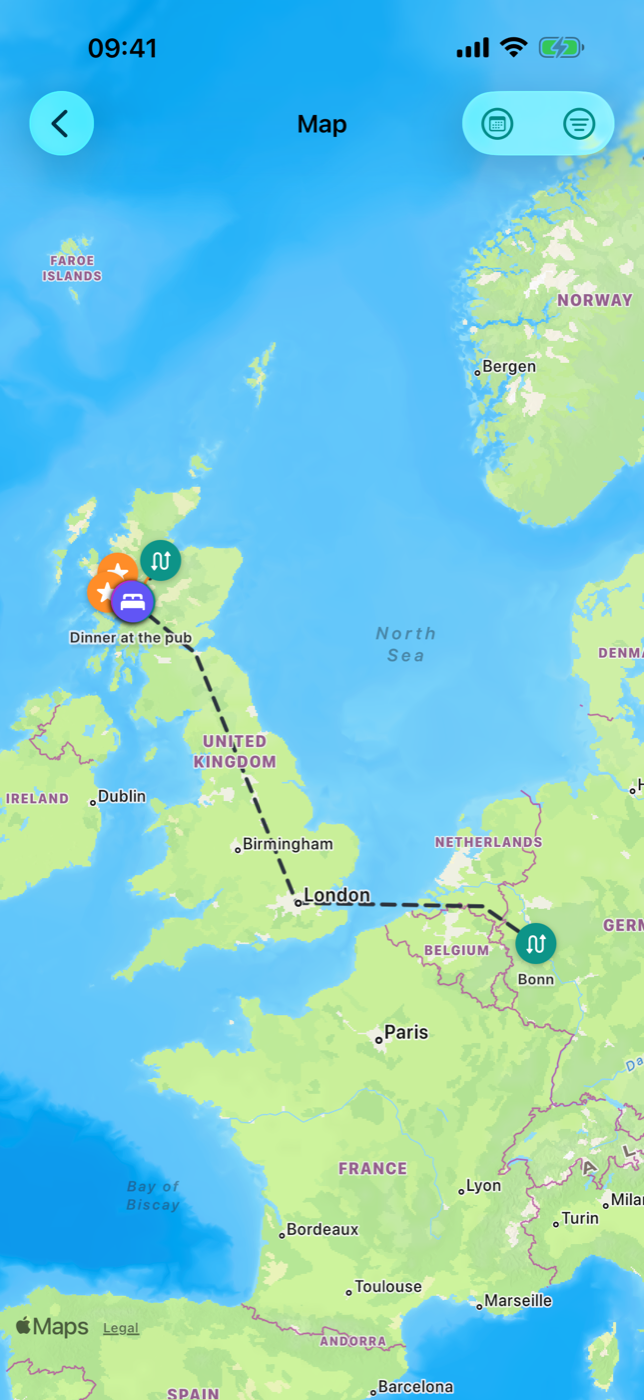
27.2 Marker types and filters#
Each pin is a colored circle with the symbol of its type. The name of the entry sits above the pin.
| Type | Color | Symbol | What it includes |
|---|---|---|---|
| Accommodations | Indigo | Bed | accommodations with coordinates |
| Activities | Orange | Star | activities with coordinates |
| Outdoor activities | Green | Hiker | starting point from the form or from the GPX track |
| Journeys | Teal | Double arrow | one pin each for the start and destination of every journey, labeled with the place name (or the journey name as a fallback) |
| Journal | Purple | Book | entries with a place |
At the top right sits Filter. The popover lists the five types; a tap turns a type on or off, the checkmark on the right shows the state. Once not all types are active, the filter symbol appears filled — so you can see at a glance that the map is currently not showing everything.
The filter applies to pins and lines: without Journeys, journey lines and recordings disappear too; without Outdoor activities, so do the GPX tracks. If you turn off all types, the map stays empty — the “No geodata” note does not appear then, because the data is there after all.
27.3 Filtering by trip day#
If the trip has a period, Day filter also sits at the top right. Turned on, it shows a bar at the bottom: Day X of Y on the left, weekday and date on the right, below them a slider (for trips of more than one day). This way you walk through the trip day by day and see only what is on for that day.
What counts as “on that day”:
| Entry | Applies on the day if |
|---|---|
| Accommodation | the day lies between check-in and check-out |
| Activity | the day lies within the from/to period |
| Journey | start pin and line: the day lies between departure and arrival; destination pin: only on the day of arrival |
| Outdoor activity | the date of the entry matches |
| Journal | the date of the entry matches |
| Recorded route | the day lies between the start and end of the recording |
Important: Entries without a date are hidden while the day filter is active. If you are missing something on the map, the date is usually empty — or the day filter is still on. Turn it off again with the same symbol, and the map shows the whole period again.
27.4 Tapping a pin and jumping to the entry#
A tap on a pin opens a half-height info sheet. At the top are symbol, name, type and the period — a single date such as “Thu, 06/12” or a range if start and end fall on different days.
For accommodations, the contact rows are added, provided they have been entered:
- Address — a tap starts navigation in your chosen route planner; the symbol on the right copies the address to the clipboard.
- Phone — a tap dials the campground’s number.
- Website — a tap opens it in the browser.
If the accommodation is a campground with recorded amenities, the features appear below as chips (Accommodations).
At the very bottom, Open details leads straight into the entry — depending on the type, into the detail of the accommodation, activity, outdoor activity entry, journey or journal entry. You get back as usual via the back navigation.
27.5 Zooming, panning, map section#
The map responds to the familiar gestures: pan with one finger, zoom and rotate with two fingers, double-tap to zoom in. The long press is taken (see 27.6 New entry by long press) — short taps on the pins and all map gestures are unaffected by it.
Etappe sets the initial section itself when the map opens: it covers all visible points including the start and end of the lines, with some margin. The home location only helps span the section if the trip has fewer than two points of its own — otherwise a distant destination would force half the world map. After that you control the map freely; if you leave the map and come back, the calculated section is set again.
27.6 New entry by long press#
Standing in front of a place you want to remember? Hold your finger on the map for about half a second. New entry opens with three sections:
- What — a choice between Accommodation, Activity and Journal (Activity is preselected).
- When — the date. Preset to the currently selected day if the day filter is running, otherwise to the start of the trip.
- Place — the coordinates you hit, for checking.
Next opens the matching form, already filled with place and date; you just add the name and details and save. Cancel discards everything. If your trial has expired, the note about the full version appears instead of the dialog (Trial and full version).
27.7 The house: your home location#
If a home location is set, the map shows it as a white house on a green circle, labeled “Home”. It belongs to no trip and therefore cannot be hidden with the type filter or the day filter — it is always the fixed reference point.
You set it in Settings under Home with Choose home location: tap the point on the map or use Current location, then Apply. Remove home location deletes it again. With iCloud, the setting applies on all your devices; without iCloud only on this one (Home, All settings).
28. Recording a journey#
The plan is one thing, the drive another: detours, spontaneous side trips, the country road instead of the motorway. Etappe can log the route you actually take and lays it next to the planned one — including distance, duration and elevation gain.
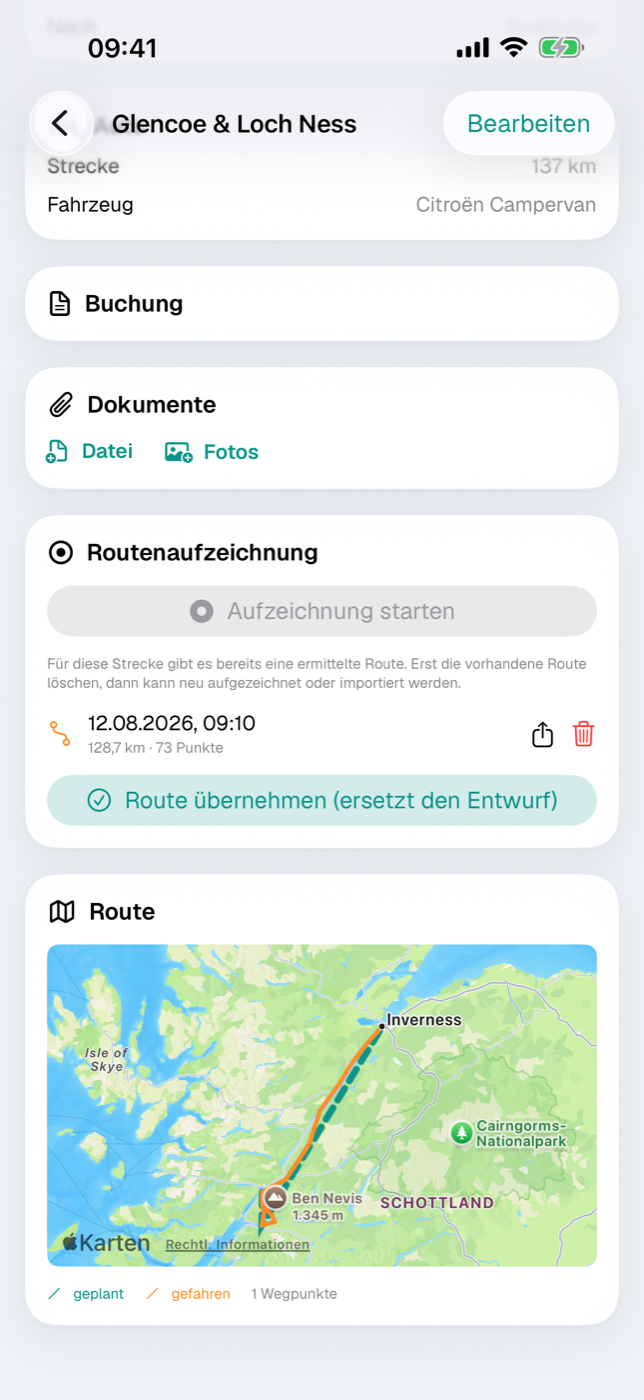
28.1 What a recording is for#
A recording answers three questions that a plan alone leaves open: how far did we really drive, how long did it take, and which way exactly did we go. Looking back, that is often worth more than the plan — and it makes a better basis for estimating the next trip.
Recordings always belong to a journey (Journeys). So this is not about logging your movements in general, but about exactly the leg you are driving, cycling or walking right now.
28.2 Starting and stopping a recording#
- Open the trip and, within it, the journey you are currently on.
- Scroll to the Recorded route card.
- Tap Start recording. The first time, iOS asks for permission to use your location — without it, Etappe cannot log anything.
- While recording, the card shows a red dot along with the distance covered so far and the number of points.
- When you arrive, tap Stop recording.
After you stop, Etappe asks whether the recorded route should replace the planned route draft. You can decline and do it later (see 28.5 Applying the route: writing km and driving time to the journey).
Only one recording runs at a time. If you try to start a second one, Etappe tells you that a recording is already running for another journey.
28.3 What gets logged — and what the device needs for it#
Etappe stores a sequence of points with timestamps. It doesn’t record every second but filters: a new point is added only once you have moved far enough or changed direction. That keeps the file small and the line clean without distorting the route.
Recording continues when you leave the app or lock the screen — meanwhile iOS shows the familiar indicator that an app is using your location. You can end it at any time in the app.
A word on battery: a recording lasting several hours uses a noticeable amount of power. On long legs, a charging cable in the car is worth it.
All points stay on your device and are not sent to anyone — see Your data.
28.4 Comparing the planned and recorded route#
On the map in the journey detail you see both lines:
| Line | Meaning |
|---|---|
| dashed, teal | the planned route draft with your waypoints |
| solid, orange | the journey as actually recorded |
The legend below the map names both again and shows how many waypoints the plan has. As long as you don’t apply the recording, both lines stay side by side.
28.5 Applying the route: writing km and driving time to the journey#
With Apply route you make the recording the definitive route. Three things happen:
- The dashed draft disappears from all maps; the orange line stays.
- The recorded kilometers become the journey’s distance.
- The time between the first and last point becomes the driving time.
There is no button to undo this; if you want to work with the draft again, delete the recording or enter the values by hand.
28.6 Key figures: average speed and estimated consumption#
Once a route has been applied, the card shows a row of key figures: kilometers, driving time, average speed and — if the journey is assigned a vehicle with a consumption value on record — the estimated fuel or energy needed for this leg.
Consumption is calculated from the distance and the value in the vehicle profile (Vehicles), not measured. For the trip finances, what counts is the fuel receipt you record as an expense (Budget).
28.7 Sharing a recording as GPX or deleting it#
Next to each recording are two icons: the share icon exports the track as a GPX file — so you can bring it into other map or touring apps. The trash icon deletes the recording after a confirmation; the journey itself is kept.
More on the other output formats in Exports and printouts.
28.8 If the app was terminated during a recording#
If the app is terminated in the middle of a recording — for example because the device restarts — Etappe finishes the recording itself on the next launch: the last recorded point counts as the end. Recordings with fewer than two points are discarded, because they don’t make a route.
If you use Etappe on two devices, a recording running on the other device is not affected.
29. Journal#
The journal is the looking-back part of a trip. While accommodations, journeys and activities describe the plan, this is where you record what actually happened: text, a highlight, photos, a spot on the map. At the end, all of it can be exported as a PDF.
You reach the section through the trip’s section picker (the eye in the toolbar); the Journal tile there shows the number of entries. As long as nothing has been recorded, it reads No entries yet with the button Write entry.
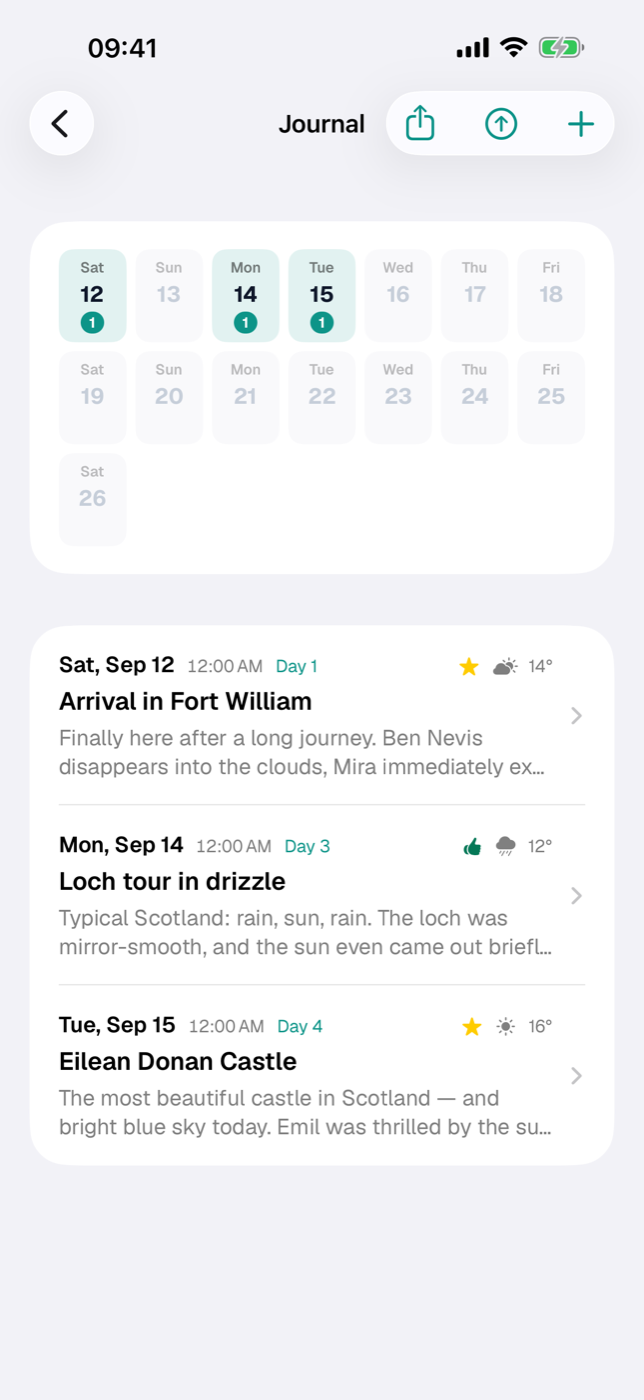
29.1 Creating a journal entry#
The plus at the top right opens a menu with three options:
| Menu item | What happens |
|---|---|
| Empty entry | Form with a default date, otherwise blank |
| Here & now | Form with the current time and GPS location; meanwhile “Preparing entry …” appears briefly |
| From photo … | Photo picker; date and location come from the image (see 29.2 Attaching photos — date and location come from the photo) |
The form is called New entry and has four sections:
- Day — Date (the calendar highlights the trip period), Time, Title and Mood.
- Entry — the large text field What happened? and, below it, Current highlight.
- Location — country, map selection and coordinates (see 29.3 Setting a location or choosing it on the map).
- Weather — the Weather picker with categories from sunny to thunderstorm and the field Temperature (°C). You enter both yourself; they then appear in the list, in the entry and in the PDF.
Save creates the entry, Cancel discards it.
The defaults are sensible, but nothing is set in stone: the date is today if it falls within the trip period, otherwise the trip’s start date. The time is the current time for today and 12:00 PM (noon) on other days. If the trip has exactly one country, it is already selected (Countries).
Several entries on the same day are expressly allowed — morning and evening can stand separately. New entries go to the end of their day.
Two more routes lead to the same form: a long press on the trip map, where you choose the type Journal in the New entry dialog (Map), and the quick action Journal entry, which opens the camera first (Quick actions from the Home Screen).
29.2 Attaching photos — date and location come from the photo#
Photos are attached to an opened entry. In the Photos card, tap Add photos and choose up to 20 images. They appear as a grid of tiles; a long press on a tile offers Delete photo.
When adding, Etappe reads the capture data stored in the image:
| Value in the photo | Used as | If missing |
|---|---|---|
| Capture date with time | Date and time of the entry (only with From photo …) | today’s date |
| GPS coordinates | Location of the entry | no location |
With From photo …, this happens when the entry is created, before the form even opens. If you attach photos to an existing entry, Etappe asks: Use location from photo? with Apply and No. The question only appears when the entry has no location yet — a location that has been set is never silently overwritten. The first photo with coordinates is used.
When saving, Etappe scales each image down to at most 2,000 pixels on its longer edge and stores it as a JPEG. The capture data is dropped in the process — it has already been read by then, but the copy in the journal no longer carries it. How much space the photos take up is shown in Storage and files.
29.3 Setting a location or choosing it on the map#
The Location section has three things side by side:
- Country — the choice is the trip’s countries, plus Not specified. The country’s flag later appears in the list and in the entry.
- Choose on map — opens the Choose location map. A tap sets the marker, Current location jumps to your position, Apply writes the coordinates into the form. If a location is already set, the coordinate pair replaces the label.
- Latitude and Longitude — for entering values directly.
In the opened entry, the Location map shows the point with a marker; you can pan and zoom in it. Without a location, there is no map at all.
29.4 Mood, highlights and notes#
Mood is a single value with five levels, plus Not specified:
| Mood | Shown as |
|---|---|
| great | yellow star |
| good | green thumbs up |
| okay | gray equals sign |
| so-so | orange thumbs down |
| bad | red cross |
Current highlight is a single line for the moment that made the day. In the entry it stands out with a sparkle symbol; in the PDF it gets its own colored box.
The actual text goes in What happened?. The field grows as you type and shows up to 15 lines. Blank lines between paragraphs pay off: the PDF breaks long entries exactly at these points. The Title is optional; without one, the entry carries only its date.
29.5 Browsing and editing entries#
The list is chronological, oldest first. The arrow button at the top right reverses the order — Newest first or Oldest first.
On multi-day trips, a day grid sits above the list: each travel day as a tile with weekday and date, days with entries with a count pill. A tap jumps to the first entry of that day; days without an entry can’t be tapped. Entries outside the trip period still get a tile.
Each row shows weekday and date, the time, the number of the travel day (Day 3), the country flag and mood symbol, the weather you entered with temperature, plus the title and the first two lines of text. Counting starts at the trip’s start date; entries before it get no number.
- Open: tap the row. Edit at the top right opens the same form as when creating, now titled Edit entry.
- Delete: swipe the row to the left.
If you move the date to a different day while editing, the entry goes to the end of that day.
29.6 The journal as a PDF#
In the journal list, the share symbol at the top right (Share as PDF) generates the document; without entries, the button is disabled. The same command is in the trip’s share menu as Journal as PDF. The structure:
- Cover page with the trip’s cover image, the heading “Travel journal”, trip title, period, country flags and the counts of entries and photos.
- One page per entry with date and time in the header, title, the pill Day 3, the mood as a capsule, the highlight box, the text paragraph by paragraph, the photos two side by side and the coordinates at the foot.
- If an entry doesn’t fit on one sheet, it continues on further pages, marked Continued.
Photos are scaled down to 1,200 pixels on the longer edge for the PDF so the file stays manageable. Then the iOS share sheet opens: save, print, send. The other output formats are listed in Exports and printouts.
30. Quick actions from the Home Screen#
On the road, every tap counts. That’s why Etappe attaches two quick actions directly to the app icon: one press takes you to the day’s program, or you take a photo that immediately becomes a journal entry — without tapping your way through trip, section and form first.
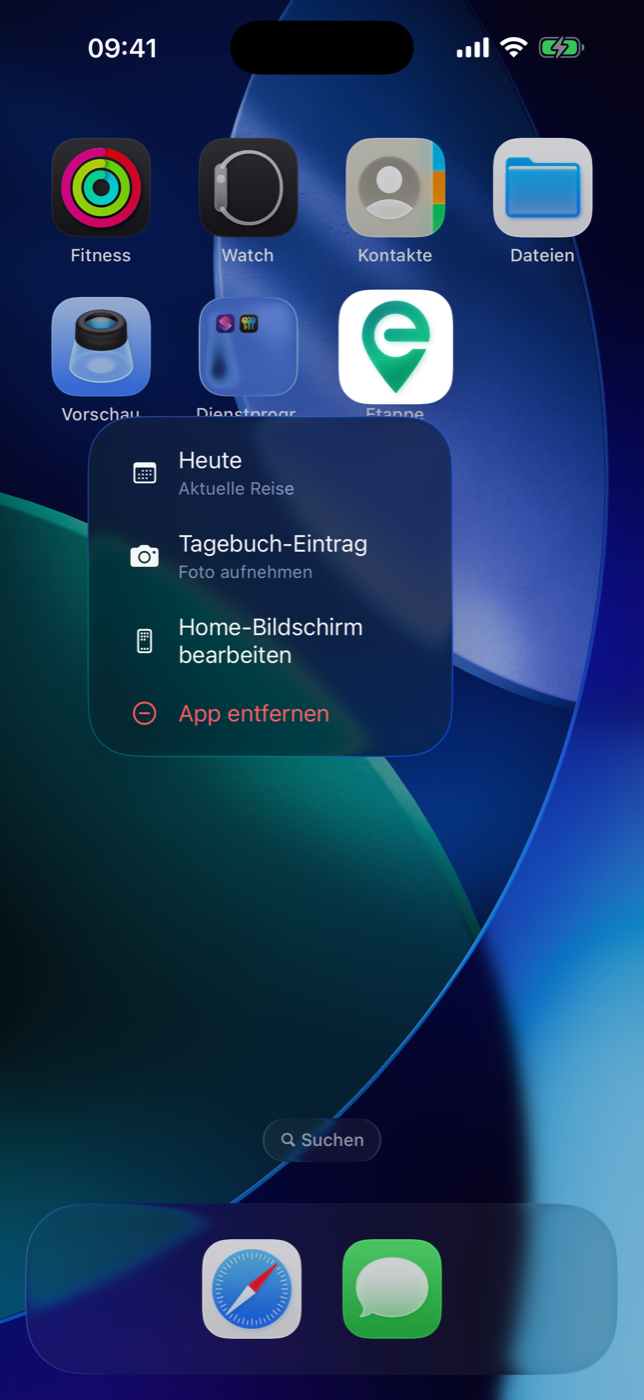
30.1 Press and hold the app icon#
Press and hold the Etappe icon on the Home Screen. Two entries unfold beneath the icon:
| Quick action | Subtitle | What it does |
|---|---|---|
| Today | Current trip | Opens the Today screen of the current trip |
| Journal entry | Take a photo | Camera, then a new journal entry |
Both are built into the app and available right after installation — you don’t need to have launched or set up the app first. Both do require a trip that is under way, though (see 30.4 Requirement: a trip with the status “Under way”).
30.2 Opening “Today” directly#
Today shows the day screen of the current trip full-screen on top of whatever is open at the moment. You see the same cards as in the regular Today section: the day’s program items to check off, ongoing overnight stays, jumps into the details, documents and place markers (Today).
At the top left is Done. It closes the quick action and takes you back exactly where you were before.
30.3 A journal entry with a photo in one step#
Journal entry is the quick route for the moment when you see something and want to capture it:
- Etappe opens the camera full-screen.
- You take a photo and confirm it.
- Etappe immediately creates a journal entry with today’s date and the current time, attaches the photo and saves both.
- The entry then opens for editing — title, text, mood, highlight, place and the other fields as described in Journal.
The entry is only created when you tap Save — just like the normal way via the journal. If you tap Cancel in the form, nothing remains; the photo you took is discarded as well. If you cancel the camera already, nothing happens either.
When attached, the photo is scaled down and stored as JPEG so the database doesn’t grow unnecessarily (Documents and receipts).
If no camera is available, Etappe skips steps 1 and 2 and creates the entry without a photo — so you never end up in a dead end.
This quick action writes data and therefore needs write access. If the trial has expired and the full version is not unlocked, the purchase notice appears instead of the camera or the form (Trial and full version).
30.4 Requirement: a trip with the status “Under way”#
Both quick actions refer to the trip you are currently on. Etappe looks for trips with the status Under way and prefers the one whose date range includes today. If there is no such trip, the first trip with this status is used.
If there is none at all, the alert No current trip appears with the text: “There is currently no trip with the status ‘Under way’. Set this status on your current trip to use the quick actions.” A tap on OK dismisses it.
As a rule, you don’t need to do anything for this: Etappe updates the status itself at app launch and when you open the trip list — Making arrangements becomes Under way on the first day of the trip and Past after the last day. Trips in other statuses (Considering, Bucket list, Planning) and archived trips are left untouched. If your trip is still in planning or has no start date, set the status by hand in the trip form (Creating a trip).
30.5 Interaction with the launch screen and app lock#
A quick action doesn’t push in ahead. Etappe remembers your choice and only carries it out once two conditions are met: the launch screen has finished, and the app is unlocked. So if a PIN or Face ID is set up, unlocking comes first, and right after that Today or the camera opens (App lock).
This applies equally whether Etappe was closed completely and starts fresh, or whether the app was only in the background.
31. Overview#
The Overview is the bird’s-eye view: it doesn’t show one trip in detail but what matters right now across all your trips. You don’t enter anything here — every card is an entry point and takes you to the place where you actually do the work.
On iPhone you reach it via More → Overview, on iPad via the Overview entry in the sidebar. Not to be confused with Today: that belongs to a single trip and answers the question “What’s on today?”, whereas the Overview looks across everything you have.
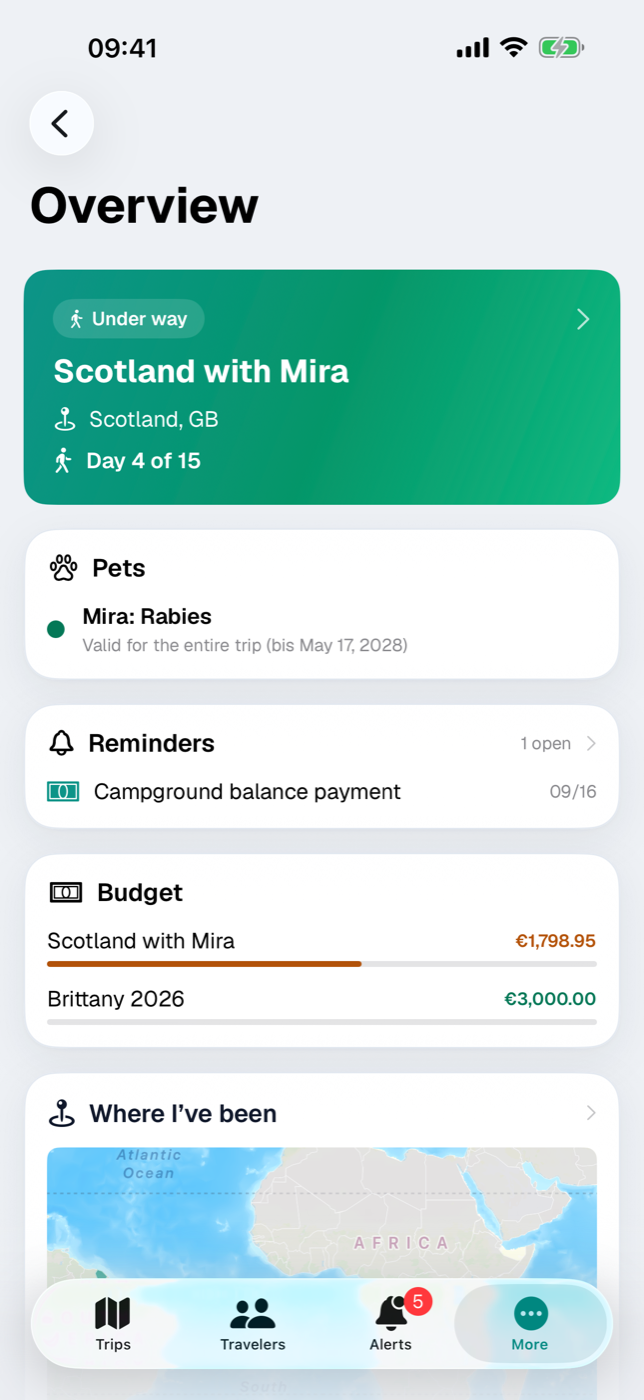
31.1 Next and current trip#
At the very top sits a wide card in the app’s color gradient. It shows the trip’s status pill, the title, the Region (if filled in) and the day counter. A tap opens the trip.
Which trip ends up there is decided by three rules:
- If a trip is under way today — today’s date lies between start and end, both days included — it takes precedence. If several are under way, the one that started first wins.
- Otherwise Etappe takes the next upcoming trip, i.e. the one with the earliest start after today.
- If there is none of those either, the most recently created trip without a start date steps in — instead of the day counter it then reads “Period still open”.
Trips that have already ended and archived trips are never considered. If the end date is missing, the start also counts as the end. Only when there is no current, no future and no undated trip does the card disappear entirely.
Directly below, a second card may appear: Pets. It shows up only if pets are assigned to the displayed trip and at least one of its countries requires a rabies vaccination. For each animal there is then a status-light row “Name: Rabies” with plain-text wording next to it, such as “Valid for the entire trip” or “Expires during the trip”. The full check, including the deworming treatment window, is in Entry checklist.
31.2 Day counter and countdown#
The trip card contains exactly one line with a time reference — which one depends on where you currently stand:
| Situation | Line | Calculation |
|---|---|---|
| Trip under way | Day 3 of 10 | days since start + 1; total duration with both boundary days included |
| Trip upcoming | 42 days to go | calendar days from today to the start |
| Trip without start date | Period still open | — |
Whole calendar days are counted, not hours: the day you set off shows Day 1, the day you head home shows the last day. A trip from May 1 to 10 has ten days, not nine.
The day counter needs both dates. If a trip has only a start, the card shows the countdown, and from the start day on the line stays empty — add an end date then (Creating a trip).
31.3 Open reminders and document expiries#
Two narrow cards take care of deadlines.
Reminders lists the reminders not yet done from everything you have — trip-related and standalone alike; only reminders of archived trips are left out. The header shows the total as “N open”, below it the three due next with type symbol, title and date as day and month. A date that has already passed is shown in red. The header is what you tap: it takes you to the full list (Reminders); the individual rows are display only.
Document expiry collects ID documents of people and pets whose validity ends within the next six months or has already run out — sorted by expiry date, at most five entries. Documents marked as permanently valid never appear here, nor do documents of archived people or pets. Each row names “Name: Document type” and below it the date: as long as the document is still valid, it reads “valid until Mar 14, 2027” next to an orange dot; if it has expired, “expired on Mar 14, 2025” next to a red one. The header takes you to Travelers, where you edit the document (People).
Both cards are a selection. The deadlines in full, with reasons, are in Alerts.
31.4 Budget status lights across all trips#
The Budget card stacks up to three trips, sorted by start. A trip is included only if both apply: its status is Planning, Making arrangements or Under way, and a budget limit is set. Trips you are considering, bucket-list entries, ended and archived trips are left out.
For each trip you see the title, on the right the remaining amount in your base currency and below it a bar that sets the expenses so far against the limit. Both carry the same status-light color (if Etappe has no rate for your base currency, “No rate for … — amounts in EUR” appears below the card, Budget):
| Color | Remaining budget |
|---|---|
| green | more than 50 % |
| yellow | more than 20 % |
| orange | 0 to 20 % |
| red | budget exceeded |
When the budget is exceeded, the bar stays full and the amount turns negative. Tapping a row opens that trip’s Budget screen; what counts toward expenses is explained in Budget.
31.5 “Where I’ve been” on the world map#
The bottom card shows a small world map of the countries you have visited. It is the only one that is always there — even if you haven’t been anywhere yet.
| Color | Meaning |
|---|---|
| teal | visited country |
| gold | your chosen home country (Home); without a selection there is no gold |
| gray | not yet visited |
A country counts as visited if it belongs to a trip with the status Under way or Past — or if you have marked it by hand. You can pan and zoom the small map; tapping and marking countries only works in the large view, which you reach via the Where I’ve been header (Where I’ve been).
31.6 Which card disappears when#
The Overview has no empty placeholders: whatever has nothing to report doesn’t appear at all. The order of the cards is fixed.
| Card | Appears only if … |
|---|---|
| Trip card | a trip is under way, still upcoming or created without dates |
| Pets | that trip has pets and a country requires a rabies vaccination |
| Reminders | at least one reminder is open |
| Document expiry | a document expires within six months or has expired |
| Budget | a planned or current trip has a budget limit |
| Where I’ve been | always |
If no trip has been created at all, a notice replaces the whole screen: “Welcome to Etappe — Create your first trip under ‘Trips’ — or import a backup under ‘Backup’.” How the import works is described in Backup.
32. Alerts#
An expired passport usually gets noticed exactly when it’s too late. The Alerts section turns that around: Etappe checks documents, vaccinations, deadlines and vehicle documents against the trips that are coming up or under way, and gathers everything that stands out in one place. On the iPhone that is the third tab, on the iPad an entry in the sidebar.
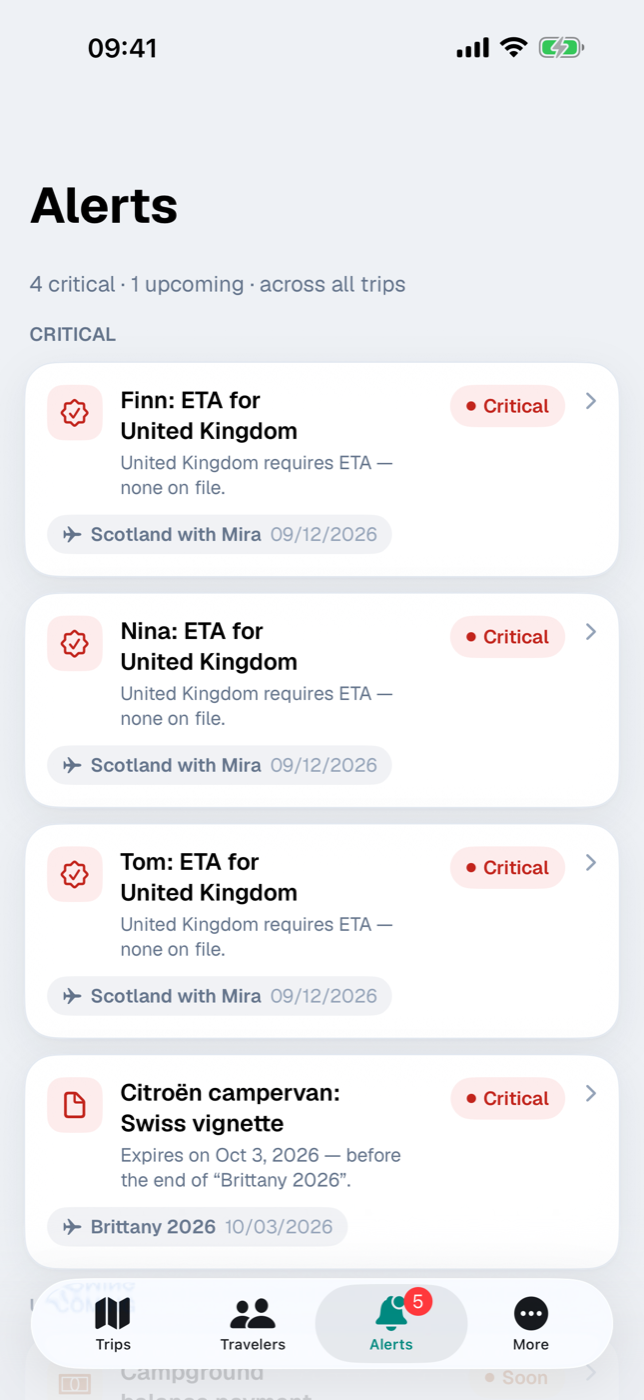
32.1 How alerts come about#
Alerts aren’t stored; they’re recalculated every time you open the list — there is no “Refresh” button. Enter a new “Valid until” date, and the alert is gone the next time you look.
Almost all rules refer to active trips. A trip counts as active when it meets all three conditions:
- Its status isn’t “Past”.
- It has a start date.
- Its end is today or later (if the end date is missing or lies before the start, the start day counts instead).
So trips without dates trigger nothing, and neither do completed ones — and archived people, pets and vehicles stay silent.
At the top there’s a line such as “3 critical · 5 upcoming · across all trips”. When nothing is open, it reads All clear. As long as your data is entirely empty — no trips, and no people, pets or vehicles either — it reads Nothing to check yet instead: once travelers and trips exist, Etappe warns you here about deadlines and expirations.
32.2 Critical and upcoming — the two levels#
Every alert has exactly one of two levels. The list is grouped accordingly: CRITICAL at the top, UPCOMING below it; within a group by date, entries without a date last.
| Level | Pill on the card | Meaning |
|---|---|---|
| critical | Critical | the deadline has passed or will run out before or during an active trip |
| upcoming | Soon | the deadline is approaching but isn’t critical yet |
Every card shows a symbol, a title, the reason with a date, and the level pill; if it belongs to a trip, a chip with the trip title and date follows below.
The badge on the Alerts tab counts both levels together, not just the critical ones. When nothing is open, the tab carries no number. The iPad sidebar shows the same number on the Alerts row.
32.3 Expiring ID documents, passports and driver’s licenses#
Checked are the ID documents of people and pets (People, Pets) that have a date in the Valid until field; without that date, a document never appears here. It enters the list when 180 days or less of validity remain — expired documents included, and permanently so.
| Situation | Level |
|---|---|
| expired | critical |
| expires before the end of an active trip with this person or pet | critical |
| expires in 180 days or less, no trip affected | upcoming |
If the validity runs out before the end of an active trip, the reason names the trip. For documents that have already expired, it only says “Expired on …” — the trip then appears solely in the chip below.
32.4 Minimum passport validity per destination country#
If a country has a minimum validity in months on file (Countries), Etappe adds those months to the start of the trip and compares.
The check runs per country of the trip and per non-archived participating person, using that person’s passport with the latest validity — national ID cards don’t count here. If the passport doesn’t last until the calculated cut-off date, there is an alert; it is always critical and names the country, the months required and both dates.
32.5 ETA and visa#
If ETA required or Visa required is set for a country, every participating person needs an ID document of type ETA or Visa respectively that is valid until the end of the trip. A checkmark at “Apply for ETA” isn’t enough — what counts is the document on file (Entry checklist).
This alert is always critical. Four cases trigger it: no matching document, an expired document, expiry before the end of the trip — or a document without a “Valid until” date and without the Permanently valid checkbox, whose validity therefore counts as unknown. A permanently valid document, on the other hand, always satisfies the requirement.
32.6 Vaccinations: what shows up here#
There is no separate alert rule for people’s vaccinations. A country’s vaccination recommendations are in the Entry checklist; whether a vaccination is expiring, you can see on the person’s profile. If you want to be reminded, create a reminder of type Vaccination (Reminders) — it shows up in this list via 32.10 Overdue reminders. The only vaccination with a rule of its own is the rabies vaccination of pets.
32.7 Rabies and the deworming treatment window#
Rabies. If an active trip has at least one country with a rabies vaccination requirement, the vaccination status of every pet on the trip is assessed over the trip period. Green triggers nothing, red becomes critical, orange becomes Soon; the reason is the same text as in the checklist.
Deworming treatment, not yet done. For every country with a deworming treatment requirement, Etappe calculates the time window before the border crossing (failing that, before the arrival of the first journey into that country, otherwise before the start of the trip) — one separate alert per trip, country and pet. If a trip has two countries with a deworming treatment requirement, two cards therefore appear in the list, each with the country code in its title. What counts in each case is the end of its own window:
| Days until the end of the window | Level |
|---|---|
| more than 14 | no alert |
| 4 to 14 | upcoming |
| 3 or less, including past | critical |
Deworming treatment done. Etappe then checks the other direction: if the planned border crossing falls outside the window that follows from the recorded treatment time, the alert is critical and names both times.
32.8 Vehicle documents and vignettes#
Checked is every document of a non-archived vehicle with a “Valid until” date: Inspection, Registration, Insurance, Roadside assistance coverage, Emissions sticker, Vignette or Other (Vehicles).
| Situation | Level |
|---|---|
| expired | critical |
| expires before the end of an active trip with this vehicle | critical |
| expires in 60 days or less | upcoming |
32.9 Medication doses#
If you enter a Next dose for one of a pet’s medications, Etappe speaks up as soon as the date is 7 days or less away: until then as upcoming, from the day after the date as critical. This alert isn’t tied to any trip and appears without a trip chip.
32.10 Overdue reminders#
Open reminders have a due date and a lead time in days (Reminders).
- Due time passed: critical.
- Lead time begun — due day minus lead-time days —: Soon.
Completed reminders disappear immediately. The alert takes its symbol and trip reference from the reminder.
32.11 Completing an alert or opening its cause#
Every alert card can be tapped — a small arrow on the right indicates it — and opens the view where the cause gets fixed. That is exactly where an alert is completed; it has no completed state of its own:
| Alert | Tapping opens | What to do |
|---|---|---|
| Document, minimum passport validity, ETA, visa | Detail of the person or pet | Add the document or fill in “Valid until” |
| Rabies | Checklist of the trip | Add the vaccination to the pet |
| Deworming treatment | Checklist of the trip | Check it off, set the time and the border crossing |
| Vehicle document | Vehicle detail | Update the document |
| Medication | Pet detail | Set a new next dose |
| Reminder | Reminders list | Check it off |
The one exception: a document alert with no person and no pet assigned remains display only.
There is no “swiping away” an alert — it has no state of its own. If a deadline should stop concerning you for good, archive the person, pet or vehicle.
33. Where I’ve been#
After a few years of traveling, it’s easy to lose track of all the places you’ve already been. “Where I’ve been” answers that at a glance: a world map on which every visited country is colored in, and below it a counter and the list of countries with the number of trips and the years.
The map is built from what is already in Etappe — there is nothing extra to maintain. For countries from the time before the app, you simply tap them on the map.
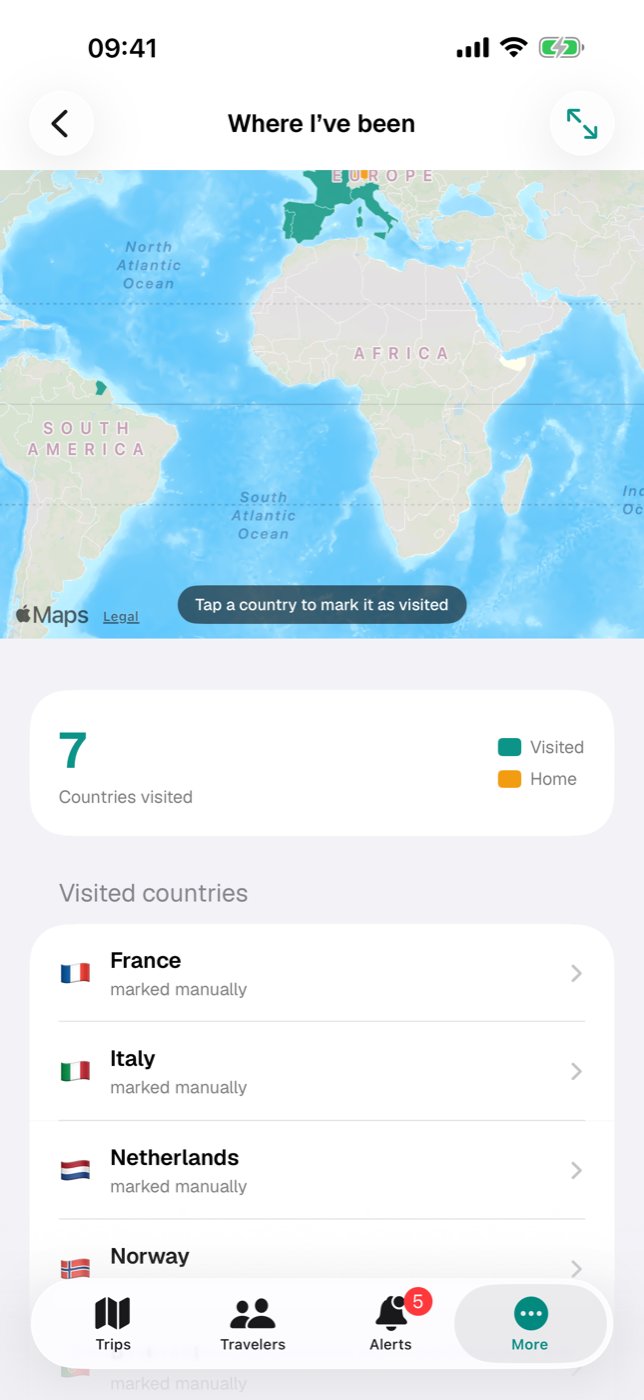
33.1 The world map of visited countries#
The map shows 175 country areas in up to three colors. The legend to the right of the counter names the ones in use:
| Color | Meaning |
|---|---|
| Teal | Visited — via a trip or marked by hand |
| Gold | Home — the home country you chose in Settings (section 33.5); without a selection there is no gold country and no legend entry |
| Gray | not visited yet |
You can zoom and pan the map; rotating and tilting are disabled so the world view keeps its familiar orientation. The map is drawn in muted colors and points of interest are hidden so the country outlines stay in the foreground.
If you have set a home location (Home), it appears here too: as a white house on a green circle, the same marker as on the maps of your trips. The house is display only — it can’t be tapped; a tap at that spot hits the country underneath. Without a home location there is no house.
At the top right is Full screen. It opens the same map filling the screen, with the note “Tap a country to mark it · rotate iPhone for a wider view” along the bottom edge. The cross at the top right closes it again.
Not every country has an area of its own: microstates such as Monaco, Liechtenstein, San Marino, Andorra, Malta or Singapore are not included in the map data as separate outlines. You therefore can’t tap them on the map, and they aren’t colored in there. For them there is the section Microstates without map area below the map (section 33.3) — there they can be tapped just like a map area.
33.2 When a country counts as visited#
There are exactly two ways, and they can be combined.
From a trip. Every country assigned to a trip (Countries) counts as visited as soon as the trip has the status Under way or Past. Trips in planning, trips you are still considering and bucket-list entries don’t count — otherwise the map would be a wish list rather than a tally. Whether a trip is archived makes no difference; it keeps counting.
By hand. Tap a country on the map — it turns teal and then appears in the list. The hint pill at the bottom edge of the map says so: “Tap a country to mark it as visited”. A second tap removes the mark. This is the way for everything you experienced before you used Etappe, and for countries you don’t want to create a trip for.
Two cases deliberately don’t respond to a tap: countries that already count as visited via a trip, and the home country — provided you have chosen one in Settings. Both are fixed and can’t be deselected by tapping. Without a chosen home country, every country can be marked as usual.
You can also get rid of a manual mark in the list: swipe the row to the left and tap Remove. This swipe action exists only for countries labeled “marked manually” — a country attached to a trip only disappears once you change the assignment or the trip itself.
Marking is a change to your data. If the trial has expired and the full version isn’t unlocked, the tap opens the purchase notice instead (Trial and full version). You can always view the map.
33.3 The counter and the list of countries#
Below the map, the number of visited countries is shown in large type, next to it “Country visited” or “Countries visited”. All countries from both sources are counted together — without the home country, if one is chosen. It would be part of almost every trip and would only inflate the tally; that’s why it appears neither in the counter nor in the list, only in gold on the map. Without a chosen home country, every visited country counts.
In the Visited countries section below, every country is listed with flag and name, sorted alphabetically. The second line tells you where the entry comes from:
| Second line | Meaning |
|---|---|
| “3 trips · 2023, 2025” | number of trips with this country, plus the years of the departure dates |
| “marked manually” | only tapped on the map, no trip on record |
Tapping the row opens the trips of that country as cards, newest first. There you see all trips with this country, including planned ones — the count in the row above sticks to “Under way” and “Past”. For a country that is only marked, it says “No trip to … yet”.
If the list is empty, Etappe explains both ways in one sentence: tap, or create a trip with the matching status.
Microstates without map area. Below the country list follows a separate section with all countries from your country records, your trips and your manual marks that have no outline of their own on the world map — sorted alphabetically. Each row shows flag and name, and on the right a color swatch following the logic of the map: teal visited, gold home (only with a chosen home country), gray not visited yet. Tapping the row works like tapping a map area: it marks the country as visited, and a second tap removes the mark. The rules from 33.2 apply here as well — countries with a trip and the home country don’t respond to a tap.
The list starts out collapsed: the section shows only the button Show microstates; tapping it expands the country rows, and Hide microstates collapses them again. That way the enumeration doesn’t dominate the view as long as you don’t need it — right after a country import it would otherwise be longer than your list of visits. If there are no countries without map area in your data at all, the section doesn’t appear in the first place.
There is no grouping by continent here — you’ll find that in the country records, in the Continents view (Countries).
33.4 Getting there via “More” or the Overview#
Two paths lead to the full view:
- Directly: on the iPhone More → Where I’ve been, on the iPad the entry of the same name in the sidebar.
- Via the Overview: scroll all the way down to the Where I’ve been card and tap its heading — the arrow on the right leads to the full view.
The small world map on the Overview shows the same colors and can also be zoomed and panned. But you can’t mark countries there: on the Overview, a tap on a country has no effect, so you don’t color anything in by accident while scrolling. For that, go to the full view. The home location’s house is also missing from the small map — it belongs to the full view.
33.5 The home country in gold#
The gold country is your home country from More → Settings → Home (Home). If one is chosen there, it is always colored in — regardless of whether you have ever recorded a trip in it — and can’t be tapped. If the setting is Not specified (the default), there is no gold country: the legend then shows only “Visited”, and the country you actually live in behaves like any other — gray until you tap it or a trip brings it along.
It’s the same setting that leaves out the home country’s flag on the small trip tiles of the trip list (Home) — chosen once, it takes effect in both places.
Your manual marks are ordinary app data: they go into the backup and come back with an import (Backup).
34. Exports and printouts#
For a printout for the glove box or for companions who don’t use Etappe, the app generates finished files: PDFs for printing and a calendar file for importing. They are created on the device, from the state your data is in at that moment.
These exports are meant for reading and passing on. A backup you can restore from is something else — see Backup.
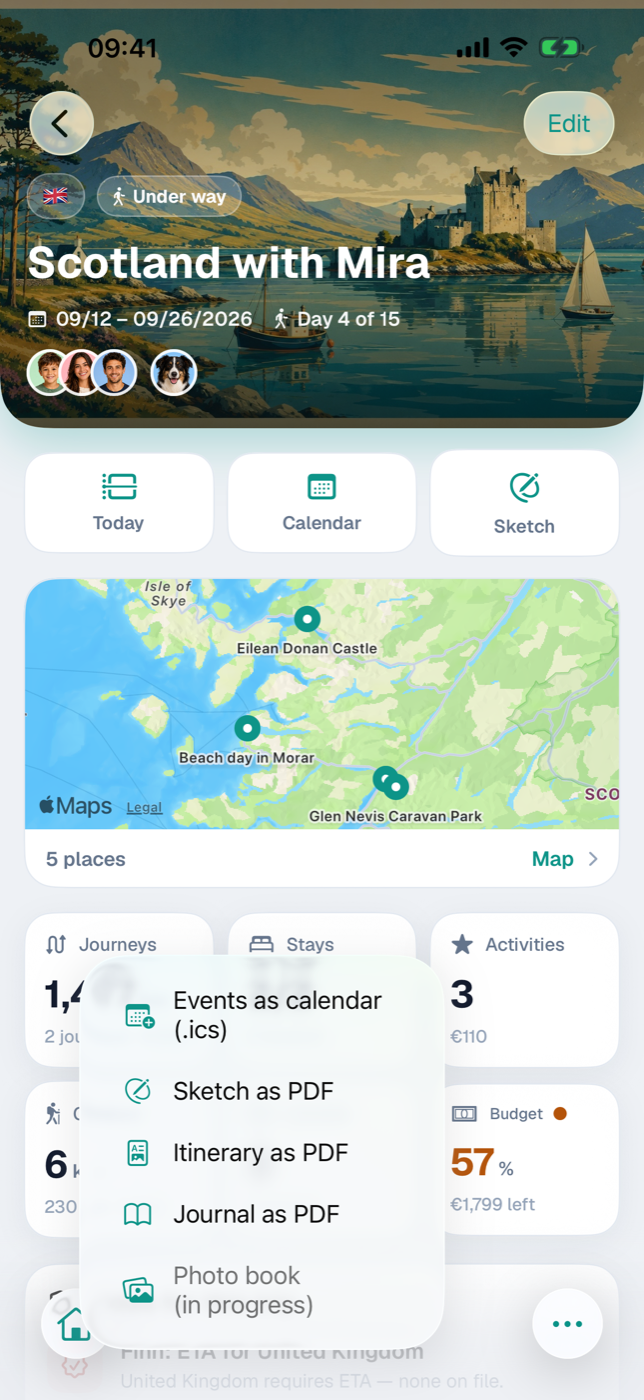
34.1 The trip’s Share menu#
Open a trip. In the bar at the bottom edge sits Share; a tap unfolds the menu upward:
| Entry | Result | Not selectable if … |
|---|---|---|
| Events as calendar (.ics) | calendar file | the trip has no calendar day at all |
| Sketch as PDF | the trip has no blocks in the sketch | |
| Itinerary as PDF | PDF, preceded by a dialog | the trip has no calendar day at all |
| Journal as PDF | the trip has no journal entry | |
| Photo book (in progress) | — | grayed out |
A trip has a calendar day as soon as a period is entered or any dated entry exists — an accommodation with check-in, a journey, an activity, an outdoor activity or a journal entry. Without either, the calendar file and the itinerary would be empty, which is why those entries stay gray.
Photo book (in progress) is already visible as the placeholder for a future output format — see What’s next.
Once generated, the iOS share sheet opens (34.8 Where you can share to). An export is not a write operation — the outputs remain available even when you can only read your data (Trial and full version). The packing list takes its own route (34.4 Packing list as PDF).
34.2 Itinerary as PDF — one page per day, optionally with receipts#
If you choose Itinerary as PDF, a half-height dialog of the same name appears first, with one decision and one button:
- If receipts are marked, it shows the Attach booking receipts (N) switch — N is their number; it starts out off.
- Otherwise it shows a note that only the itinerary is created.
- Create PDF generates the file.
The cover page carries the title, the period with weekdays, region and flags, below that companions, pets and accommodations (each with name, period with the number of nights, address).
Then comes one page per day — never two days on one sheet. The header names the weekday and date; on the right sits the “Day N” pill. If the day has a day theme from the sketch (Sketch), it appears in teal directly below the date — on continuation pages too, so every sheet can be matched to its day. Below that, in a subdued style, comes the day’s overnight stay, provided an accommodation covers the adjoining nights: Overnight: ‹name› for the same accommodation in both nights, on arrival, departure and changeover days split into Night before and Night after — as in the day view (Calendar and day view). It is not repeated on continuation pages. Below that, the schedule in chronological order: time or “all day”, symbol, title and place — check-in and check-out, journeys, activities and outdoor activities. Journal entries are deliberately left out; they have their own export. Without a program, the page reads “Nothing scheduled.” A very full day runs over onto a following page marked “Continued”. Included are all days of the trip period plus every day outside it on which something is entered.
With receipts, each receipt is placed directly after the day its booking refers to: accommodation at check-in, journey at departure, activity at its start, outdoor activity on its date. Receipts that can’t be assigned to a day are collected at the end, announced by the divider page More booking receipts. Receipt PDFs are taken over page by page; images each get a page of their own.
Only what you have marked is attached: in the Documents card of an accommodation, journey, activity or outdoor activity, press and hold a file and choose Mark as booking receipt (Documents and receipts). Journal photos and attachments of people or pets are never included.
34.3 Journal as PDF#
Journal as PDF turns your entries into a travel journal. The cover page shows the trip’s cover image, title, period, flags and two counters: entries and photos.
Then comes one page per entry, in chronological order, with date, time, title and the “Day N” pill. Below that, where present:
- pills for mood and for weather with temperature
- the highlight in an emphasized box
- the text, set paragraph by paragraph
- the photos — title image first, then the rest, two per row
- the coordinates of the location
Long entries run over onto further pages (“Continued” in the header). Photos are always downsized so the file stays manageable. On the entries themselves, see Journal.
34.4 Packing list as PDF#
You export the packing list in the trip’s Packing list section via Export as PDF in the toolbar. The menu offers:
- Complete list — all entries; assigned ones carry the person’s name after them.
- For ‹name› — one line per person who has entries assigned. The PDF contains their entries plus everything general without an assignment.
At the top it reads “Packing list · ‹trip›”, in the per-person export supplemented by the name, below that “x of y packed” and today’s date. The entries are grouped by category, each with a checkbox — packed items are checked off, a quantity greater than one appears after the item as “(× 3)”. The finished PDF opens in the preview; its Share symbol takes you to printing or sending (Packing list).
34.5 Sketch as PDF#
Sketch as PDF outputs the planning status while no dates are fixed yet (Sketch). The header of the first page names the title and flags, the period with the number of days — or “No start date yet” —, the “x of y blocks turned into entries” pill and the time of the planning status. Then the blocks run through in sketch order, interrupted by day headers such as “Day 2 · Sat, 07/25”.
Each block appears with symbol, title, brief details (country flag, mode of transport, duration or nights), route text and notes; those already created carry the entry created mark. If a research item is attached, a gray box follows with topic, category, place, cost (in the research item’s currency, with an “≈” amount in the base currency if that differs), link, source and content. Following pages are titled “Sketch · continued”.
34.6 Events as a calendar file (.ics)#
Events as calendar (.ics) writes the trip’s events into a standard calendar file. Etappe doesn’t access your calendar itself — you import the file into the app of your choice.
| Entry | Form in the calendar |
|---|---|
| Overnight stay per accommodation | all-day bar from the check-in day to the check-out day, marked as “free” |
| Day theme | all-day entry with the theme as its title, marked as “free” — the day’s heading |
| Check-in, check-out | event at the stored time |
| Journey | from departure to arrival |
| Activity | from start to end |
| Outdoor activity | from the start time, otherwise all day |
Events without an end time get a duration of one hour; entries without a time become all-day. Journal entries are left out — they are a look back, not an event.
The file is a snapshot, not a subscription: later changes don’t flow into the imported calendar — export again in that case. The ongoing planning is easier to follow anyway in Calendar and day view.
34.7 GPX of a recorded journey#
A recorded route you pass on directly from the recording in the journey detail — as a GPX file for map and touring apps (Recording a journey).
34.8 Where you can share to#
All exports end up in the iOS share sheet. What it offers depends on the device and the installed apps; typical are Print, Save to Files, AirDrop, and Mail or Messages.
Until then, the files sit only in a temporary folder. Whatever you want to keep, save from the share sheet to a permanent location. The names carry the trip title after “Itinerary-”, “Journal-”, “Sketch-”, “Packing-list-” or “Etappe-” (.ics).
35. Backup#
Everything you record in Etappe lives on your device. Backup turns it into a single file that you keep yourself — on your Mac, in the Files app, on a hard drive. It is also the way to move your data to another device if you don’t use iCloud.
You’ll find the section under More → Backup; on the iPad it sits in the sidebar under the same name.
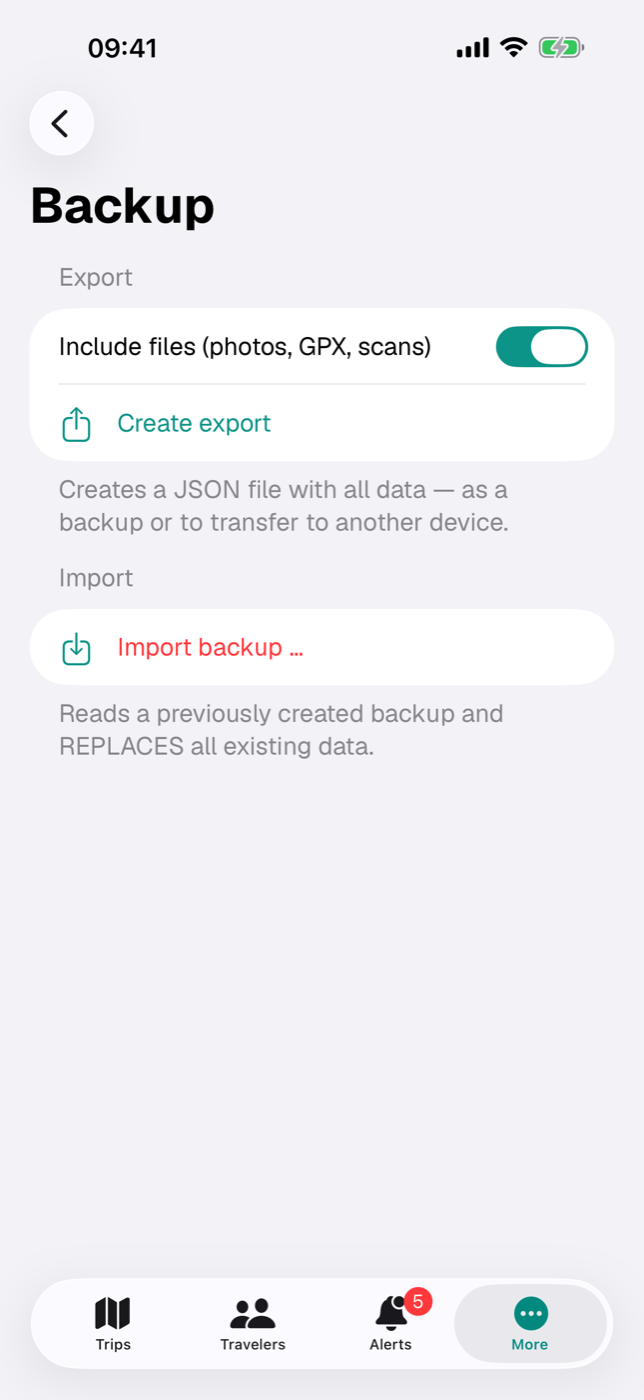
35.1 Why a backup of your own makes sense#
iCloud sync is not a backup: it keeps your devices at the same state — including when you delete. What you remove on one device disappears on the others too (iCloud sync). An export, by contrast, freezes a state and stays untouched from then on.
Good moments for an export:
- before cleaning up under “Storage & files” (Storage and files)
- before loading someone else’s or an older backup
- before switching devices
- after every completed trip, once journal and photos are complete
35.2 Exporting a backup#
- Open More → Backup.
- Use the Include files (photos, GPX, scans) switch to decide whether the attachments go into the file. It is on by default.
- Tap Create export. While it runs, the button reads “Exporting …”; with many photos this takes a moment.
- Below it, a share row appears with the file name and size, such as Share “etappe-export-2026-08-10_14-30.json” (86.4 MB).
- Tap it and put the file somewhere — in Files, via AirDrop, by mail, or in a cloud service of your choice.
The last step is the one that counts: at first, the file exists only in a temporary folder. Only once you’ve stored it somewhere via the share sheet do you actually have a backup. The file name includes date and time, so several backups don’t overwrite each other.
With the switch off, the file becomes many times smaller: only text, numbers and links go in. The document entries are kept with name, type and size, but their content is missing — after such an import, the preview stays empty.
You can export at any time, even after the trial has expired. Importing a backup, on the other hand, is one of the writing functions and requires the full version or a running trial (Trial and full version).
35.3 Restoring a backup — and what happens when you do#
The import replaces the entire data set. It doesn’t merge anything: everything is deleted first, and afterwards the app contains only what is in the file. So two backups cannot be combined.
- In the Import section, tap Import backup ….
- Select the file. Only JSON files are offered; it may be no larger than 500 MB.
- Etappe asks Replace all data? and points out that the existing data will be deleted. Import carries on, Cancel stops without any effect.
- After loading, the Imported section appears with one line per area — trips, countries, people, documents / photos and so on — plus the total. So you can see right away whether the file was complete.
Deleting and inserting run as a single operation. If the import breaks off midway, the old data set is restored; you won’t be left with an empty app. Still: create an export first.
If the file doesn’t fit, Etappe says so in plain words instead of loading something halfway:
| Message | Cause |
|---|---|
| The file is not a valid Etappe export. | Any JSON file that isn’t an Etappe backup |
| Export version … is not supported by this app version. | Backup from a newer format version |
| The file could not be read: … | Damaged or incomplete file |
| “…” is … MB — the maximum allowed is 500 MB. | File over the limit |
If iCloud sync is turned on, an import also affects your other devices: the sync carries over both the deletion and the new data. So don’t run an import “just quickly” on a second device.
35.4 What the backup contains and what it doesn’t#
The file covers your entire data set, not just the trips:
| Area | Contents |
|---|---|
| Records | Continents, countries, places, people, pets, vehicles |
| Trips | Trips, participants, accommodations including campground details, journeys, activities, outdoor activities, pet planning |
| Planning | Sketch blocks, research items, to-dos, entry checkpoints, packing list and packing list templates, budget items, reminders |
| On the road | Journal entries, route recordings, checked-off items in the “Today” view |
| Health & documents | ID documents, vaccinations, vet appointments, medications, vehicle documents, service entries |
| Files | Photos, scans, GPX tracks, cover and profile pictures, country banners — provided the switch was on |
| Map | The countries from “Where I’ve been”, including the manually marked ones |
Not in the file:
- your Settings (display, name format, maps app, home, base currency) — they are quickly set again, and home and base currency are synced between your devices by iCloud anyway (All settings); the file only notes the base currency in its header for information, the import doesn’t change it
- the app lock code; it lives in the device’s keychain (App lock)
- local caches, which refill themselves as needed
- the purchase status of the full version; it is tied to your Apple ID, not to the data
35.5 Moving to a new device#
If you use iCloud sync, the move is already done: sign in on the new device with the same Apple ID, install Etappe and wait for the first sync (iCloud sync).
Without iCloud, the route goes through the file:
- On the old device, create an export with files.
- Store it via the share sheet where the new device can reach it — AirDrop, Files, an email to yourself.
- Install Etappe on the new device and finish the Getting started assistant with Close, without creating countries or travelers — the import replaces everything anyway.
- Open More → Backup → Import backup …, select the file and confirm with Import.
- Check the Imported list and spot-check a trip with photos.
Only then should you reset the old device — and keep the backup file for a while longer.
36. Storage and files#
Text and numbers hardly take up any space. Photos do: a well-documented vacation with journal pictures, booking PDFs and GPX tracks can quickly fill a few hundred megabytes. Under More → Storage & files you can see where that space goes — for trips as well as records — and clean up trip by trip in three stages.
All three actions are final. There is no trash and no undo. Create an export first (Backup) — the confirmation dialogs point this out themselves.
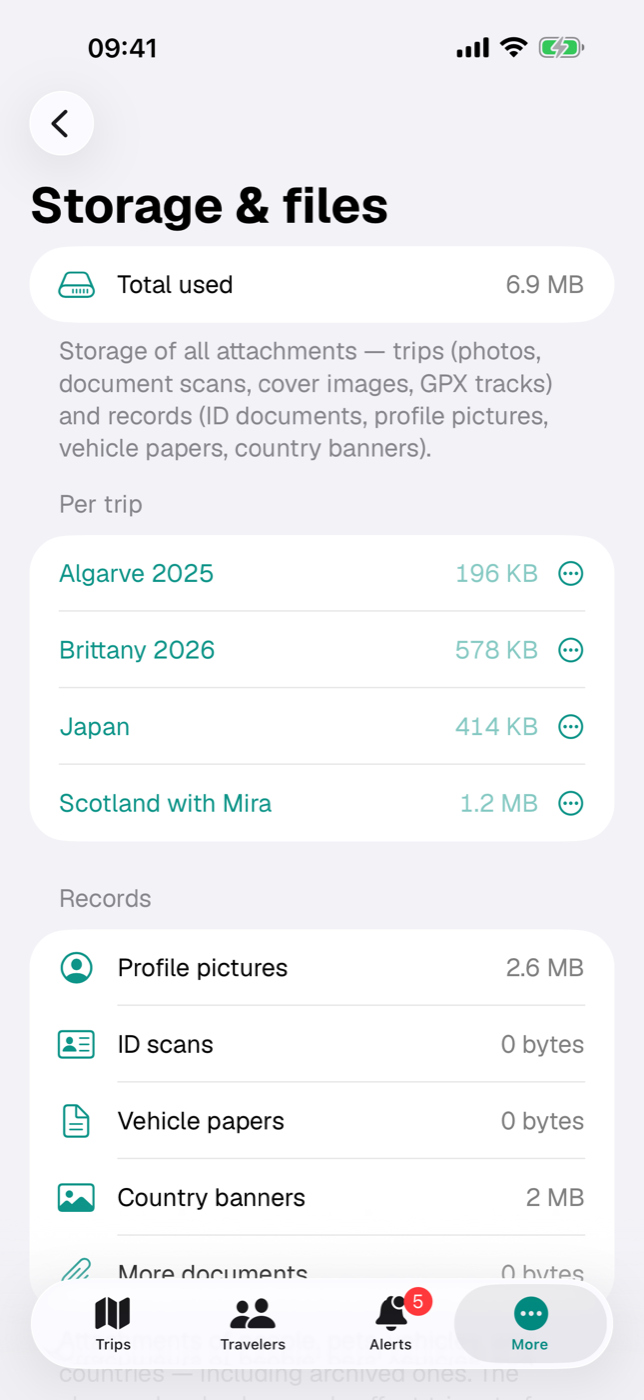
36.1 How much space the attachments take up#
At the very top is Total used — the sum of all attachments, of trips and records alike. Trip attachments include:
- cover photos of trips
- documents and photos attached to trips, accommodations, journeys, activities, outdoor activities and research items
- journal photos and journal cover images
- images attached to a trip’s reminders
- the imported GPX files of outdoor activities
Add to that the attachments of the records; how they break down is shown in 36.3 Storage used by records.
The values are calculated when the screen opens and recalculated after every action. The figure is the space the files themselves occupy; what iOS reports for the app as a whole is naturally somewhat higher. If iCloud sync is turned on, the same attachments also sit in your iCloud storage (iCloud sync).
If there are no attachments at all yet, the screen skips the breakdown: instead of the “Per trip” and “Records” sections, it shows only the note “No attachments yet — photos, scans, and documents appear here as soon as you add some.” The Total used row then shows 0 bytes. The two sections appear with the first attachment.
36.2 Storage per trip#
Below, the Per trip section lists all trips alphabetically with their size; archived ones carry the label “Archived”. If there is no trip yet, it says “No trips available.”
Tapping a row opens the menu with the three cleanup stages:
| Menu item | Effect |
|---|---|
| Remove attachments only | files gone, text and structure stay |
| Reduce to key data | contents gone as well, trip is archived |
| Delete trip completely | the whole trip and everything in it disappears |
Each stage asks first. For the first two, the prompt states how much space will be freed; for complete deletion it says instead that the trip and its contents will disappear irrevocably.
36.3 Storage used by records#
Below the trip list, the Records section shows five rows:
| Row | What counts |
|---|---|
| Profile pictures | the pictures of people, pets and vehicles |
| ID scans | scan photo and file attachment of the ID documents, plus the documents attached to them |
| Vehicle papers | scan photo and file attachment of the vehicle papers |
| Country banners | the banner images of the countries |
| More documents | documents attached directly to people, pets, vehicles or countries |
These attachments belong to no trip; the cleanup stages in the trip list therefore leave them untouched. To free up the space, delete them individually in the respective detail view (Documents and receipts). Archived people, pets and vehicles count too — their space is only freed once you delete the attachments or the whole entry there.
36.4 Removing only a trip’s attachments#
The gentlest stage: it clears away files and nothing else.
- Tap the trip and choose Remove attachments only.
- The Remove attachments? dialog names the trip and the space that will be freed.
- Confirm with Remove or back out with Cancel.
Afterwards, all photos, scans, GPX files and the cover photo of this trip are deleted. What remains is the complete plan: accommodations, journeys, activities, outdoor activities, journal texts, budget, packing list, to-dos.
Two consequences stand out in everyday use: the trip’s card and hero show the automatically generated cover again instead of your photo. And for outdoor activities, the route line drawn from the GPX file and the elevation profile disappear — the values derived from it, such as distance and elevation gain, remain as numbers (Outdoor activities). The document entries themselves are deleted as well, so no empty placeholders are left behind.
36.5 Reducing a trip to key data#
This stage is meant for trips long past, of which you only want to remember that they happened and when.
- In the trip’s menu, choose Reduce to key data.
- The Reduce to key data? dialog lists what will disappear.
- Confirm with Reduce.
The action first removes all attachments as in 36.4 Removing only a trip’s attachments and then deletes the contents:
| Deleted | Kept |
|---|---|
| Journal entries | Title, period, region, status |
| Budget items | Countries, participants, vehicle |
| The trip’s packing list | Accommodations |
| To-dos | Journeys including recorded routes |
| Entry checklist items | Activities |
| Research items | Outdoor activities |
| The trip’s reminders | Sketch blocks |
| Pet planning for the trip |
Finally, the trip is archived: it moves into the Archive group in the trip list and its status is no longer updated automatically. Via the trip’s context menu, you can bring it back at any time with Restore from archive — but the deleted contents don’t come back with it.
The trip’s budget screen still shows the costs from accommodations, journeys and activities afterwards, because those amounts are attached to the bookings themselves, not to the budget items (Budget).
36.6 Deleting a trip completely#
The last step removes the trip with everything attached to it: accommodations, journeys, activities, outdoor activities, journal, photos, budget, packing list, to-dos, reminders.
- In the trip’s menu, choose Delete trip completely.
- A sheet opens, titled “Delete … completely?”, with the note that everything will disappear irrevocably.
- Drag the Swipe to delete slider all the way to the right. An accidental tap therefore deletes nothing. Cancel takes you back out.
Your records are not affected: people, pets, vehicles, countries and packing list templates stay as they are — they belong to no trip.
If iCloud sync is active, the deletion takes effect on all devices. And once again: only an export made beforehand brings the trip back (Backup).
36.7 What this means for “Where I’ve been”#
The country map counts the countries of trips with the status “Under way” or “Past”, plus the countries you marked by hand (Where I’ve been).
- Remove attachments only changes nothing here.
- Reduce to key data doesn’t either: countries and status are kept, after all. The trip still counts, year included.
- Delete trip completely takes the country out of the statistics — unless you were there on another trip or marked it manually on the map.
So if space is all you are running short of, “Reduce to key data” is the better choice than deleting: the trip remains as a row in the archive and as a patch of color on the world map.
37. iCloud sync#
Etappe has no server of its own, no user account and no sign-in. If you use the app on more than one device, iCloud takes care of the syncing: your data lives in the private area of your Apple ID, and every device with the same account works on the same data. There is nothing to set up for this in the app itself.
37.1 How syncing works#
Etappe stores everything in a database on the device first. When iCloud is available, iOS also mirrors that database into the private iCloud database of your Apple ID. Other devices with the same account pick up the changes from there. The path runs only between your devices and your iCloud — nobody else has access to it, not even the app’s developer (Your data).
The entire data set goes along:
- Records: countries and places, people, pets, vehicles along with their documents, service entries and medications, ID documents, vaccinations, vet appointments
- Trips with all their sections: accommodations, journeys, activities, outdoor activities, budget, research, to-dos, entry checklist, packing list, sketch, journal, reminders, participants
- Packing list templates and the countries from “Where I’ve been”
- Attachments: photos, cover photos, profile pictures, document scans, GPX tracks and recorded routes
Attachments are the biggest chunk and count towards your iCloud storage quota. Etappe shrinks images before saving them so that no camera original ends up in the database; how much space a trip takes up is shown under Storage and files.
On top of that there is a second, much smaller channel: the iCloud key-value store of your Apple ID. Etappe uses it to sync four settings that aren’t trip data but should be the same on all devices — home country, home location, base currency and the most recently loaded ECB rate table. If two devices hold different values, the most recent change wins; without iCloud the values stay local on the device (Home).
Etappe has no sync indicator and no “Sync now” button. Syncing is the system’s job and runs in the background.
37.2 Requirements and setup#
| Requirement | Why |
|---|---|
| The same Apple ID signed in to iCloud on every device | The data lives in the private area of exactly this account |
| iCloud turned on, storage available | Photos, scans and tracks take up space in your quota |
| A network connection | Without one, everything piles up locally and goes out later |
| iOS or iPadOS 17 or later | Etappe’s system requirement |
There is nothing to set up in the app: no switch, no sign-in dialog, no pairing of devices. If iCloud isn’t available at launch — because you aren’t signed in, say — Etappe doesn’t block; it simply carries on working locally. The data you have entered up to then is kept, and as soon as iCloud is available again, Etappe resumes syncing at the next launch.
37.3 Several devices working together#
There is no main device and no secondary device. Both work on the same data as equals, and both may create, change and delete. That has a few practical consequences:
- At the first launch on a second device, the data set is still empty and fills up bit by bit. If the Getting started assistant appears, you can simply close it — it only shows while trips, people and countries are all empty. It shows home country and base currency the way the first device set them, as soon as the key-value store has delivered them.
- Duplicate default packing list templates can appear if the second device created them itself before the first sync. Etappe cleans that up automatically at every launch and keeps the same copy on both devices (Packing list templates).
- Don’t edit the same entry on two devices at the same time. Anyone writing to the same accommodation on iPhone and iPad simultaneously has to expect that only one version will survive in the end.
- Deleting takes effect everywhere. What you remove on one device disappears on the other too. Before a big clean-up, an export is worth it (Backup).
- A running journey recording belongs to the device that started it. Launching the app on the other device doesn’t end it — only once no new measurement point has been added for 24 hours will another device close the forgotten recording as well. Once stopped, the finished track travels along like any other entry (Recording a journey).
37.4 What is not synced#
Everything that belongs to operating the individual device deliberately stays there. On a new device you set it up once more:
| Stays on the device | Where to find it |
|---|---|
| Appearance, names in checklists, route planner | More → Settings (All settings) |
| Country data from the perspective of — the override of the perspective | More → Settings, “Home” section (Home) |
| PIN, Face ID / Touch ID, lock interval | More → Settings, “Security” section (App lock) |
| Scheduled notifications for reminders | see below (Reminders) |
| Start of the trial | (Trial and full version) |
| Caches that Etappe creates to speed things up | local to the device, invisible to you |
Home country, home location, base currency and the rate table are deliberately absent from this table: they travel along via the key-value store (section 37.1) — but need iCloud for that just the same.
Two points deserve an explanation.
Reminders: The reminder itself is an ordinary record and is synced. The notification, however, is scheduled by Etappe on the device where you create, edit or check off the reminder. If it should also ring on the second device, open it there once for editing and save it.
Full version: The purchase has nothing to do with iCloud; it is tied to your Apple ID and therefore applies on all devices with that account. If a device doesn’t recognize the purchase, “Restore Purchases” on the Full version screen helps.
37.5 When something doesn’t arrive#
If only a single trip is missing on the second device, check the filters and the archive of the trip list first before suspecting the sync. If more is missing, go through these steps in order:
- Check at the very top of the iOS Settings on both devices whether the same Apple ID is signed in.
- Check that iCloud is turned on and there is still storage available. A full quota stops syncing.
- Check the network connection — no airplane mode, Wi-Fi or cellular active.
- Leave Etappe open in the foreground on both devices for a few minutes.
- Quit Etappe completely and relaunch it. The connection to iCloud is established at launch: if iCloud wasn’t available at the last launch, the app has been running locally since then.
- If that doesn’t help, restart the device.
If it stays that way, there is the reliable route via a file: on the device with the complete data set, create an export under More → Backup, bring the JSON file to the other device and import it there. Be clear about what that does — the import deletes the entire current data set on the target device and replaces it with the contents of the file. Everything about this is in Backup.
37.6 How your data is protected in iCloud#
On the way between device and iCloud the connection is encrypted, and on Apple’s servers the data is stored encrypted as well. This applies without any action on your part to everything Etappe syncs — trips, records, scans and photos.
The difference lies in who holds the key:
| Setting of your Apple ID | Who can read the data |
|---|---|
| Standard data protection (default) | Your devices — and Apple, because Apple keeps the keys |
| Advanced Data Protection for iCloud | Only your devices — end-to-end encrypted, not even Apple can look inside |
Advanced Data Protection is a setting of your Apple ID, not of the app: iOS Settings → your name → iCloud → Advanced Data Protection. Apple explicitly includes the iCloud data of apps like Etappe in it. Once it is turned on, your Etappe data in iCloud is end-to-end encrypted; nothing changes in Etappe, syncing runs as before. Apple requires a recovery method for it — a recovery contact or a recovery key — because without the key nobody can get at the data any more, not even Apple.
One limitation should be mentioned: the App lock protects the display on the device, not the copy in iCloud. If you keep passport numbers, ID scans or emergency contacts in Etappe and value end-to-end encryption, turn on Advanced Data Protection. What Etappe itself does and doesn’t do is in Your data.
38. App lock#
Etappe holds passport numbers, addresses, booking receipts and journal photos. If you hand your device to someone for a moment, you don’t want them simply opening the app. That is what the app’s own lock is for: a four-digit code, combined with Face ID or Touch ID if you like. It is independent of the device passcode and applies only to Etappe. It protects what is shown on this device — not the copy of your data in iCloud; that is the job of Advanced Data Protection for your Apple ID (iCloud sync, section 37.6).
You’ll find it under More → Settings in the Security section.
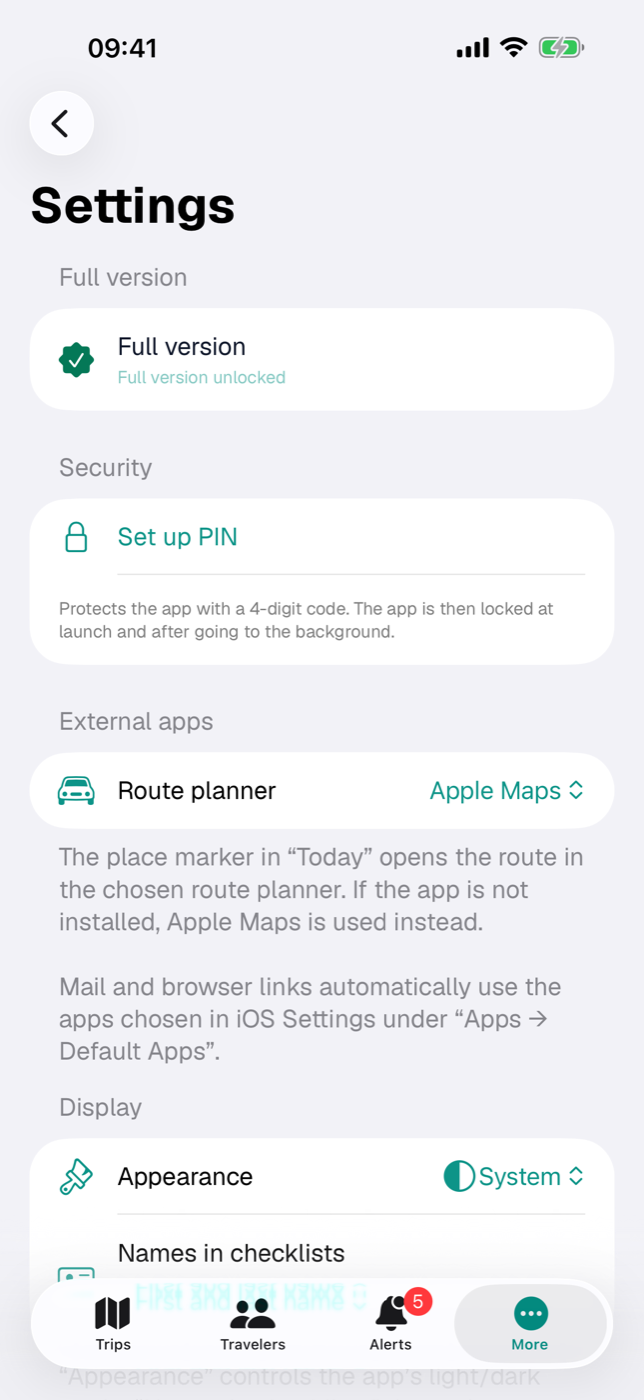
38.1 Setting up a code#
- Open More → Settings and go to the Security section.
- Tap Set up PIN.
- Enter your code under New PIN (4 digits). The field accepts digits only and stops after four.
- Repeat it under Confirm PIN.
- Tap Save. The button only becomes active once both fields contain four digits.
If the two entries don’t match, the form reports “The two entries do not match.” and clears the confirmation field. Should saving fail, “The PIN could not be stored securely — please try again.” appears — in that case the app is not protected yet, so you need to try again.
The code is stored in the device’s keychain. It can only be read while the device is unlocked, stays on this one device and is never part of an export (Backup). From then on, the Security section shows the line App lock active.
38.2 Allowing Face ID or Touch ID#
Once a code is set and your device supports biometrics, the Allow Face ID or Allow Touch ID switch appears — the label depends on the device. It is on by default.
The lock screen then shows the Face ID or Touch ID symbol at the bottom left, next to the zero. Tapping it starts the check; iOS shows the reason “Unlock Etappe”. The first time, iOS asks for permission with the note “Unlock Etappe with Face ID.”
Etappe also triggers Face ID on its own — but only once the launch screen has finished and the app is actually in the foreground. When the app moves to the background, this deliberately does not happen.
If recognition is canceled or fails, the keypad stays in place: biometrics are the shortcut, the code is the route that always works. If you turn the switch off, the symbol disappears from the keypad and it stays with code entry.
38.3 When Etappe locks — setting the interval#
Two things are fixed: after a cold start, Etappe is locked as long as a code is set. And the lock screen sits in its own window above everything — including open forms, document previews and full-screen views.
The only thing you can choose is how long the app may stay in the background before it locks again when you return. The Lock picker offers:
| Setting | Effect |
|---|---|
| Immediately | locks as soon as you leave the app |
| After 1 minute | locks if the app was in the background for at least 1 minute |
| After 5 minutes | locks after 5 minutes in the background |
| After 15 minutes | locks after 15 minutes in the background |
Immediately is the default and the strictest option: the lock screen is built as soon as you leave, which is why the app switcher preview shows only the lock screen and no longer your last screen. With the other levels you can switch briefly to another app — say, to look up a booking confirmation — and come back without entering the code again.
If a quick action from the Home Screen is waiting, Etappe runs it only after unlocking (Quick actions from the Home Screen).
38.4 Changing or removing the code#
Change PIN opens the same form as when setting up: enter the new code twice, Save. You are not asked for the old code — you can only reach Settings in an unlocked app anyway.
Remove PIN is red and asks first, to be on the safe side: the “Remove PIN?” dialog explains “The app will no longer be protected by a code.” and offers Remove or Cancel. After removal, the biometrics switch and the interval disappear from the section, and the lock screen no longer appears — not even at the next launch.
Your settings for biometrics and interval remain stored and apply again as soon as you set up a code again.
38.5 What happens if the code has been forgotten#
First, the brake against trial and error: after five wrong entries in a row, Etappe locks the keypad for 30 seconds. With every further failed attempt, the waiting time doubles — 60 seconds, 120 seconds and so on, up to a maximum of 15 minutes. While this runs, the lock screen shows the note “Too many failed attempts — please wait N s.” The count survives an app restart; quitting the app does not shorten the wait. If biometrics are allowed, the Face ID or Touch ID button remains usable during the waiting time.
And then the uncomfortable truth: there is no fallback code and no security question. Etappe can neither show the code nor reset it, because it is stored encrypted in the keychain and nowhere else.
That leaves one way: delete Etappe and reinstall it from the App Store. On the first launch after a reinstall, Etappe clears away any leftover code, so the app starts unlocked. What you lose in the process depends on how well you have prepared:
- If iCloud sync is running, your trips come back from your iCloud after the reinstall (iCloud sync).
- If you have a JSON backup, you import it afterwards (Backup).
- Without either, the local data is gone with the app.
Your purchase is unaffected: the full version is tied to your Apple ID and can be retrieved via Restore Purchases; the start date of the trial also survives a reinstall, so it does not start over (Trial and full version).
In short: choose a code you will definitely remember, and keep a backup alongside it. What else Etappe protects and what leaves the device is covered in Your data.
39. Your data#
A travel app knows a great deal: passport numbers, addresses, bookings, the dog’s vaccination dates, photos from the evening at the harbor. So it should be clear where that data is kept, when Etappe connects to the internet at all, and which permissions the app needs for what. This chapter answers those questions as precisely as it can.
You meet the short version in the app as well: More → About this app simply says On device + private iCloud under “Data”.
39.1 What stays on the device#
Everything you enter is stored in the app’s database on your device: trips with all their sections, records for people, pets, vehicles and countries, journal entries, packing lists, budget items, reminders. Files come on top — photos, PDFs, ID scans, cover photos, imported GPX tracks and recorded routes (Documents and receipts, Storage and files).
Alongside that, a few small things live outside the database:
| What | Where | Note |
|---|---|---|
| Settings (appearance, route planner, name format, lock interval, perspective for country data) | the app’s settings store | stay local |
| Home country, home location, base currency, ECB rate table | the app’s settings store and, with iCloud, the key-value store of your Apple ID | travel between your devices; local without iCloud (Home) |
| App lock code | the device’s keychain | readable only while the device is unlocked, tied to the device |
| Trial start date | the device’s keychain | tied to the device, survives a reinstall |
| Preview files for documents and scans | temporary folder | readable only while the device is unlocked, cleared at the next app launch |
This data leaves your device only when you make it happen — through an export, a PDF, the share menu (Exports and printouts, Backup) — or via iCloud sync in your own iCloud space (iCloud sync). There it is stored encrypted; whether only your devices hold the key or Apple does too depends on the Advanced Data Protection setting of your Apple ID (iCloud sync, section 37.6). Etappe itself does not currently add any encryption of its own to individual fields.
39.2 Which connections the app makes (maps, country file, exchange rates, purchase)#
Etappe has no server of its own for your data. These are the only occasions on which the network is involved:
| Occasion | Counterpart | When |
|---|---|---|
| Displaying maps and place markers | Apple Maps | whenever a map is visible |
| Handing a destination to the route planner | Apple Maps or the app you chose | when you tap a place marker — in “Today”, on an accommodation, activity or research item, or on the map |
| Loading country records | etappe.app | only when you tap Import from etappe.app |
| Loading exchange rates | frankfurter.dev (reference rates of the European Central Bank) | only when you tap Refresh Rates or once after a country import |
| Buying or restoring the full version | App Store | only in the purchase view |
| Syncing between your devices | your iCloud | continuously, while iCloud is on |
| Opening web links (website, legal notice, privacy policy, font license, redeem code, your own links) | your browser | when you tap them |
Four points deserve a closer look.
Maps. The map display comes from Apple; the line “Map data — Apple Maps © Apple Inc.” under About this app says as much. To show a map, the map sections you look at are fetched from Apple. If a route planner you have chosen cannot handle addresses, Etappe first resolves the address into coordinates — that also goes through Apple (Map, Today).
Country file. The import under Records → Countries fetches a file from etappe.app. The confirmation dialog spells it out: “The country list is loaded from etappe.app. The file is digitally signed — before importing, the app verifies with its built-in key that it is genuine and unchanged. Then you see a preview.” If the signature doesn’t match, Etappe stops and doesn’t process the file at all. It is a plain download; nothing about you is transmitted (Countries).
Exchange rates. The only service outside Apple and etappe.app that Etappe contacts. The app says it verbatim under Legal: “Etappe fetches exchange rates from frankfurter.dev (reference rates of the European Central Bank) — only when you tap ‘Refresh Rates’ or import countries. Nothing is transmitted beyond what every request technically requires (IP address); no data from the app.” The response is the ECB’s daily rates; Etappe stores them in the country records and in the key-value store. At app launch, in the background or on a schedule, Etappe loads nothing (Countries, section 6.8).
Purchase. Purchase, restore and redeemed codes go through the App Store and your Apple ID. All Etappe learns from that is whether the full version is unlocked — the app never sees payment details (Trial and full version).
39.3 Which permissions are needed for what#
iOS asks for each permission only when it is first needed — not at launch. The text in the dialog comes from the app and reads verbatim:
| Permission | Text in the dialog | Used for |
|---|---|---|
| Location (while using the app) | “For your current location in journal entries, map selection, and manual route recording.” | location in the journal, picking a location on the map, route recording |
| Camera | “To take photos for journal entries.” | taking a photo directly, for instance via the quick action |
| Face ID | “Unlock Etappe with Face ID.” | app lock |
On top of that come notifications: they are requested when you save your first reminder and serve the 9:00 AM reminders only (Reminders).
Two special cases are worth mentioning. For photos from your photo library, Etappe asks for no permission at all: selection goes through the system picker, which hands over only the pictures you marked — there is no access to the rest of the library. And route recording keeps going when you leave the app; iOS shows the familiar notice about location use (Recording a journey).
Every permission can be revoked again in the iOS Settings. Without location, no journey can be recorded, and the buttons for the current position have no effect; without the camera, the way via the photo library remains; without notifications, the reminders still sit in the app but don’t announce themselves. Everything else works unchanged.
39.4 No accounts, no tracking, no sharing#
Etappe requires no registration. There is no username, no password, no account and no profile in the app. Your Apple ID comes into play only where it is in charge anyway: for the purchase in the App Store and for iCloud sync — both between you and Apple, not through the app.
There are no analytics or advertising components, no usage statistics, no crash collection and no identifier that recognizes you. No third-party libraries are included; the only outside ingredient is the bundled font “Geist”, which loads nothing. Its license is under About this app. The only third-party service the app contacts is the rate service frankfurter.dev — and that only when you tap (section 39.2).
So, in one sentence: your travel data goes to no one unless you pass it on yourself — by export, PDF or share menu — or you use sync in your own iCloud.
You reach the legal notice and privacy policy directly from the app via More → About this app; they open in the browser. How to protect the app with a code on top is in App lock; the legal details and the contact are in Legal and contact.
40. All settings#
Etappe has few settings, and you don’t need to touch any of them — the defaults give you a working app. This chapter still goes through the screen line by line, as a reference.
On the iPhone you reach it via More → Settings, on the iPad via Settings in the sidebar. It has seven sections: Full version, Security, External apps, Display, Home, Currency and — at the very bottom — Reset.
| Setting | Section | Default |
|---|---|---|
| Full version | Full version | not purchased, trial running |
| PIN | Security | none set |
| Allow Face ID / Touch ID | Security | on |
| Lock | Security | Immediately |
| Route planner | External apps | Apple Maps |
| Appearance | Display | System |
| Names in checklists | Display | First and last name |
| Home country | Home | Not specified (the Getting started assistant pre-fills the country of the device region) |
| Country data from the perspective of | Home | follows the home country, otherwise the device region |
| Home location | Home | not set |
| Base currency | Currency | currency of the device region |
| Rates | Currency | No rates loaded yet |
None of these values is part of the backup. Most of them apply per device — on a second device you set them once more. The exceptions are home country, home location, base currency and the rate table: they travel between your devices via the iCloud key-value store (Home, iCloud sync).
40.1 Full version#
The top row shows your purchase status and opens the purchase screen with a tap. Before the purchase it reads Etappe Full Version, afterwards Full version with a green seal icon. Below it is a status line:
| Status line | Meaning |
|---|---|
| Trial — N days left | the trial is running |
| Trial expired — reading & export remain free | creating and editing are locked |
| Full version unlocked | everything free, permanently |
The same row also sits at the very top of More and in the iPad sidebar, there additionally with the price and the note “Never a subscription. Promise!”. What works in which state is covered in Trial and full version.
40.2 Security: PIN, biometrics, lock interval#
Without a PIN set, this section shows only Set up PIN, plus a note that the app is then locked at launch and after going to the background. The dialog asks for the code twice (New PIN (4 digits) and Confirm PIN); Save only becomes active once both fields contain four digits.
Once a PIN is set, the section grows:
| Row | Effect |
|---|---|
| App lock active | status display only |
| Change PIN | opens the same dialog again |
| Allow Face ID / Allow Touch ID | unlock by biometrics; only appears if the device offers it — default: on |
| Lock | Immediately, After 1 minute, After 5 minutes, After 15 minutes — default: Immediately |
| Remove PIN | deletes the PIN after confirmation |
Lock sets how long the app may stay in the background before the lock screen returns; with “Immediately” it locks as soon as you leave. Failed attempts, waiting time and a forgotten PIN: App lock.
40.3 External apps: choosing a route planner#
iOS has no system default for map apps, so Etappe has its own selection. The choices are Apple Maps (default), Google Maps, Waze and TomTom GO. If an app is not on the device, “(not installed)” follows its name — it can still be selected.
The selection applies wherever you tap an address or place marker: in accommodations, activities and research items, in the detail panel of a map pin (Map) and via the place marker icon in Today. The address is handed over in preference to the coordinate.
If the chosen app cannot be opened, Etappe falls back: first to the web version (Google Maps, Waze), finally to Apple Maps. TomTom GO navigates only to coordinates; an address is resolved first.
Mail and browser links do not go through this setting but through the apps you have chosen in iOS Settings under “Apps → Default Apps”.
40.4 Display: appearance, names in checklists#
Appearance controls the app’s light/dark mode independently of the system: System (default) follows the device, Light and Dark are fixed. The change takes effect immediately, lock screen included.
Names in checklists decides how people’s names appear in lists where space is tight:
| Value | Shown |
|---|---|
| First and last name | full name (default) |
| First name only | first name only |
This affects the Packing list — both the person filters and the name lines of the items — and the Entry checklist. If a person has no first name, Etappe falls back to their nickname. All other views continue to show the full name.
40.5 Home: home country, country data perspective, home location#
Home country opens a list of all countries in the world with flag and search field, plus the entry Not specified. The Getting started assistant has already entered the country of your device region here — even if you only tapped Next in its country step; Not specified appears only if you never reached that step or come from version 1.0 without a home country. The selection does not need loaded country records. Effect: the country import enters embassies and travel advice from this country’s perspective, its flag is left off the small trip tiles in the trip list, and on the “Where I’ve been” world map it is colored gold (Where I’ve been); with Not specified, none of this applies.
Country data from the perspective of — Germany, Austria or Switzerland — follows the home country (Liechtenstein counts as Switzerland) and can be overridden here; changing the home country resets the override. If your home country has no perspective of its own, a note appears below: “There is no dedicated perspective for France — embassies and travel advice show the perspective of Germany.” After switching, re-import the countries under More → Records → Countries from etappe.app; the section’s footer reminds you of that.
Choose home location — Change home location once a location is set — opens the map picker “Choose location”. The Home location row then shows the coordinates with four decimal places, Remove home location deletes them. On the trip maps the location appears as a house and influences the map section as long as the trip has fewer than two points of its own.
Described in detail in Home.
40.6 Currency: base currency and ECB rates#
Base currency is the currency in which you enter amounts and read totals — pre-filled with the currency of your device region, in the Getting started assistant with that of your home country. The picker lists the currencies of the ECB rate list as “CHF – Swiss Franc”, plus your home country’s currency if it is missing there — then with the suffix “(no automatic exchange rate)”. The footer says what switching does: “Switching changes the display and new entries; saved amounts keep their currency.” (Budget, How Etappe does the math).
Below that is the row Rates: ECB as of … — or No rates loaded yet — with the Refresh button, which fetches the European Central Bank’s reference rates via frankfurter.dev and applies them to the countries (write access required, Trial and full version). A failed fetch shows as a single line below. If Etappe knows no rate for your base currency, the note “No rate for … — amounts in EUR” follows. Everything else about rates is in Countries, section 6.8.
40.7 Reset: delete all data#
At the very bottom of Settings is the Reset section. It has two rows, and the order is deliberate: first Create backup first — which takes you straight to Backup (Backup) —, and only below it Delete all data in red.
Deleting empties the app completely: trips with all their content, travelers, pets, vehicles, countries, documents and photos. Two things you need to know:
- It also hits the iCloud copy. If sync is on, the data is gone from all devices with the same Apple ID (iCloud sync) — not just from the device you are sitting at.
- It cannot be undone. Without a backup, the data is gone for good. That is why the way there sits directly above.
The PIN stays in place — it protects access on the device, it is not trip data (App lock). The unlocked full version is also untouched: it is tied to your Apple ID, not to the data (Trial and full version).
After deleting, the app is back where it was at the very first launch — and accordingly the Getting started assistant appears again (Installation and first launch). Home country, home location, base currency and the rate table are reset too — in the iCloud key-value store as well, so on all devices — and so is the perspective override.
40.8 Notifications (via iOS Settings)#
Etappe has no notification switch — iOS handles that. You are asked when you first save a reminder; after that you change the permission in iOS Settings under Etappe. If you say no, everything else remains usable, only the notification at 9:00 AM on the lead day stays off (Reminders).
Location (route recording, location picker on the map, journal entries) and Camera (photos in the journal) also go through iOS. If location permission is missing when you start a recording, Etappe shows “Location permission missing” with the Open Settings button (Recording a journey).
40.9 Help, About this app, licenses#
Two entries under “More” are not settings but references.
Help contains Getting started — the guided setup for countries, travelers and the first trip, which appears automatically at the very first launch and can be reopened here at any time (Installation and first launch) — and the Deworming treatment calculator, which works out the vet appointment or border crossing from a country’s treatment window (Pets). Added to that are the links Open manual (this manual on etappe.app), Guide on etappe.app and Website as well as the entry Legal — the data sources used (maps, country file, exchange rates) and the license note for the “Geist” typeface (Legal and contact).
About this app shows logo, name and the line “Version … (build …)”. Below are three groups:
- App: Platform (iOS / iPadOS), Data (“On device + private iCloud”) and Backup (“JSON export under Backup”).
- Links: Website, Legal notice, Privacy.
- Licenses & acknowledgments: the “Geist” typeface (© Vercel, SIL OFL 1.1) and the map data (Apple Maps © Apple Inc.).
More on this in Legal and contact.
40.10 The remaining entries under “More”#
Everything else in the same list has a chapter of its own:
| Entry | Chapter |
|---|---|
| Overview | Overview |
| Where I’ve been | Where I’ve been |
| Records (Countries, Vehicles, Packing list templates) | Countries, Vehicles, Packing list templates |
| Reminders | Reminders |
| Storage & files | Storage and files |
| Backup | Backup |
On the iPad the same items are in the sidebar, joined by Trips, Alerts and Travelers (Finding your way around).
41. How Etappe does the math#
In several places Etappe does the arithmetic for you: a walking time, a status-light color, a time window for the deworming treatment. This chapter lays open how those numbers come about — with the formula, an example, and a note on where the result shows up.
41.1 Walking time by DAV/DIN 33466#
The walking time of an outdoor activity comes from three lines:
vertical     = ascent / 300 + descent / 500      (meters of elevation per hour)
horizontal   = distance / 4                      (km per hour)
walking time = larger value + smaller value / 2
Example: 10 km, 500 m of ascent, 500 m of descent. Vertical, that is 500/300 + 500/500 = 2.67 h, horizontal 10/4 = 2.50 h. The larger value is 2.67 h, half the smaller one 1.25 h — making 3.92 h, shown in the app as 3:55.
Below that is With breaks (× 1.25): walking time × 1.25 as the likely total duration including rests and photo stops, here 4:54.
Etappe takes distance and ascent from your own fields first, otherwise from the GPX values. It knows the descent only from a GPX file. If it is missing, it is set equal to the ascent — then the note “Descent unknown — assumed equal to the ascent.” appears below the calculation. Without a distance and without an ascent there is no walking time.
The formula applies only to types on foot (hike, long-distance hike, city walk, mountain hike, via ferrata); for bike tour, mountain bike tour and long-distance cycle route the line stays empty (Outdoor activities). You see the result in the form while typing, in the detail under Distance & walking time, as the Walking time total above the list, and as the event length in the Calendar and day view — there the duration with breaks counts.
41.2 Budget status light and currency conversion#
A trip’s expense total is the sum of accommodation costs, journey costs including tolls, activity costs, and the euro amounts of your budget items. From that follows:
Remaining   = Available budget − Expenses
Remaining % = Remaining / Available budget × 100| Remaining in percent | Status light |
|---|---|
| above 50 % | green |
| above 20 % | yellow |
| 0 to 20 % | orange |
| below 0 % | red |
Example: limit €3,000, expenses €2,500 → €500 remaining → 16.7 % → orange. Without a limit there is no status light.
The Budget tile in the trip detail uses the same status light with the same thresholds — so tile, Budget screen, and Overview always show the same color.
Foreign currencies are converted by the EUR factor — the value of one unit in euros:
Euro amount = amount × EUR factor (rounded to 2 decimal places)7.77 GBP at a factor of 1.16789 gives 9.0745… → €9.07. Items in euros need no factor and always count in full; an item in another currency without a factor on record has no euro amount and is missing from the total — the Budget screen then points this out with a note. The same calculation sits behind the cost of a research item (Research) and — since the base currency — behind accommodation, journey, activity, and trip budget: they too carry a rate frozen when saved, “1 unit = X EUR”; if it is missing, the amount is euros. Details on the handling in Budget.
Base currency. If your base is not the euro, that changes nothing about the calculation, only about the display. The total is built in euros, and only the result goes into the base, once:
Amount in base = total in EUR ÷ base rate (base rate: 1 base = X EUR)The base rate comes unrounded from the ECB table, otherwise from the exchange rate of a country with that currency. Rounding is to two decimal places, half up — only at display time, not in the calculation. Example: base CHF with 1 CHF = 0.93 EUR, expenses €2,500.00 → 2,500 ÷ 0.93 = 2,688.172… → CHF 2,688.17. The status light keeps calculating in euros and so doesn’t depend on the day’s rate: €500 of €3,000 is 16.7 %, whether the display shows francs or kroner. Individual amounts are not recalculated — CHF 64.50 stays CHF 64.50; only where an amount’s currency differs from the base does “≈ …” follow, formed from its frozen euro value and the current base rate. If there is no base rate, Etappe shows all totals in euros and says so.
41.3 Nights and trip days#
The nights of an accommodation are the calendar days between the check-in day and the check-out day; the times of day play no role. Check-in on Jul 12 at 4:00 PM and check-out on Jul 15 at 10:00 AM are 3 nights.
Trip duration counts both boundary days: days between start and end plus 1. Jul 12 to Jul 19 is 8 days.
The trip day of a date is the number of days since the trip start plus 1. Before the start there is no trip day. Normally the count ends with the last trip day; in the Journal it keeps running, so that an entry after the planned end gets a number too.
This produces the familiar displays: “Day X of Y” in the Overview appears only while today’s date falls within the trip period. “Night n of total” in Today counts the calendar days since check-in plus 1, at most up to the total.
41.4 Rabies validity and the deworming treatment window#
For the rabies status, Etappe looks through the animal’s vaccinations for all whose type contains “Rabies” or “Tollwut”. Green only comes if one of them was given before the trip start and stays valid until the trip end. Otherwise the vaccination with the longest validity is rated:
| Situation | Status light |
|---|---|
| no rabies vaccination on record | red |
| expired before the trip start | red |
| expires during the trip | red |
| given only after the trip start | orange |
| validity unknown or incomplete | orange |
Without an end date, the trip start also counts as the end. The status appears in the Overview, in the Entry checklist and — for countries with a rabies requirement — in the Alerts.
The deworming treatment window comes from the two country fields Earliest and Latest (in hours; if not specified, 120 and 24 apply):
earliest = border crossing − Earliest hours
latest   = border crossing − Latest hours
The basis is the border crossing set in the checklist, otherwise the trip start. Example: United Kingdom with 120/24 and a border crossing on Aug 20 at 6:00 PM: the deworming treatment is allowed from Aug 15, 6:00 PM to Aug 19, 6:00 PM.
Once you have checked off the deworming treatment and entered its time, Etappe turns the calculation around and shows the permitted border crossing: treatment + 24 h to treatment + 120 h. A treatment on Aug 18 at 9:00 AM means entry between Aug 19, 9:00 AM and Aug 23, 9:00 AM. If the planned crossing lies outside that, a critical alert appears.
41.5 Distance, ascent and descent from GPX data#
From a GPX file Etappe reads the track points, otherwise the route points, otherwise the waypoints. It then runs through the sequence of points:
- Distance: the sum of the great-circle distances between each two consecutive points (Earth radius 6,371 km), rounded to two decimal places.
- Ascent: the sum of all positive elevation differences between two points.
- Descent: the sum of all negative elevation differences, as a positive number.
Elevations count only if both points have a value — a file without elevation values yields 0 m. For the map and the chart, the data is thinned evenly: at most 200 track points, at most 48 values in the elevation profile, start and end are kept. Etappe discards implausible coordinates and elevations while reading.
What is calculated each time is the straight line between two measuring points: a closely spaced track comes very close to the real path length, a coarsely sampled one underestimates it. The route recording adds up its kilometers by the same principle (Recording a journey). There, the average speed is distance divided by the time between the first and last measuring point, and the estimated consumption is distance × consumption per 100 km ÷ 100.
42. FAQ and troubleshooting#
Most of what looks inexplicable in Etappe at first has a plain cause: a missing date, an active filter, a permission iOS hasn’t granted yet. This chapter collects the most common cases with cause and way out; the details are in the chapter linked in each case.
42.1 An entry doesn’t show up on the map#
Go through three points in turn:
- Coordinates are missing. Only what has coordinates makes it onto the map — a place name alone isn’t enough. Add them in the entry, in the journal for example via Choose on map.
- The type filter is active. If the filter symbol at the top right is filled in, the map isn’t showing all five types right now. A tap on the type in the filter popover switches it back on.
- The day filter is running. With the day filter active, entries without a date are always hidden. Switch it off or add a date.
If a journey line is missing, usually the start or the destination has no coordinates — both must be set (Map).
42.2 The alert won’t go away#
Alerts have no state of their own: they are recalculated every time you open them, can’t be swiped away and need no “refresh”. They only disappear once the cause is fixed. Two stumbling blocks:
- The checkmark next to Apply for ETA or Apply for visa in the checklist doesn’t clear anything. What it takes is the document on the person, with Valid until or the checkmark Permanently valid; if both are missing, the validity counts as unknown and the alert stays critical.
- If a deadline should stop concerning you for good, archive the person, pet or vehicle — archived records no longer trigger anything.
Incidentally, the badge on the tab counts both levels together, not only the critical ones (Alerts, Entry checklist).
42.3 GPX import is rejected#
| Message | Cause and way out |
|---|---|
| “…” is … MB — the maximum allowed is 25 MB. | The file exceeds the limit. Export the single tour from your tour portal instead of a collection. |
| “…” could not be read. | The file could not be accessed. Select it again, preferably from a local folder. |
| The file could not be read as GPX. | No usable content. Etappe reads track points, or route and waypoints as a fallback; a file with no points at all or in another format yields nothing. |
Remember that the file only ends up on the entry with Save (Outdoor activities).
42.4 Photo without date or location#
Etappe reads the capture date and GPS coordinates from the image itself. If it doesn’t carry them, today counts as the date and the location stays empty; the question Use location from photo? doesn’t appear at all then. Typical cases are screenshots, forwarded or downloaded images, and copies that another app has rewritten.
Important: when saving, Etappe shrinks every image, and this copy no longer carries the capture data with it. So there is no reading it out later from a photo that is already saved. Correct the date and time in the form and set the location via Choose on map (Journal).
42.5 Notifications don’t arrive#
| Cause | Way out |
|---|---|
| Permission denied | You are asked the first time you save a reminder or a vet appointment. After that, you change it in iOS Settings under Etappe. |
| Wrong time expected | Delivery is at 9:00 AM on the day “due date minus lead days”, not at the time of the due date. |
| Date already past | Nothing is delivered any more for past due dates; they appear as overdue in the alerts. |
| Reminder checked off | Completing it withdraws the scheduled notification. |
| Second device | The notification is only scheduled on the device on which you create or edit the entry. Open it there once for editing and save it. |
Everything here applies equally to reminders and to vet appointments with a lead time (Pets).
More on this in Reminders and All settings.
42.6 Purchase isn’t recognized#
The first step is always More → Etappe Full Version → Restore Purchases. The response tells you what the problem is: “No previous purchase found.” means nothing was bought with this Apple ID — check the account signed in to the App Store. “Restore canceled or not possible.” means a canceled sign-in or no network; just try again.
Further cases: if the button only says Buy instead of a price, the price information couldn’t be loaded. If a payment was triggered but not confirmed, Etappe deliberately doesn’t unlock — restore later, nothing is charged twice. With “Ask to Buy” in Family Sharing, the purchase waits for approval and unlocks by itself afterwards. If the purchase view opens when you create or edit something, the trial has simply expired (Trial and full version).
42.7 Two devices show different data#
If only a single trip is missing, check the filter chips and the archive of the trip list first. If more is missing, work through these in order:
- Same Apple ID signed in on both devices?
- iCloud switched on and storage space still free?
- Network connection available, no airplane mode?
- Leave Etappe open in the foreground on both devices for a few minutes.
- Quit Etappe completely and restart it — the iCloud connection is established at launch.
- If that doesn’t help, restart the device.
Some things Etappe deliberately doesn’t sync: appearance, route planner, name format, the perspective of the country data, PIN, scheduled notifications and the start of the trial stay on the device. Home country, home location and base currency, on the other hand, travel via the iCloud key-value store — and need iCloud for that as well. As a last resort there is export and import — though the import replaces the complete data on the target device (iCloud sync, Backup).
42.8 A trip has disappeared from the list#
Usually it is in the archive. Archiving is done via the context menu of the trip card (press and hold) — and automatically when you reduce it to key data under Storage & files. It becomes visible via the filter chip Archive above the trip list; Restore from archive brings it back (Finding your way around, Storage and files).
42.9 Journey recording won’t start#
Three reasons are possible. If location permission is missing, Etappe reports Location permission missing and offers Open Settings. If another recording is already running, “A recording is already running for another journey.” appears — only one can run at a time. And in the Today screen the red record button is grayed out if a route has already been recorded for this journey (Recording a journey, Today).
42.10 An old entry shows euros although my base is CHF#
That is intended. Changing the base currency only affects the display and new entries — saved amounts stay in the currency you entered them in, together with the rate frozen at the time. An entry from before the base currency is a euro entry: in the list and in the detail it appears as euros, followed by “≈ …” in francs; in the form its cost field shows “€” as the unit and below it “Amount in EUR (as saved) — the base currency applies to new entries.” If it should be kept in francs from now on, enter the franc amount in a new entry and delete the old one. New entries ask in the base currency by themselves (Accommodations, section 15.3, Budget).
42.11 Rates won’t load#
| Cause | Way out |
|---|---|
| No network | The row says “No connection — the rates could not be loaded.” Etappe never loads rates by itself; once you have a connection, tap Refresh Rates in the menu of the country list again, or Refresh next to the rate row in the budget or in the settings. |
| The purchase notice appears instead of the rates | Fetching rates writes to the countries and therefore needs write access — after the trial, that means the full version (Trial and full version). |
| It says “No rates loaded yet” | No fetch has ever been triggered — the first one happens after the country import in the Getting started assistant or when you tap. |
| A country keeps its old rate | Its currency is outside the ECB list (MKD, for example); you keep maintaining such rates by hand (Countries, section 6.8). |
| Totals appear in euros instead of my base | No rate is known for the base — the note “No rate for … — amounts in EUR” appears in the budget and in the settings. Refresh the rates or, for a currency outside the ECB list, enter the rate on a country with that currency. |
The loaded rate table travels via iCloud to your other devices; you don’t need to reload anything there (iCloud sync).
43. Glossary#
Etappe uses some words in a very specific sense: a “night” is something different from a trip day, a “block” something different from an entry. Each of these terms is explained here in brief, with a reference to its chapter.
A#
Alert. A notice about a deadline, in two levels: “Critical” and “Soon”. Alerts are recalculated every time you open them and disappear as soon as you fix the cause (Alerts).
Archive. Setting aside instead of deleting: archived people, pets and vehicles are kept, but are no longer offered in new selection lists. Archived trips disappear from the Trips list and can be reached again via the Archive filter (People, Creating a trip).
B#
Base currency. The currency you enter amounts in and read totals in — chosen in the Getting started assistant or under Settings → Currency, and the same on all your devices via iCloud. Internally, Etappe keeps calculating in euros; switching changes only the display and new entries, saved amounts keep their currency (Budget, How Etappe does the math).
Block. A row in the sketch — accommodation, journey, activity, outdoor activity or note — with a title, a duration and a position in the sequence, but no date (Sketch).
Booking receipt. An attachment on an accommodation, journey, activity or outdoor activity that is marked as a receipt. Only marked receipts can be attached to the itinerary PDF (Documents and receipts).
Border crossing. The moment you leave the EU, which you set by hand in the checklist. It is the reference point for the deworming treatment window; without it, the start of the trip applies (Entry checklist).
Budget item. An expense you record yourself, with a description, category, amount and currency — for everything that has no booking of its own (Budget).
C#
Checkpoint. A point in the entry checklist that you can check off. There are exactly three, all derived from the country data: Apply for ETA, Apply for visa, Deworming treatment (Entry checklist).
Considering. The first trip status: the destination appeals to you, nothing more is settled yet. The date never moves this status forward (Core concepts).
Create entry. The action that turns a sketch block into the real entry. The block stays put, with a green check mark (Sketch).
D#
DAV walking time. The walking time of an outdoor activity, calculated by the formula of the German Alpine Club (DAV, DIN 33466). It applies only to types on foot; for bike tours, the detail view shows the distance without a walking time (Outdoor activities).
Day boundary. A separate entry in the sketch that starts a new day. It alone determines how the days are divided — the duration of the blocks does not (Sketch).
Deworming treatment window. The permitted period for the deworming treatment before the border crossing, calculated from the country fields “Earliest” and “Latest”; if nothing is entered, 120 and 24 hours apply (How Etappe does the math).
E#
ECB rates (rate table). The reference rates of the European Central Bank, which Etappe fetches from frankfurter.dev when you tap Refresh Rates or after a country import — never on its own. They lay over the exchange rates of all countries with a matching currency, supply the rate of the base currency and travel with you via iCloud; the line “Rates: ECB as of …” shows how current they are (Countries).
ETA. An electronic travel authorization. If a country requires one, a checkpoint is created; the alert only goes away once the document is on file (Countries).
Etappe. The name of the app. A single leg of the way you cover, by contrast, is called a journey in the app (Journeys).
EUR factor. The value of one unit of a foreign currency in euros, i.e. “1 GBP = ? EUR” — the rate field on budget items and research items, prefilled from the ECB rates or the country’s rate and frozen when you save. Without it, Etappe cannot convert an amount and does not count it toward the expenses. The reverse reading, “1 EUR = ? GBP”, is called the exchange rate on the country (Budget, Countries).
Exchange rate. The rate on a country in the reading direction “1 EUR = X” — for instance 1 EUR = 0.85 GBP. For currencies on the ECB list, the rate table sets it; otherwise you maintain it by hand, and the next country import overwrites it (Countries).
F#
Full version. The one-time unlock of all writing functions, with no subscription and no user account. It is tied to your Apple ID (Trial and full version).
G#
GPX. A widely used file format for waypoints and tracks. Etappe reads it when importing outdoor activities and routes, and writes it when you share a recording (Outdoor activities).
H#
Home country and home location. Two settings that are the same on all your devices via iCloud: the home country — selectable from all countries of the world — determines the perspective of the country data (embassies, travel advice), is left out as a flag on the small trip tiles and is shown in gold on the world map; the home location appears as a house on the maps (Home).
I#
ICS. The standard format for calendar files. “Events as calendar (.ics)” writes a trip’s events into one; the file is a snapshot, not a subscription (Exports and printouts).
ID document. A document on file — for people, say, a national ID card, passport, driver’s license, ETA or visa; for animals an EU pet passport, pet passport or vaccination record. If “Valid until” is missing and “Permanently valid” isn’t set either, the validity counts as unknown: the entry checklist reports orange, and the ETA/visa check treats it as not fulfilled (People, Entry checklist).
Item. The name for a single entry in a packing list or template, with a name, category and quantity (Packing list).
J#
Journey. Every movement within a trip with a start, a destination and a mode of transport: the ferry, the flight, the car leg between two accommodations (Journeys).
K#
Key-value store (iCloud). A small storage area in your Apple ID alongside the actual database. Etappe keeps the home country, home location, base currency and the ECB rate table there so that they are the same on all your devices; the last change wins, and without iCloud the values stay local (iCloud sync).
N#
NLT. The abbreviation in the to-do form for “not later than”, i.e. to be done by that date at the latest. What is saved is always a whole day, without a time of day (To-dos).
Note. The sketch block type for anything that has no shape yet — when you create the entry, it becomes a research item. Not to be confused with the notes field that almost every entry has (Sketch).
O#
Outdoor activities. The area for everything you cover under your own power — hike, mountain hike, via ferrata, bike tour — with distance, elevation gain and GPX track (Outdoor activities).
Overnight stay. The unit an accommodation is counted in: calendar days between the check-in day and the check-out day; times of day play no role. Friday to Monday is three nights, but four trip days (Core concepts).
Overview. The view across all trips: next trip, reminders, expiring documents, budget status lights (Overview).
P#
Packing list template. A packing list that spans trips and that you take over into a trip’s packing list with one tap. Items with the same category and the same name are not created twice (Packing list templates).
Participants. The people, pets and the vehicle of a trip, assigned under “Travel party”. Packing list assignments and deadline checks follow from them (Core concepts).
Q#
Quick action. A shortcut on the app icon: “Today” and “Journal entry”. Both need a trip with the status Under way (Quick actions).
R#
Rabies status. The status light for a pet’s rabies vaccination. It is green only if the vaccination was given before the start of the trip and is valid until the end of the trip (Pets).
Records. Data that doesn’t belong to any trip but is only assigned to one: countries, people, pets, vehicles, packing list templates (Core concepts).
Reminder. A dated event with a lead time that reports as a notification at 9:00 AM on the day “due date minus lead-time days”. To-dos never do that (Reminders).
Research item. A find for a trip with a link, place, costs and rating. “Turn into” makes it an activity, accommodation or journey (Research).
Route recording. The actual route of a journey, recorded as you go. If you apply it, it replaces the draft and supplies the kilometers and driving time (Recording a journey).
S#
Sketch. A trip’s planning mode: a sequence of blocks without dates, from which real entries are created later (Sketch).
Status light. A rating in four colors — green, yellow, orange, red — for the remaining budget, the validity of documents and the rabies status (How Etappe does the math).
Status pill. The small colored label on cards and list rows that shows a state — trip status, booking status, validity (Finding your way around).
T#
Time zone offset. The time difference at a journey’s destination, in half-hour steps. You enter the arrival as local time; for the duration, Etappe factors the offset out (Journeys).
Today. A trip’s day screen with the day’s program items to check off. It always shows the actual current date, never a chosen trip day (Today).
Trial. The first 14 days from the first launch, during which everything can be used. After that, reading and exporting stay free (Trial and full version).
Trip day. The number of a day counted from the start date (“Day 3 of 12”); both boundary days count (How Etappe does the math).
Trip status. One of six states of a trip: Considering, Bucket list, Planning, Making arrangements, Under way, Past. From “Making arrangements” on, Etappe moves it forward by date (Core concepts).
W#
Waypoint. An intermediate point in a journey’s route path. It bends the line on the map into the actual course (Journeys).
44. What’s next#
Etappe keeps growing. This chapter collects what is being considered — as an outlook, not a promise. There are no dates here, and none of it is guaranteed.
44.1 Weather in the journal and on the map#
Weather for the travel day, automatically: one idea is that Etappe determines the weather for date and place itself instead of asking you for it.
By hand, this already works today. The form of a journal entry has the section Weather with the Weather picker and the field Temperature (°C). The matching symbol then appears in the list, the detail view shows the line with category and degrees, and both go into the journal PDF (Journal).
There are eight categories to choose from:
| Category | meant for |
|---|---|
| Sunny | clear sky |
| Changeable | partly cloudy |
| Cloudy | overcast |
| Foggy | fog, haze, strong wind |
| Rainy | drizzle to steady rain |
| Snow | snow, sleet, hail |
| Showers | short, heavy downpours |
| Thunderstorm | thunderstorms and storms |
44.2 Photo book export#
The share menu of a trip has the entry Photo book (in progress). The idea behind it: an output format that turns journal and photos into a book instead of a list — with pages you can give away or have printed.
What the share menu already offers today is described in Exports and printouts: Itinerary as PDF, Journal as PDF, Sketch as PDF and Events as calendar (.ics). For looking back with pictures, the journal PDF is the closest thing.
44.3 Sharing individual trips#
Passing a single trip on to fellow travelers without transferring your whole collection — as a file that joins the recipient’s own collection. Also conceivable is an anonymized version as a template: the same route, but without booking numbers, notes and prices, with day offsets instead of fixed dates.
For everyday use, a single document is usually enough today: the itinerary PDF, the journal PDF, the packing list as PDF or the .ics file, which lands in the recipient’s calendar. The export under Backup, on the other hand, is meant for you — as a backup and for moving to a new device (Backup).
44.4 More languages#
Etappe is available in German, English and French: all labels, notes and messages. Further languages are being considered.
Your own entries are unaffected: you write trip titles, notes and journal entries in whatever language your keyboard offers.
If one of these ideas is close to your heart: feedback is welcome, and how to get in touch is described in Legal and contact.
45. Legal and contact#
Everything formal sits in one place: under About this app. On the iPhone you find the entry at the very bottom of the More tab, on the iPad in the sidebar. The screen shows the app icon, the name Etappe and below it the line Version … (build …) — the two details you will be asked for first whenever you get in touch with a question.
Below it comes the App group with three rows:
| Row | Content |
|---|---|
| Platform | iOS / iPadOS |
| Data | On device + private iCloud |
| Backup | JSON export under Backup |
That is the whole data concept in short: Etappe is a purely on-device app with no server of its own, and you make your own backup (Backup, in detail in Your data).
45.1 Legal notice and privacy#
The Links group contains three rows, each of which opens the website in your browser:
- Website — etappe.app, the home page introducing the app.
- Legal notice — the mandatory information under Section 5 of the German Digital Services Act (DDG).
- Privacy — the privacy policy for the app and the website.
The browser that opens is the one you have set as default in iOS.
The Legal notice lists the service provider with postal address, the contact details (email and phone), the person responsible for content under Section 18 (2) of the German State Media Treaty (MStV) and the VAT identification number. This manual deliberately does not repeat those details — they could change, and then you would be reading an outdated address here. The linked page is always what counts.
The privacy policy covers the website and the app separately. For the website: no cookies, no tracking, no content from third-party servers; when you visit, the usual server log files are generated at the hosting provider. For the app, essentially what you also find in Your data:
- Trips, places, photos, documents and the journal are stored locally on your device.
- Optionally, Etappe syncs them between your devices via your personal iCloud (iCloud sync).
- There is no user account, no registration and no sharing with third parties.
- Location and photo access are used only when you open a feature that needs them.
- When you open a map, the displayed map section is transmitted to Apple — with no map open, nothing at all (Map).
- Etappe downloads the signed country file from etappe.app only when you explicitly tap to do so (Countries).
- Etappe fetches exchange rates from frankfurter.dev (reference rates of the European Central Bank) — only when you tap “Refresh Rates” or import countries. Nothing is transmitted beyond what every request technically requires (IP address); no data from the app (Your data).
- The purchase of the full version runs exclusively through the App Store; all that stays on the device is whether it is unlocked, plus the date of the first launch in the keychain (Trial and full version).
The section on your rights names access, rectification, erasure, restriction, data portability and objection under Articles 15–21 GDPR, as well as the right to lodge a complaint with a supervisory authority.
45.2 Fonts, maps and licenses used#
The third group is called Licenses & acknowledgments and is short, because Etappe gets by with very little third-party material.
| Entry | Details |
|---|---|
| Font “Geist” | © Vercel · SIL OFL 1.1 |
| Map data | Apple Maps © Apple Inc. |
Geist is the typeface the entire app is set in. It is licensed under the SIL Open Font License 1.1 and is bundled with the app; the row is tappable and leads to the source project on GitHub. The website uses it too — self-hosted there, without embedding a font service.
Map data comes from Apple Maps (MapKit). Every map in Etappe — the trip map, the location picker, the route preview — is an Apple map; the map data comes from Apple Inc. and its data providers.
All of this is laid out in more detail on the Legal screen under More → Help. It names the data sources in use — the map data from Apple Maps, the signed country file that Etappe downloads from etappe.app only when you tap to do so, and the exchange rates from frankfurter.dev, fetched only on “Refresh Rates” or after a country import — and the full license notice for the font: “Copyright 2024 Vercel, in collaboration with basement.studio”, SIL Open Font License 1.1, with links to the license text and to the source project on GitHub.
On trademarks: Apple, the Apple logo and “App Store” are trademarks of Apple Inc. Etappe has no connection with Apple beyond the app being distributed through the App Store.
45.3 Feedback and support#
There is no support button in the app. The way to send feedback is through the contact details in the Legal notice — that is where you find the email address and phone number.
Before you write, two places are worth a look:
- More → Help in the app. That is where the Getting started assistant for the guided setup lives, along with the links Guide on etappe.app and Website.
- FAQ and troubleshooting in this manual. Many questions — entries that have disappeared, sync, storage — are answered there.
If that does not help, make your report easy to follow. Useful are:
- version and build from the About screen,
- the device and the iOS or iPadOS version,
- what you did and what happened instead,
- for display problems, a screenshot.
Requests for future versions are as welcome as bug reports. What is already known to be under construction is listed in What’s next — a note on how much one of those items matters to you still helps with setting the order.